DWC-Shop210Craftworks Research and Development Management Services Research and Development for products and refining manufacturing, developing toolpaths, settings, process, automation, supply chains and program management910.340.0403drew@drewswoodcraft.comMonday-Saturday 8am-8pmAccepting Cash or Credit Card$$210 Manatee StreetCape CarteretNCUSA28584
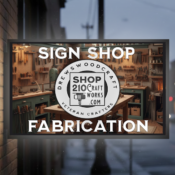
DWC-Shop210Craftworks Sign ShopDWC-Shop210Craftworks Sign ShopFrom Commercial Signs to personal signs and of every type and material. Our Medallions are a specialty!910.340.0403210 Manatee StreetCape CarteretNCUSA28584
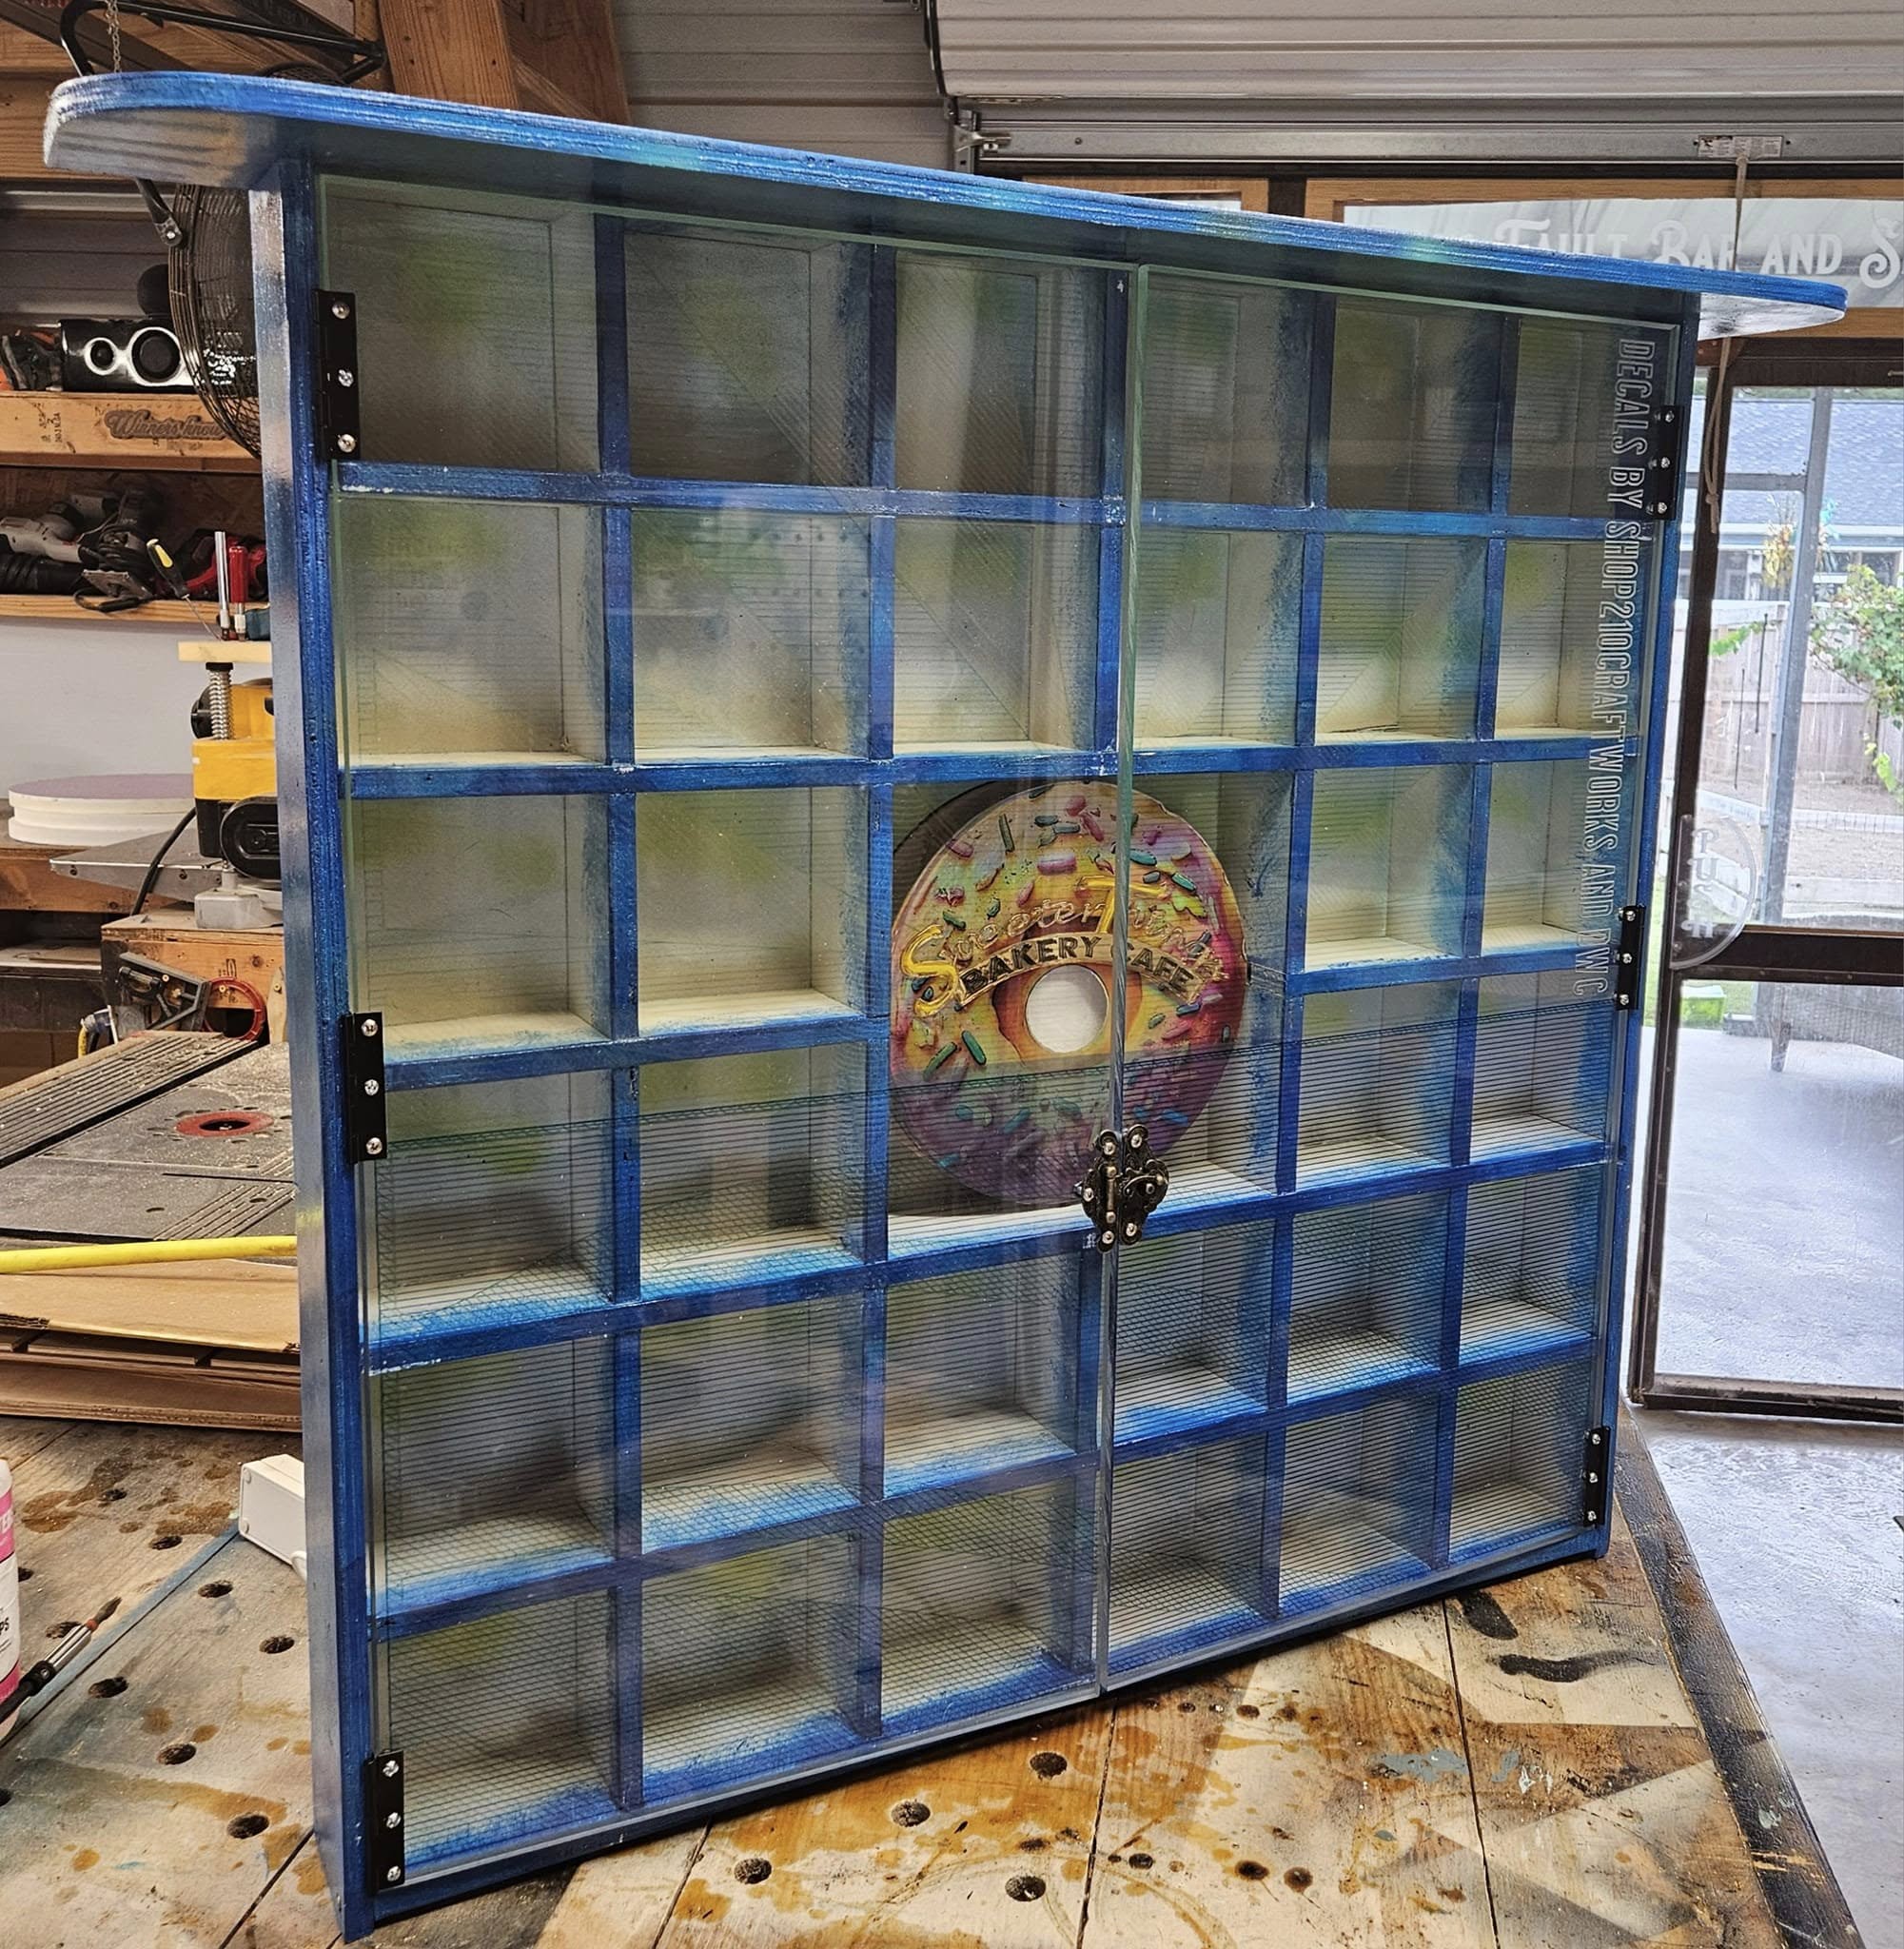
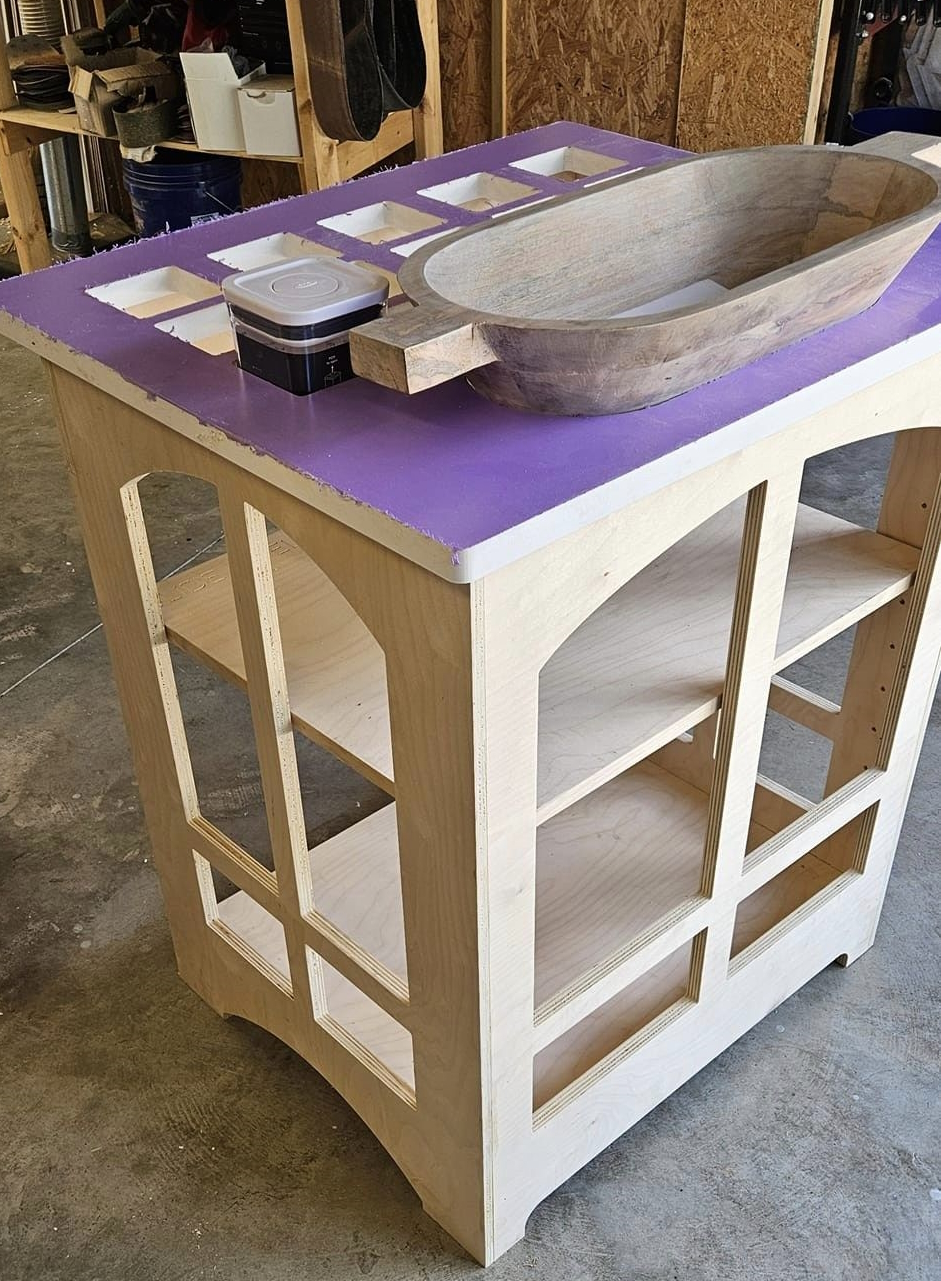
DWC-Shop210Craftworks Sign ShopDWC-Shop210Craftworks Drewswoodcraft Cabinets, Fixtures, Shelving, and Shadow BoxesCreating Retail Fixtures, Cabinets, Cases, Shadow Boxes, Bookcases and Shelves, while serving retailers, building contractors, handy man services, and individuals.$$Phone: 910.340.0403210 Manatee StreetCape CarteretNCUS28584
DWC-Shop210Craftworks Production and SupplyProviding material substrates, products, and services. Helping with small scale production of items. Making base products for makers, industries, retailers, and production facilities since 2019. We use traditional methods as well as industrial CNC and Laser machines.Open: M-Sa 8am-8pmPhone: 910.340.0403Accepting Cash or Credit Card$$210 Manatee StreetCape CarteretNCUSA28584
Sales are intended for US customers only.Return Policy Category via GoogleMerchantCenterreturn up to 60 days after receivingreturned via the carrier that delivered it.Once return is confirmed, a shipping label will be emailed to youReturn and Sales only applicable in US and US territoriesReturn and Sales only applicable in US and US territoriesReturns in person are always allowedReturns for items arriving damaged is free.Credit to the same device used for original payment
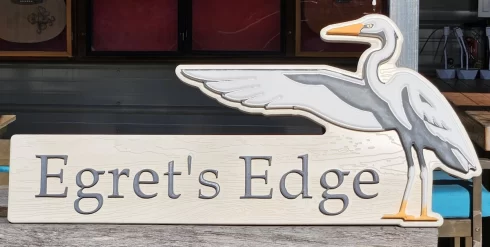
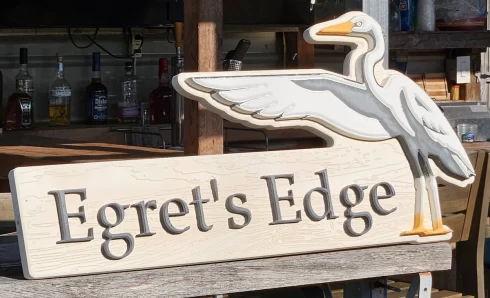
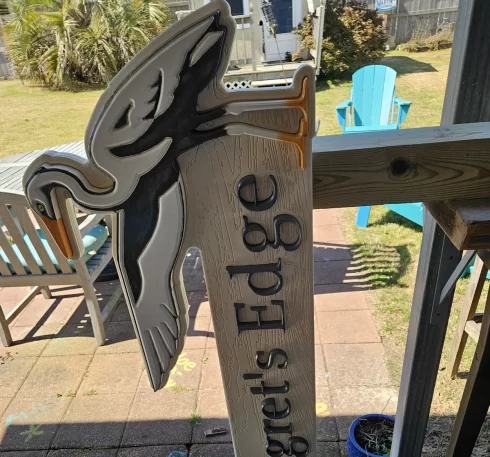
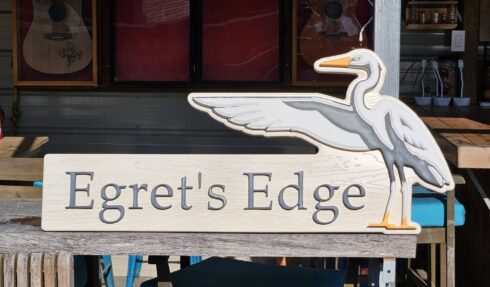
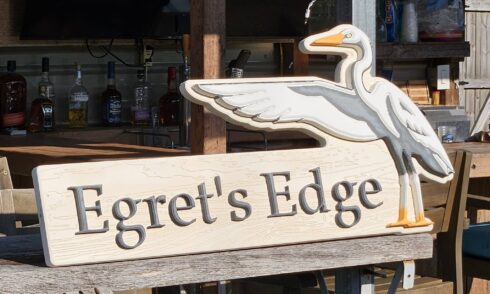
Ms. Egret is back, and she has a pointer for you (bad, bad pun…)…
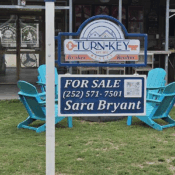
This guy is a free standing post sign- as in ‘not’ attached to a substantial backing. I’m sharing this as it’s something I’ve learned, and offer it to aspiring sign makers.
When using Paylight sign grade expanded PVC, something that has to be addressed is it’s propensity to ‘droop’ when mounted in direct sunlight, especially on the coast, here. There are two things you can do to mitigate this, but on a free standing post, you lose one… so… you do the next best thing.
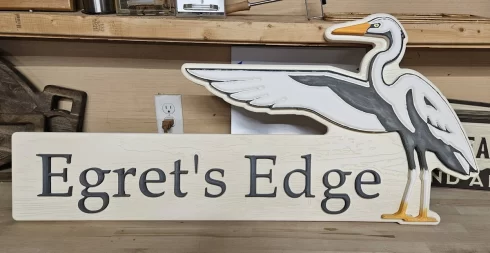
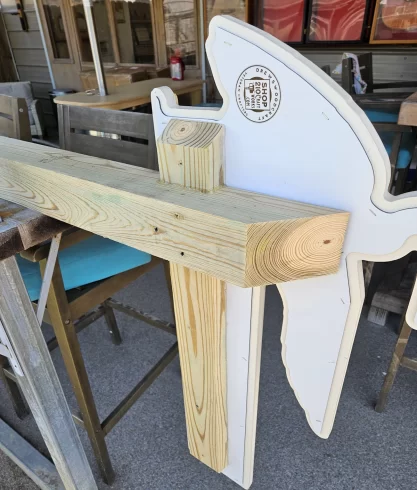
to begin with- any Paylight signs I carve will have a maxmetal backing- it’s both adhered and mechanically fixed together. Staples work great for this application, by the way. That backing should be the shape of the sign and reach no further than an inch from the edges. On bigger signs you can get by with less coverage, but you may as well, in most cases, go to no more than a quarter to half inch from the sign panel’s perimeter. Slather it up with some HD adhesive (I’ve found The Gorilla Glue Company clear construction adhesive to be as good as anything out there, even at five times its cost), and then staple it in place. Don’t forget to take the liner off the maxmetal! otherwise, you’ll be adhering the plastic protective layer to the Paylight… that doesn’t work so swell… ask me how i know.. or don’t…
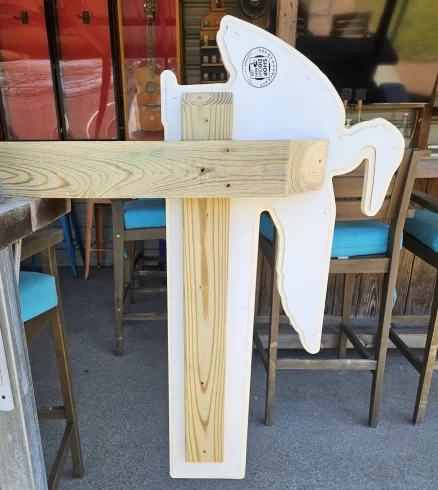
Once this is accomplished^ you’ll need to consider the second ‘hedge’ against droop… that is simple: affix the panel to a solid, flat, sturdy surface. When I have this option, I’ll usually leave a letter or part of the inset design out of the panel until it’s mounted- then mechanically attach the sign to the structure, and then use the same gorilla glue mentioned to adhere the letter/design part back in place. This hides the hardware nicely, and that sign panel isn’t going ~anywhere~… but… again… this particular job is a ‘post’ sign… so… that technique is off the table for consideration.
Brace it. In the images you’ll see how it’s done. A treated 4×4 post has a relief or mortise in the back side of the 4×4 to fit the cross member (treated) 2×4. If you do it right, it’s not visible from the front, yet it’s well attached being both mechanically affixed (screws slobbered with the same gorilla glue long enough to reach through the wood and sink into the Paylight to a depth at least half it’s thickness) and it’s adhered.
and there ya have it. A solid, professional, post sign that’ll last years to come.
bonus tip: this is counterintuitive… yet… it’s valuable and ‘could’ provide to be ~extremely~ ‘valuable’ : instead of doing the obvious and pouring a concrete foot for this post, or even using the expanding foam footers/anchors, simply set this guy in a hole no bigger than the circumference of your post hole diggers (PHD’s.. I have several… 🙂 )… and set it only 18″ to 24″ deep and adding another 6″ for every foot over six feet total height… pack it tightly. sounds crazy? maybe…. but… if your post sign is going anywhere near a road it’s a good idea… you WANT that post sign to fall over if a car hits it… you DO NOT want it to break and fly through the windshield of that vehicle, possibly making a minor accident a serious one.
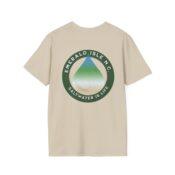
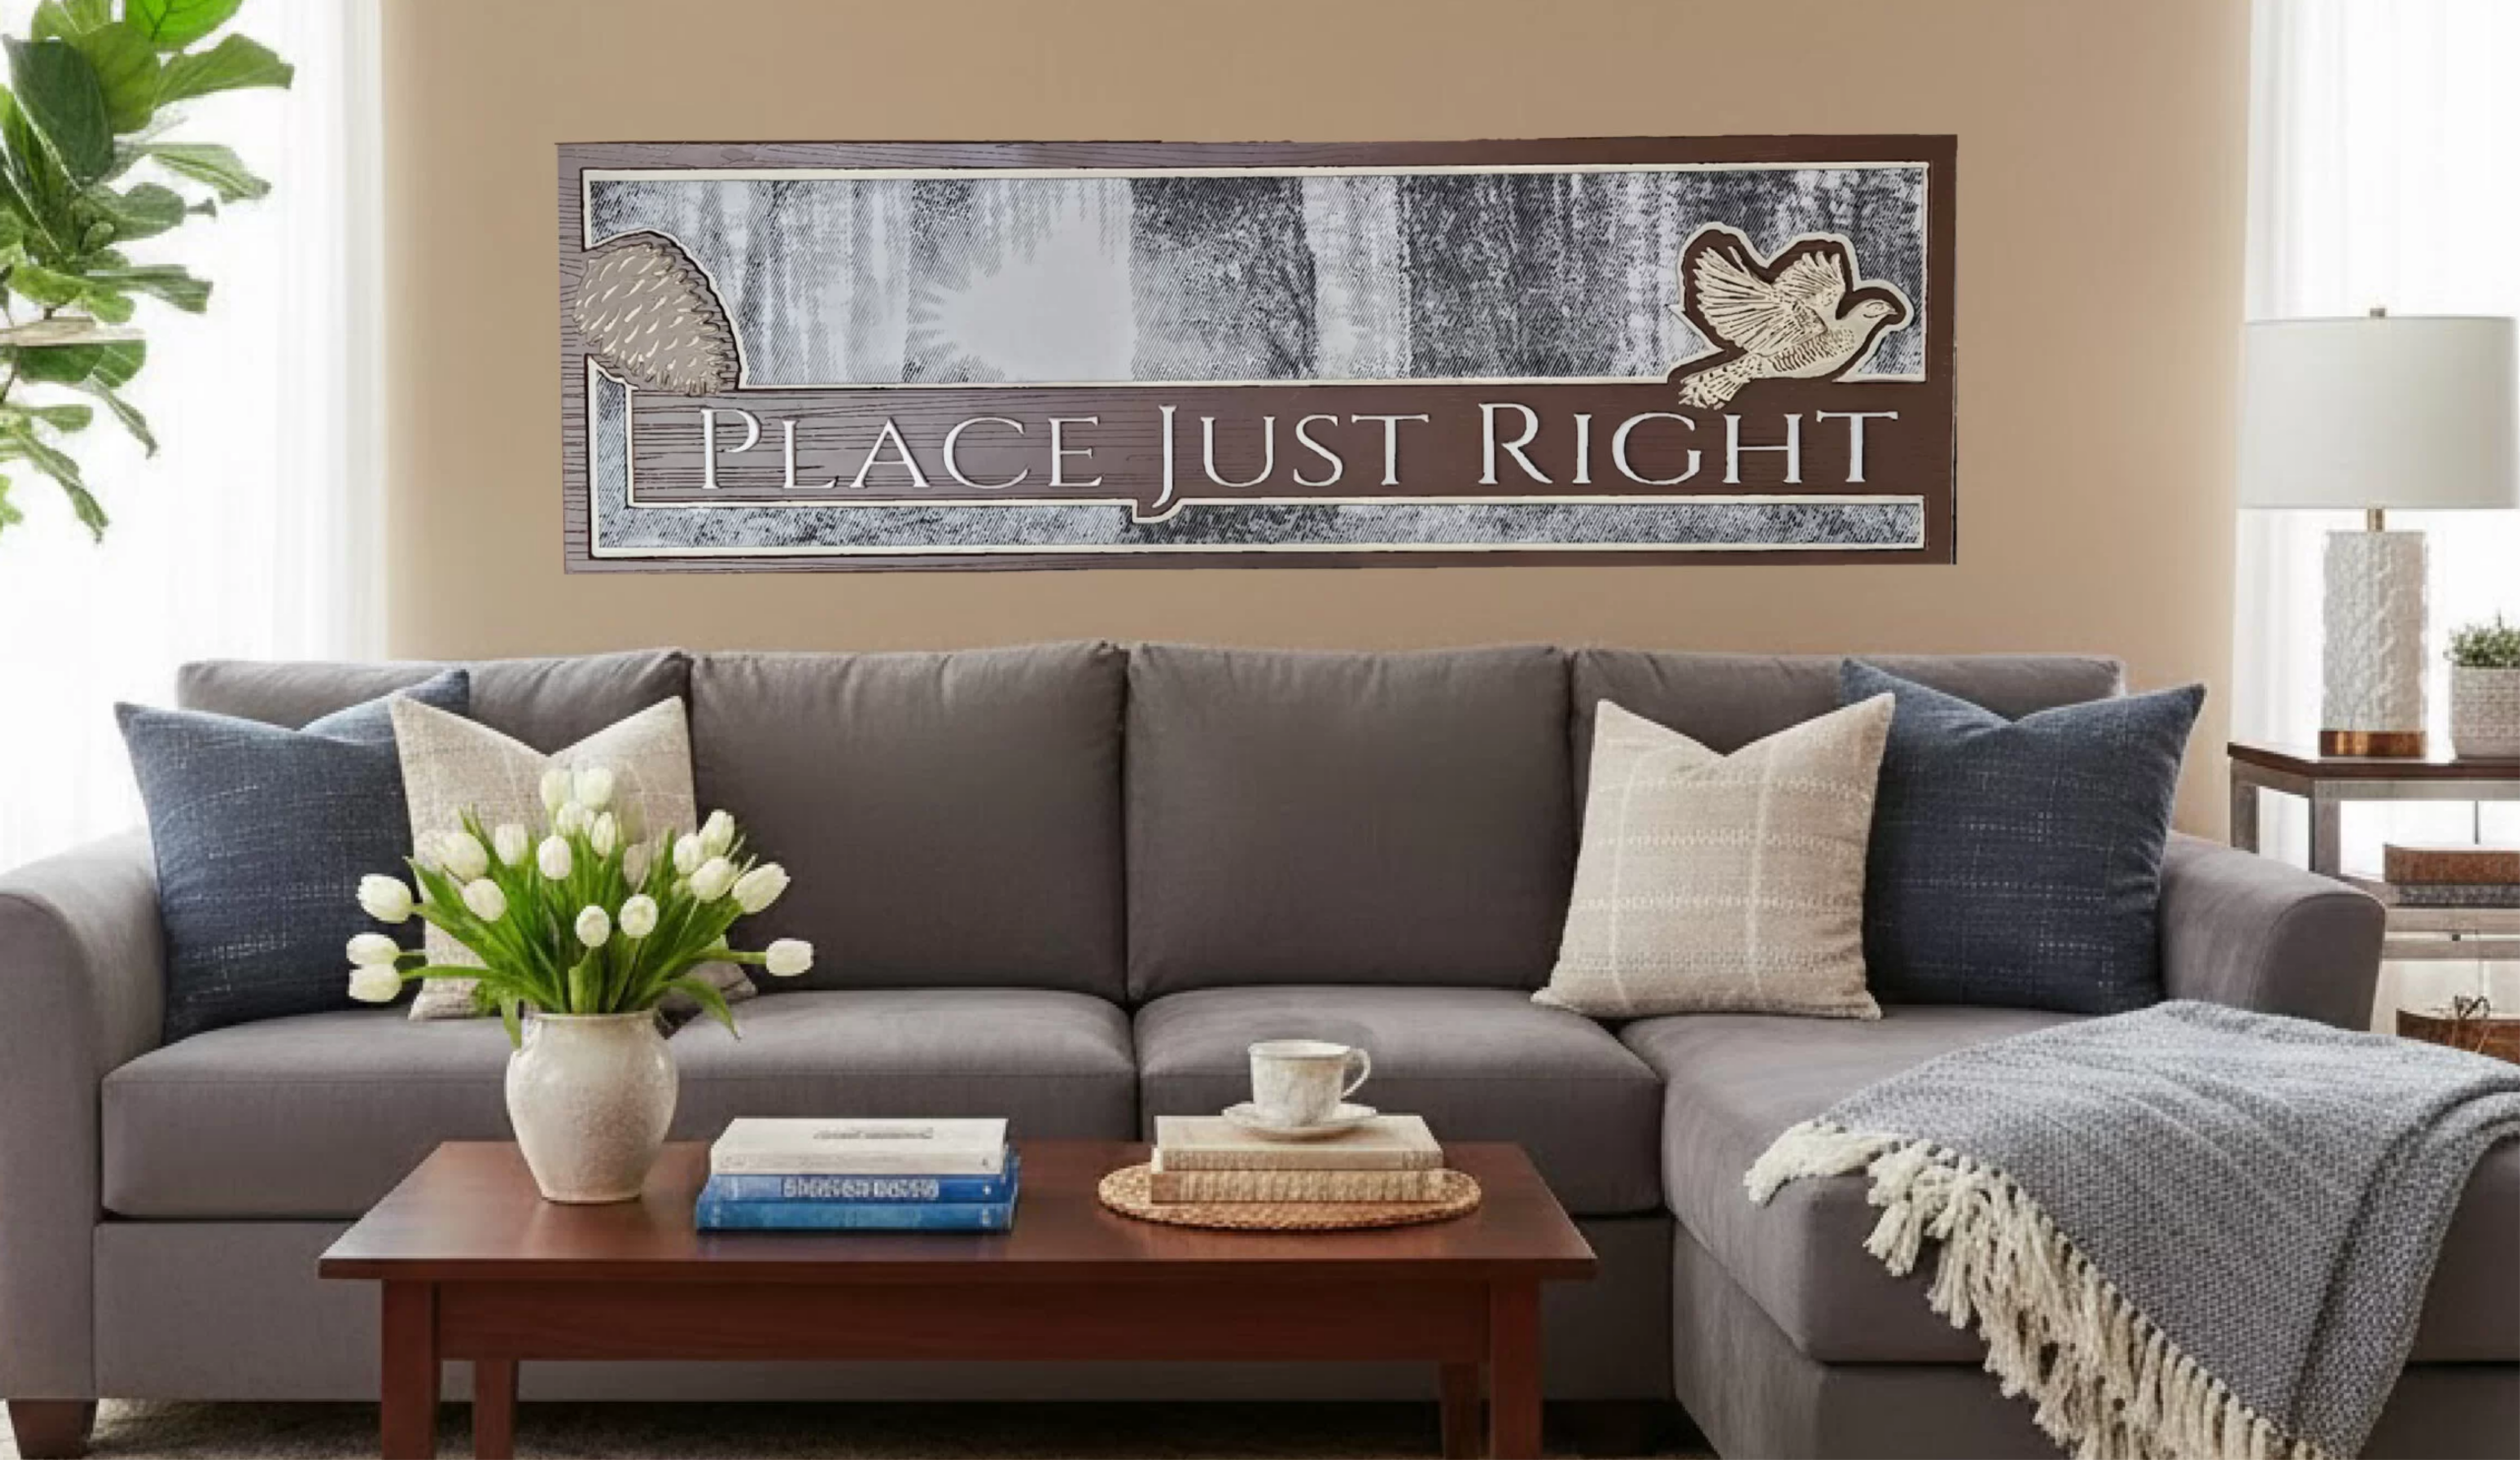
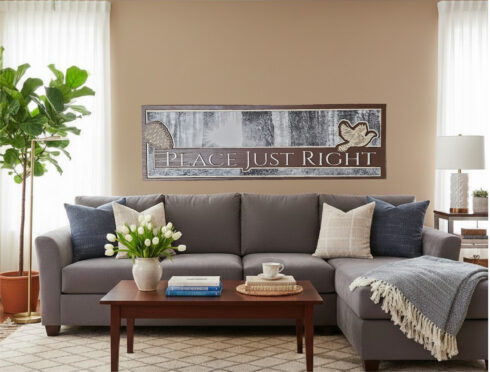
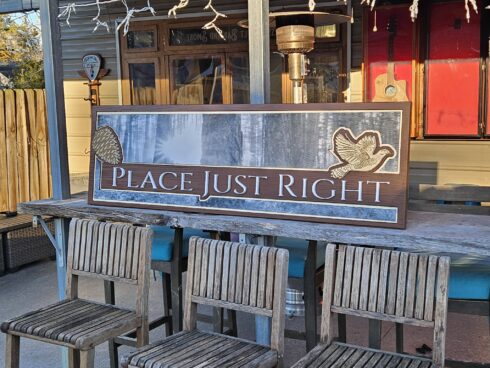
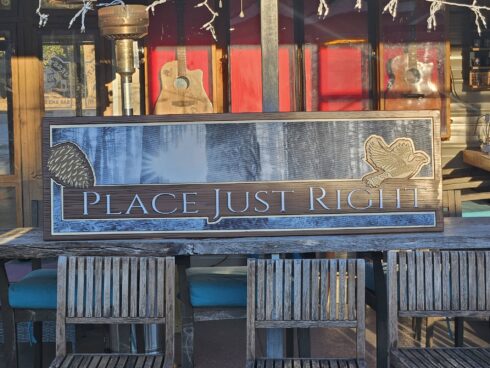
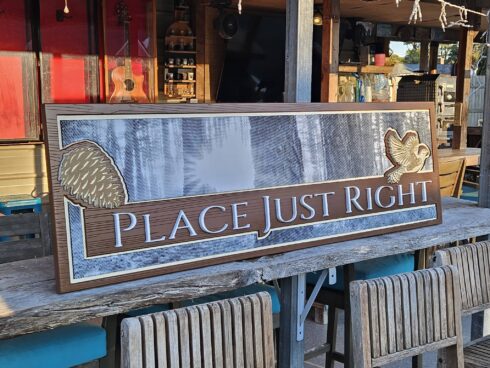
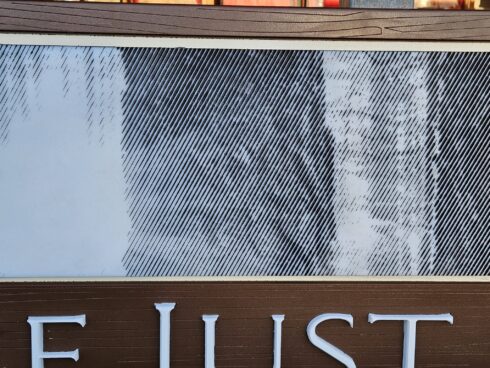
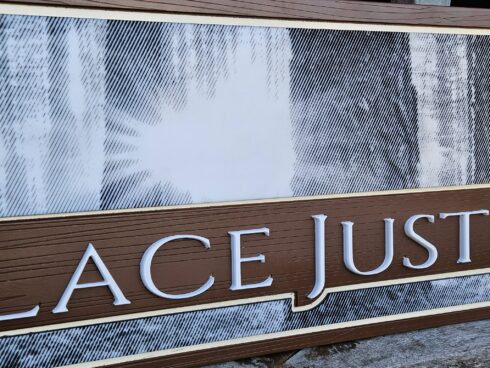
These guy’s are made to withstand whatever environment they encounter. Every material used on them is with rugged environments in mind and prepared for. The Image part of it is on cast acrylic and used a method of carving that translates the image into parallel lines of varying widths and depths to render a very nice look that is far from common. It will last, by itself, for years and years in whatever environment it is set up in. The framing/backing is synthetic material with separate insets made from that same material to allow crisp paint lines and brilliant display – not unlike other signs made in the shop. It’s painted with enamel paints and sealed up with the highest quality clear available.
What sets this one apart other than the image? Well… Nothing, really. But that image really makes it pop and turns a commercial sign into something that has the look and feel of a custom piece of art. To the degree that you would present it in your home or office with great pride. This wasn’t something I set out to do; it’s something that revealed itself only as it was coming together.
The only problem is, now my wife wants one for our home, and she is staging for me to make them as gifts to her family and friends. I knew they looked great, but maybe I should have dialed it back some? 🙂
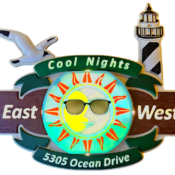
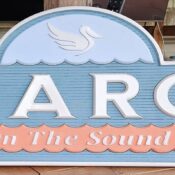
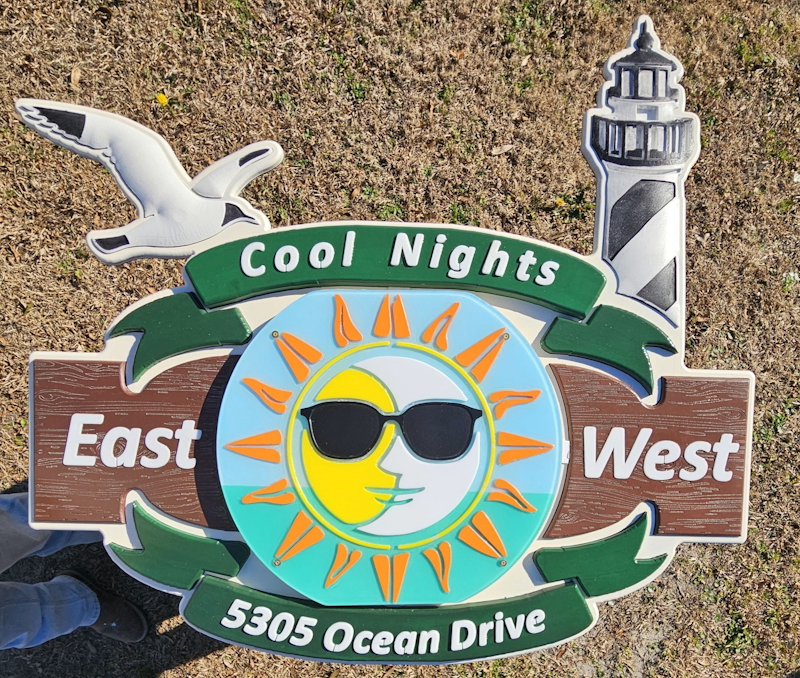
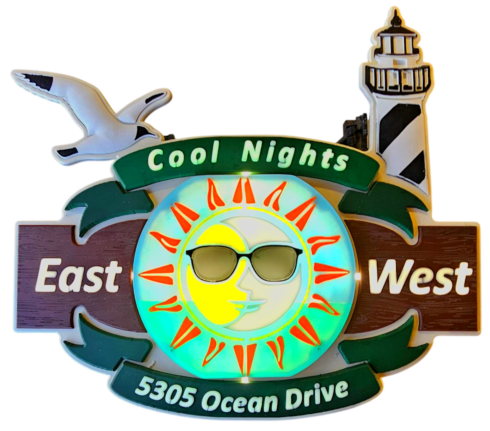
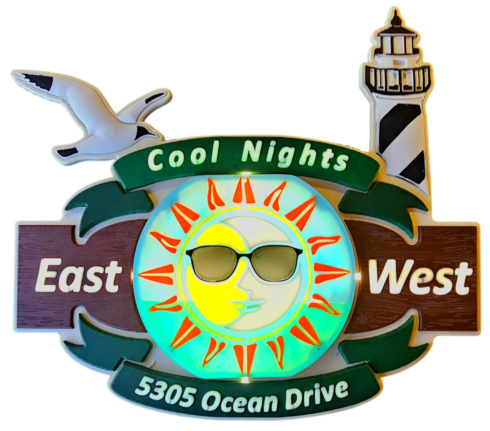
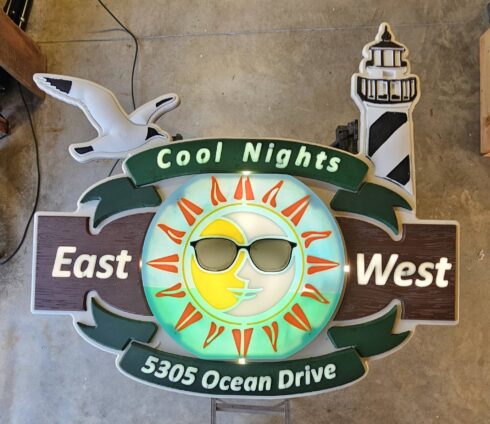
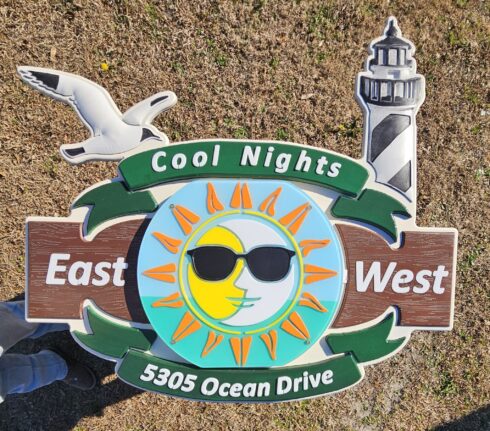
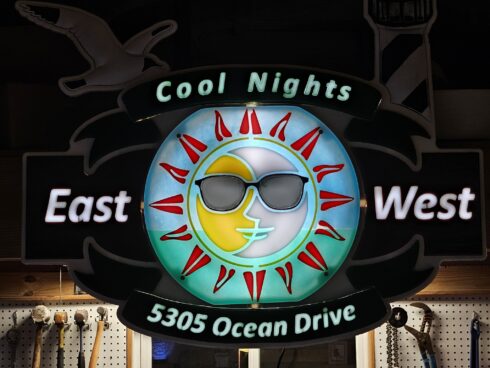
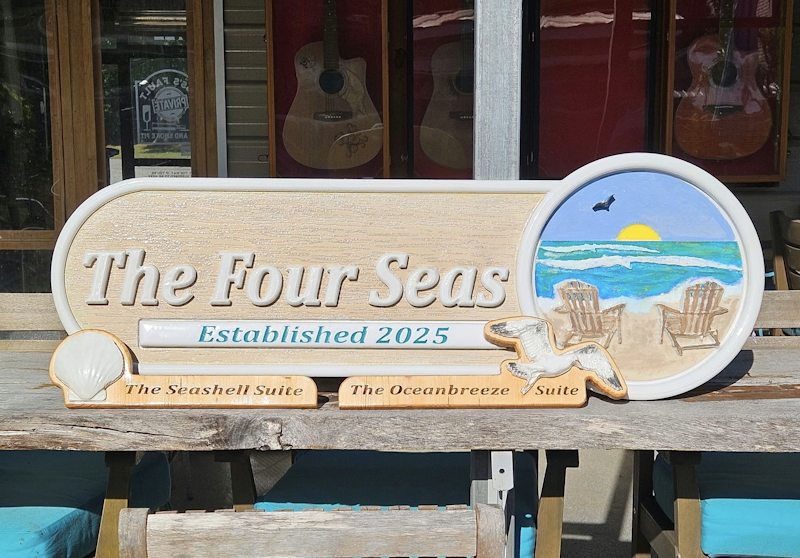
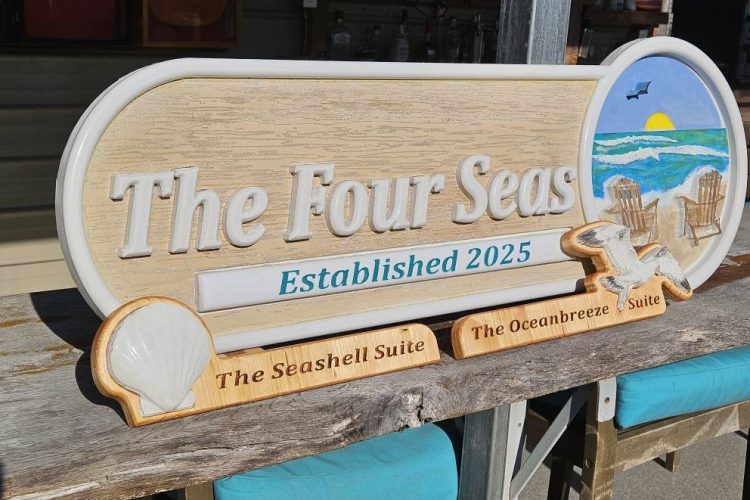
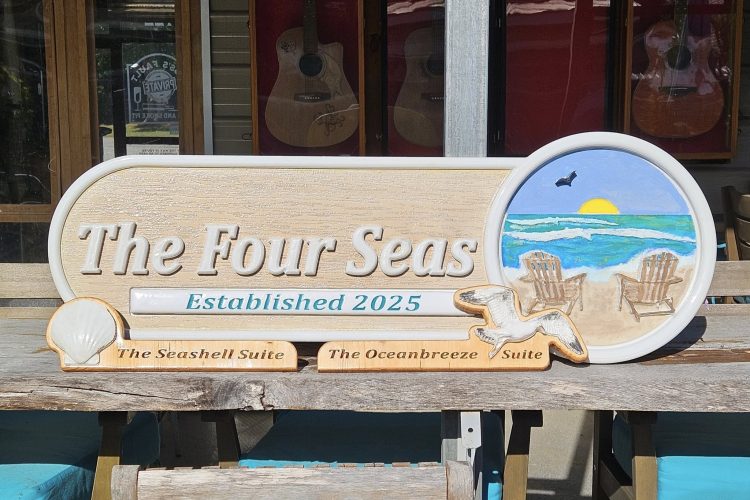
Cool Nights is a rental duplex at the beach in Emerald Isle NC, and is a southern facing beach. The house is adorned with the sign in the pic above, which is quite a complex creation, believe it or not.
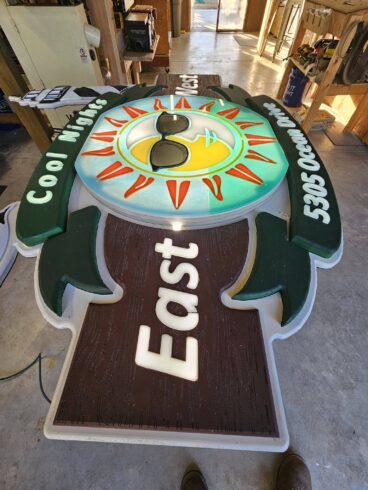
The design calls for something that will last in the environment it is found in – which means synthetic material is required. We (the owners of the home and DWC-Shop210Craftworks) wanted to make something that would really “POP” and make a statement. This called for some sorcery of colored acrylic set in clear back painted acrylic, atop white acrylic to diffuse the light behind it. It called for weatherproof LED lights and ballasts, and for that to be still accessible for repairs if it fails. It called for multi layered outdoor grade PVC in varying thickness and set as separate pieces, and affixed to a maxmetal backing to provide structural integrity for the PVC expanded foam. All of this was accomplished, the designing, the fabrication of separate pieces, and the finish of them as individual pieces before being assembled and given another finish as a whole.
For the final clear, I used Halcyon by total boat on each of the pieces and then as a whole. I used six total coats and a HVLP sprayer to make it happen. It is the first time I have used Halcyon for this purpose, so I will be watching closely how it weathers, and will be quick to snatch it and re-coat it if needed. From the looks of it, that will not be necessary for a good long while.
The means for hanging was also a new product- and one made in the shop. It is a bracket system made of HDPE which has two main parts- one for the structure, and one for the sign panel. The reason is for standoff from the lapboard structure (uneven surface) and so the sign remains perpendicular to the ground, for ease of installation, and so the sign is firmly and I mean firmly attached to the structure using material that will not rot. I could not be more pleased with how that turned out.
This one is not an inexpensive sign- it is far more like a commercial sign than a residential sign, and for all practical purposes it is a commercial sign. The carving and details within allow outstanding representation in lighted conditions (daylight) and perhaps even more eye grabbing in the dark. It was designed in layers, and the side view below should offer you that perspective. The backlight is designed to escape strategically with a diffused hal0, provided by the white layer of acrylic edge, and by four points- giving a slight cast at night around the entire sign with the main face glowing. I am really happy with how this came together!
This weeks topic is about Lettering… Numbers… Graphics. My question is why just use letters and numbers when you can add some personality?
I’m thinking, and it may be just me, but I’m thinking it makes you more noticeable and memorable, no?
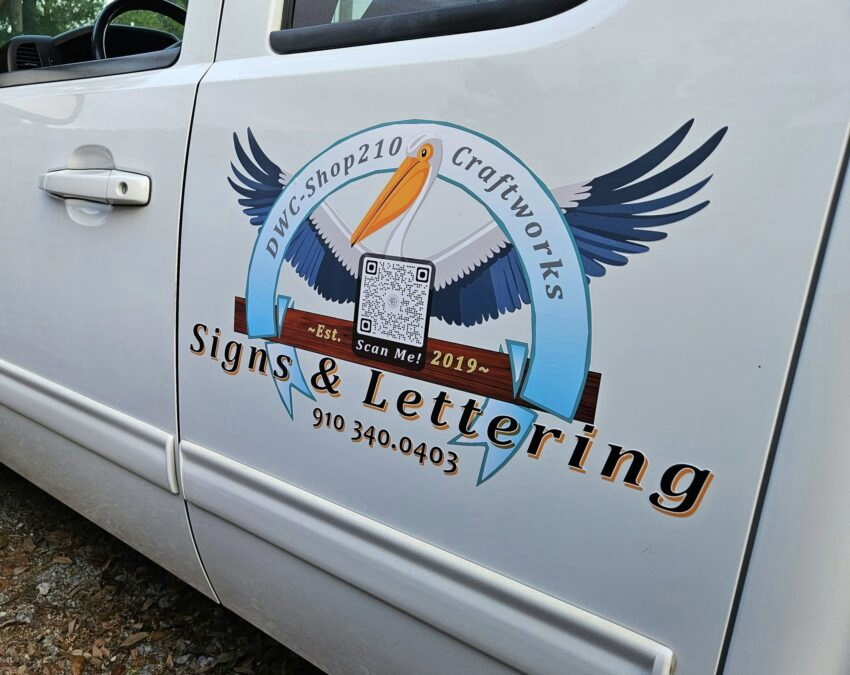
example of door graphics
If you’re in need of boat, trailer, truck, or window graphics (or numbers) I’m pretty good at fast turnaround and absolutely ALL about quality work. If you’re local I can install, and if not I can ship.
….. and I’ll help you with your unique graphics if you decide to add that touch of personality. …….
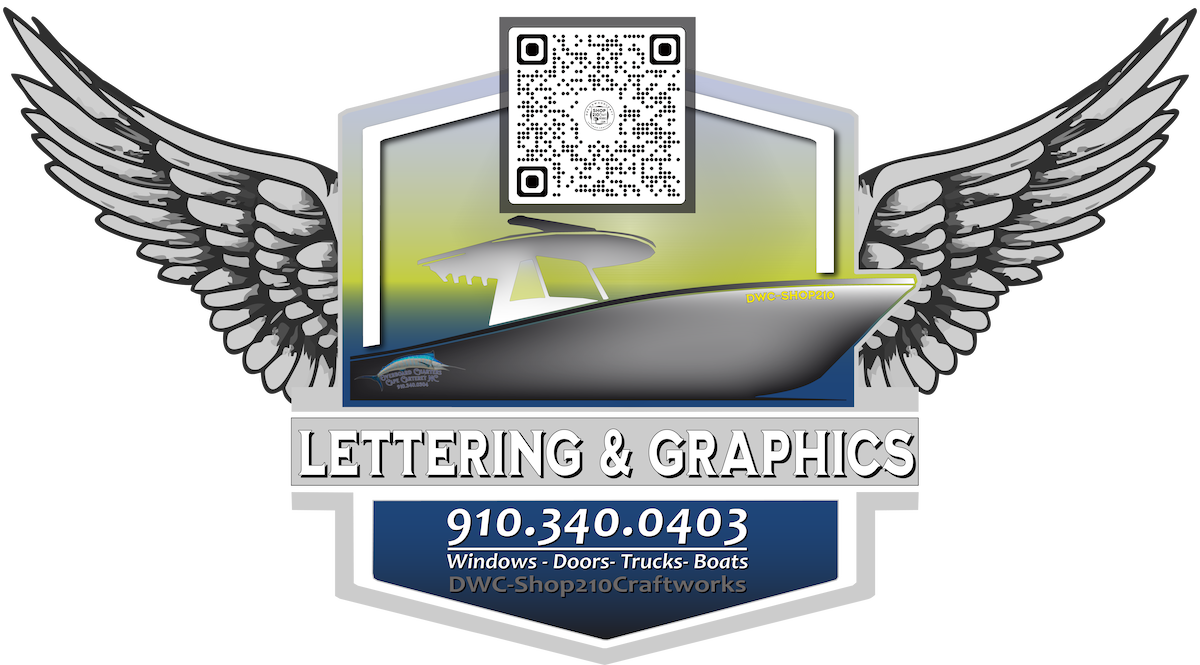
example of door graphics
and one more thing I do you may find of interest: I can host a page for you adding all your (professional) contact information in one place- phone, social media, email, cash apps, – all the perspective client needs to do is scan the code and mash the button on the page however they want to contact you… scan mine in the images above as an example…. and the QR code on your lettering will point to that page as a part of your purchase.
Straight to the point: Why do signs cost so much? Read along, friends. I’m not one that minds explaining myself, and neither am I a gate keeper. A matter of fact, if there is somebody reading this who is starting their trek into this realm, I’d be pleased to learn they learned something from me!
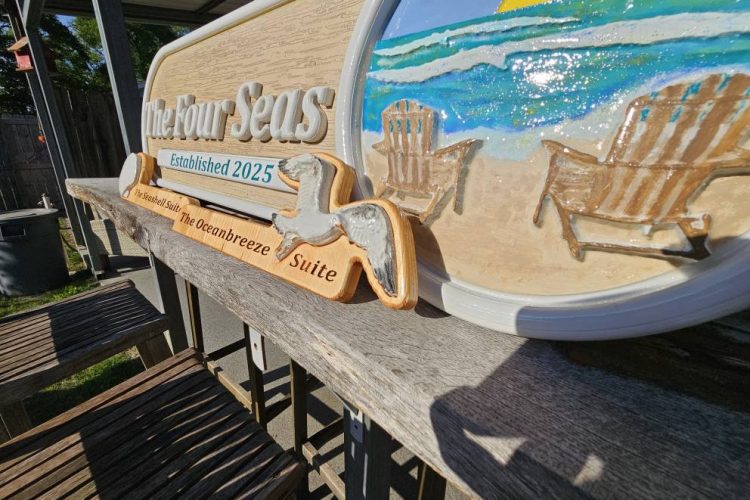
I live on the coast, and much of my effort is for homes on the beach- rentals, as they are- for vacationers. A home such as that needs a name, no? And, for the fun of it, so do rooms/suites. It just makes it a little more interesting.
The anatomy of a sign… anyone with a cnc can carve one, but are they made right? Will they last? These will. Buy from who you want when you’re in the market, but make sure you’re getting something more than just “pretty”… make sure it’s made right….sealed right… provisions to be mounted right. If you’re told those things don’t matter and only the appearance does, you may want to spend your hard earned money with someone who disagrees and places equal attention on elements that make it a truly quality piece.
In this environment, there are really only three substrates I will work with. Before those are given, though, I’ll tell you what I will NOT work with and why…
Acrylic is great, but if it isn’t UV printed, there are no vinyl prints that will survive even two years in the sun, here, without lamination. Even with lamination, you’re looking at no more than five years. And how else do you decorate acrylic? For this reason Vinyl is out, and it took acrylic with it… caveat: I use acrylic for accents and letters often and they do very well here and just about anywhere else, and, UV printed acrylic works well in this area SO LONG AS it’s printed on the inside of the fixture…. it lacks dimension, though, no matter how you slice it.
Again, vinyl is out because of the above^ .
Wood- even Cyprus- just doesn’t last. For dimensional signs it is the flagship- the high water mark- the classic… but here? Unless you stay on top of it and I mean really on top of it, wood won’t last. Looks? Spectacular in the beginning, and if well kept. It’s just not as some of the other substrates, so I exclude it… There is a caveat here as well: I make the carved/dimensional signs ‘look’ like wood, so that classic look is retained.
What WILL I work with?
King Color Core- which is two (or three) colored and layered HDPE, and HDPE is maybe the toughest material for signage there is in terms of lasting. However, it warps when used in large sections so it has to be backed with something substantial- either mounted to a flat surface, or with a flat surface mounted to it. The thickest reasonable Color Core is 3/4″ thick, and nothing sticks to it at all. It has to be mechanically affixed to it’s mount, and no paint made will bond to it, so you’re stuck with two (or three) tones of generic colors and only slight dimensional appeal. However, it will last forever with little to no maintenance.
Expanded Closed Cell Foam Sign Grade PVC works very well with dimensional signage. It carves spectacularly and it easily accepts many kinds of paint. It moves a little, so care must be taken with tolerances and compensated for. It usually requires a backing, and most often I used max-metal- a corrugated metal and plastic material- to do the job. It is much cheaper than HDU and Color Core, though not near as tough as either (when properly treated). It does, however meet every other requirement I have, so… I use it often. Put it like this: A sign that costs $375 from my shop in PVC is a quarter of the price of the same in HDU- though it will only last half as long. The economics say “use pvc”. There are some cases where I recommend HDU, but they are few when PVC can do the same job.
HDU is the best of the material available for carved or dimensional signs. It is a dense closed cell foam which is incredibly consistent. There is nothing that carves better. Nothing. The tiny details that can be revealed while carving puts this material in a realm of its own. However- the cost is only it’s first con. It has to be primed and painted. Sure, lots of people use latex paints on it with some success, and others use enamel. I’ve even used acrylics and seals. But, HDU really shines when using automotive paints and clearcoats. Not only for it’s looks, but because those paints make HDU carved signs tough and resilient to weather and washes in the same way your car looks good for years with the same treatment. You can guess, though, that a proper HDU sign, painted, clear coated, backed (it’s a VERY good idea to ‘back’ HDU, too- and either acrylic or MaxMetal works beautifully. ) and installed is very often at least a five figure job. Meaning, five positions of $’s before the cents…
Those, friends, are the substrates used most often ’round these parts.
Here is HOW they’re used and in the case of a ‘beach house’ sign.
First, I select PVC in one inch thickness. From this, I will carve a design if needed, and carve letter independent of the main sign board. The background of the design is often carved to look as wood- this is down to a science at this point and folks can even choose which grain/species of wood they prefer to imitate. Again, letters are a separate aspect so the panel is only carved with pockets to receive the letters as insets.
The letters are carved and rounded/crowned, and with enough ‘wiggle room’ to mitigate expansion and contraction due to weather changes. Because they’re carved separate, beautifully crisp lines are possible between the panel and the lettering. It simply can’t be done as well if the sign is one piece. Having the lettering separate also allows an opportunity to hide the mounting hardware. That’s actually hugely beneficial and a reason to separate the letters from the panel all by itself…. until you realize how pretty those crisp lines are, and how easily achieved compared to painting them whole.
Once painted, a huge trick for this environment involves (drumroll) …… RESIN… Everything is set in resin. Everything except the backing of the sign…
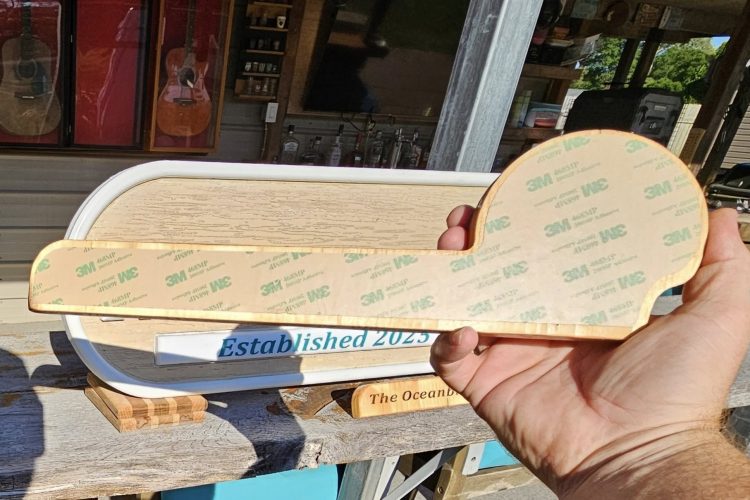
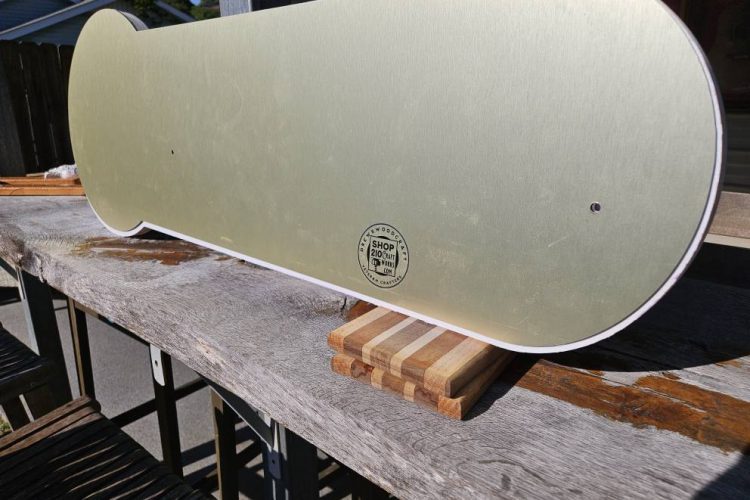
The backing is there to provide a strong surface for mounting and to exponentially increase the signs durability. It is FAR more rigid with a simple shaped MaxMetal backer.
The mounting of the sign is done via stainless lag bolt and accessed from under the first and last letters of the sign. For those letters I use a mild adhesive to hedge my bet, but the letter fit snugly into one quarter inch deep pockets (as all of them do, it’s just these particular ones use mild adhesive as opposed to locking adhesives) so they can be removed without breaking them if the sign needs to be relocated or replaced. This provides a clean look for the install.
Also, this one is intended to be mounted to the side of a house with overlapping side boards. Because of this I will use one inch barrel standoffs to ‘float’ it above the surface. This will ensure the signs face will remain flat aka perpendicular to the ground, and it will mitigate any water running off the wall ensuring it doesn’t find a path over the sign face thus dirtying it.
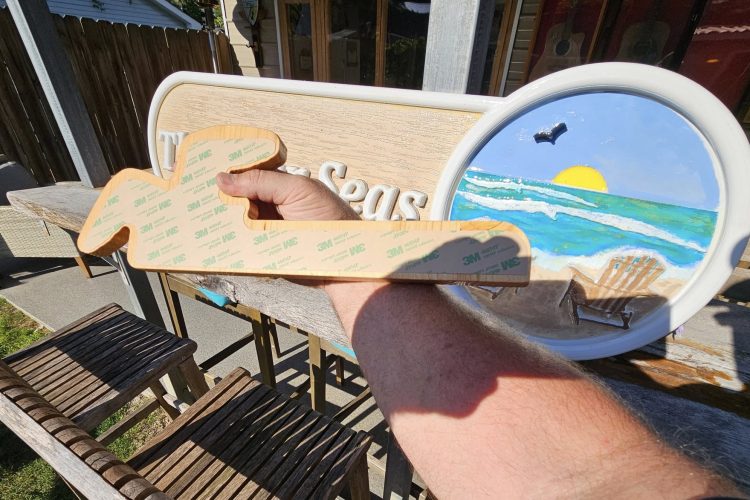
The ‘suite signs’ are of wood. These are intended for interior work, so a seal of poly was all that was needed. The back of these has a form cut adhesive panel of 3m468mp, the best adhesive for this purpose made. Note in the images the adhesive doesn’t go all the way to the edges, ensuring it remains unseen, and, by it covering the entirety of the sign (except for the very edges) it will add some strength to the sign ensuring it last for years and years, guarded against bumps and impacts.
I’m a visual type dude, and I’m going to guess y’all are too as you’re interested in signs- So- I’m going to shut up now and show you pictures of what I just spoke about, with an additional shot of two small pine signs that go on Suite entrances. They’re pine panels with PVC carvings inset and with 3M double sided adhesive on the backs as a mounting option. The opening line was “why do signs cost so much?” is better explained using the images and allowing folks to grasp the effort that goes into making them, when they’re made correctly.
Represent your brand, your club, your organization and do it in style.
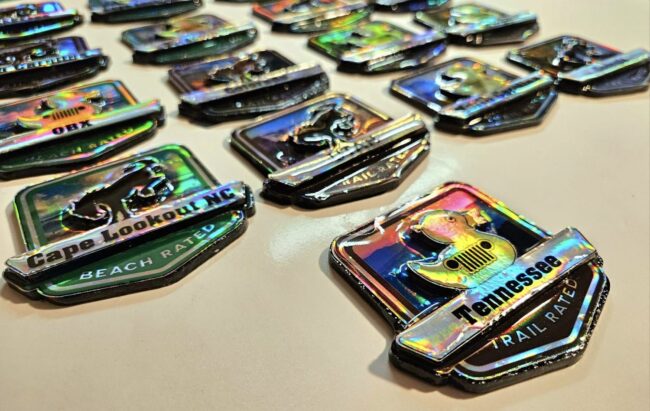
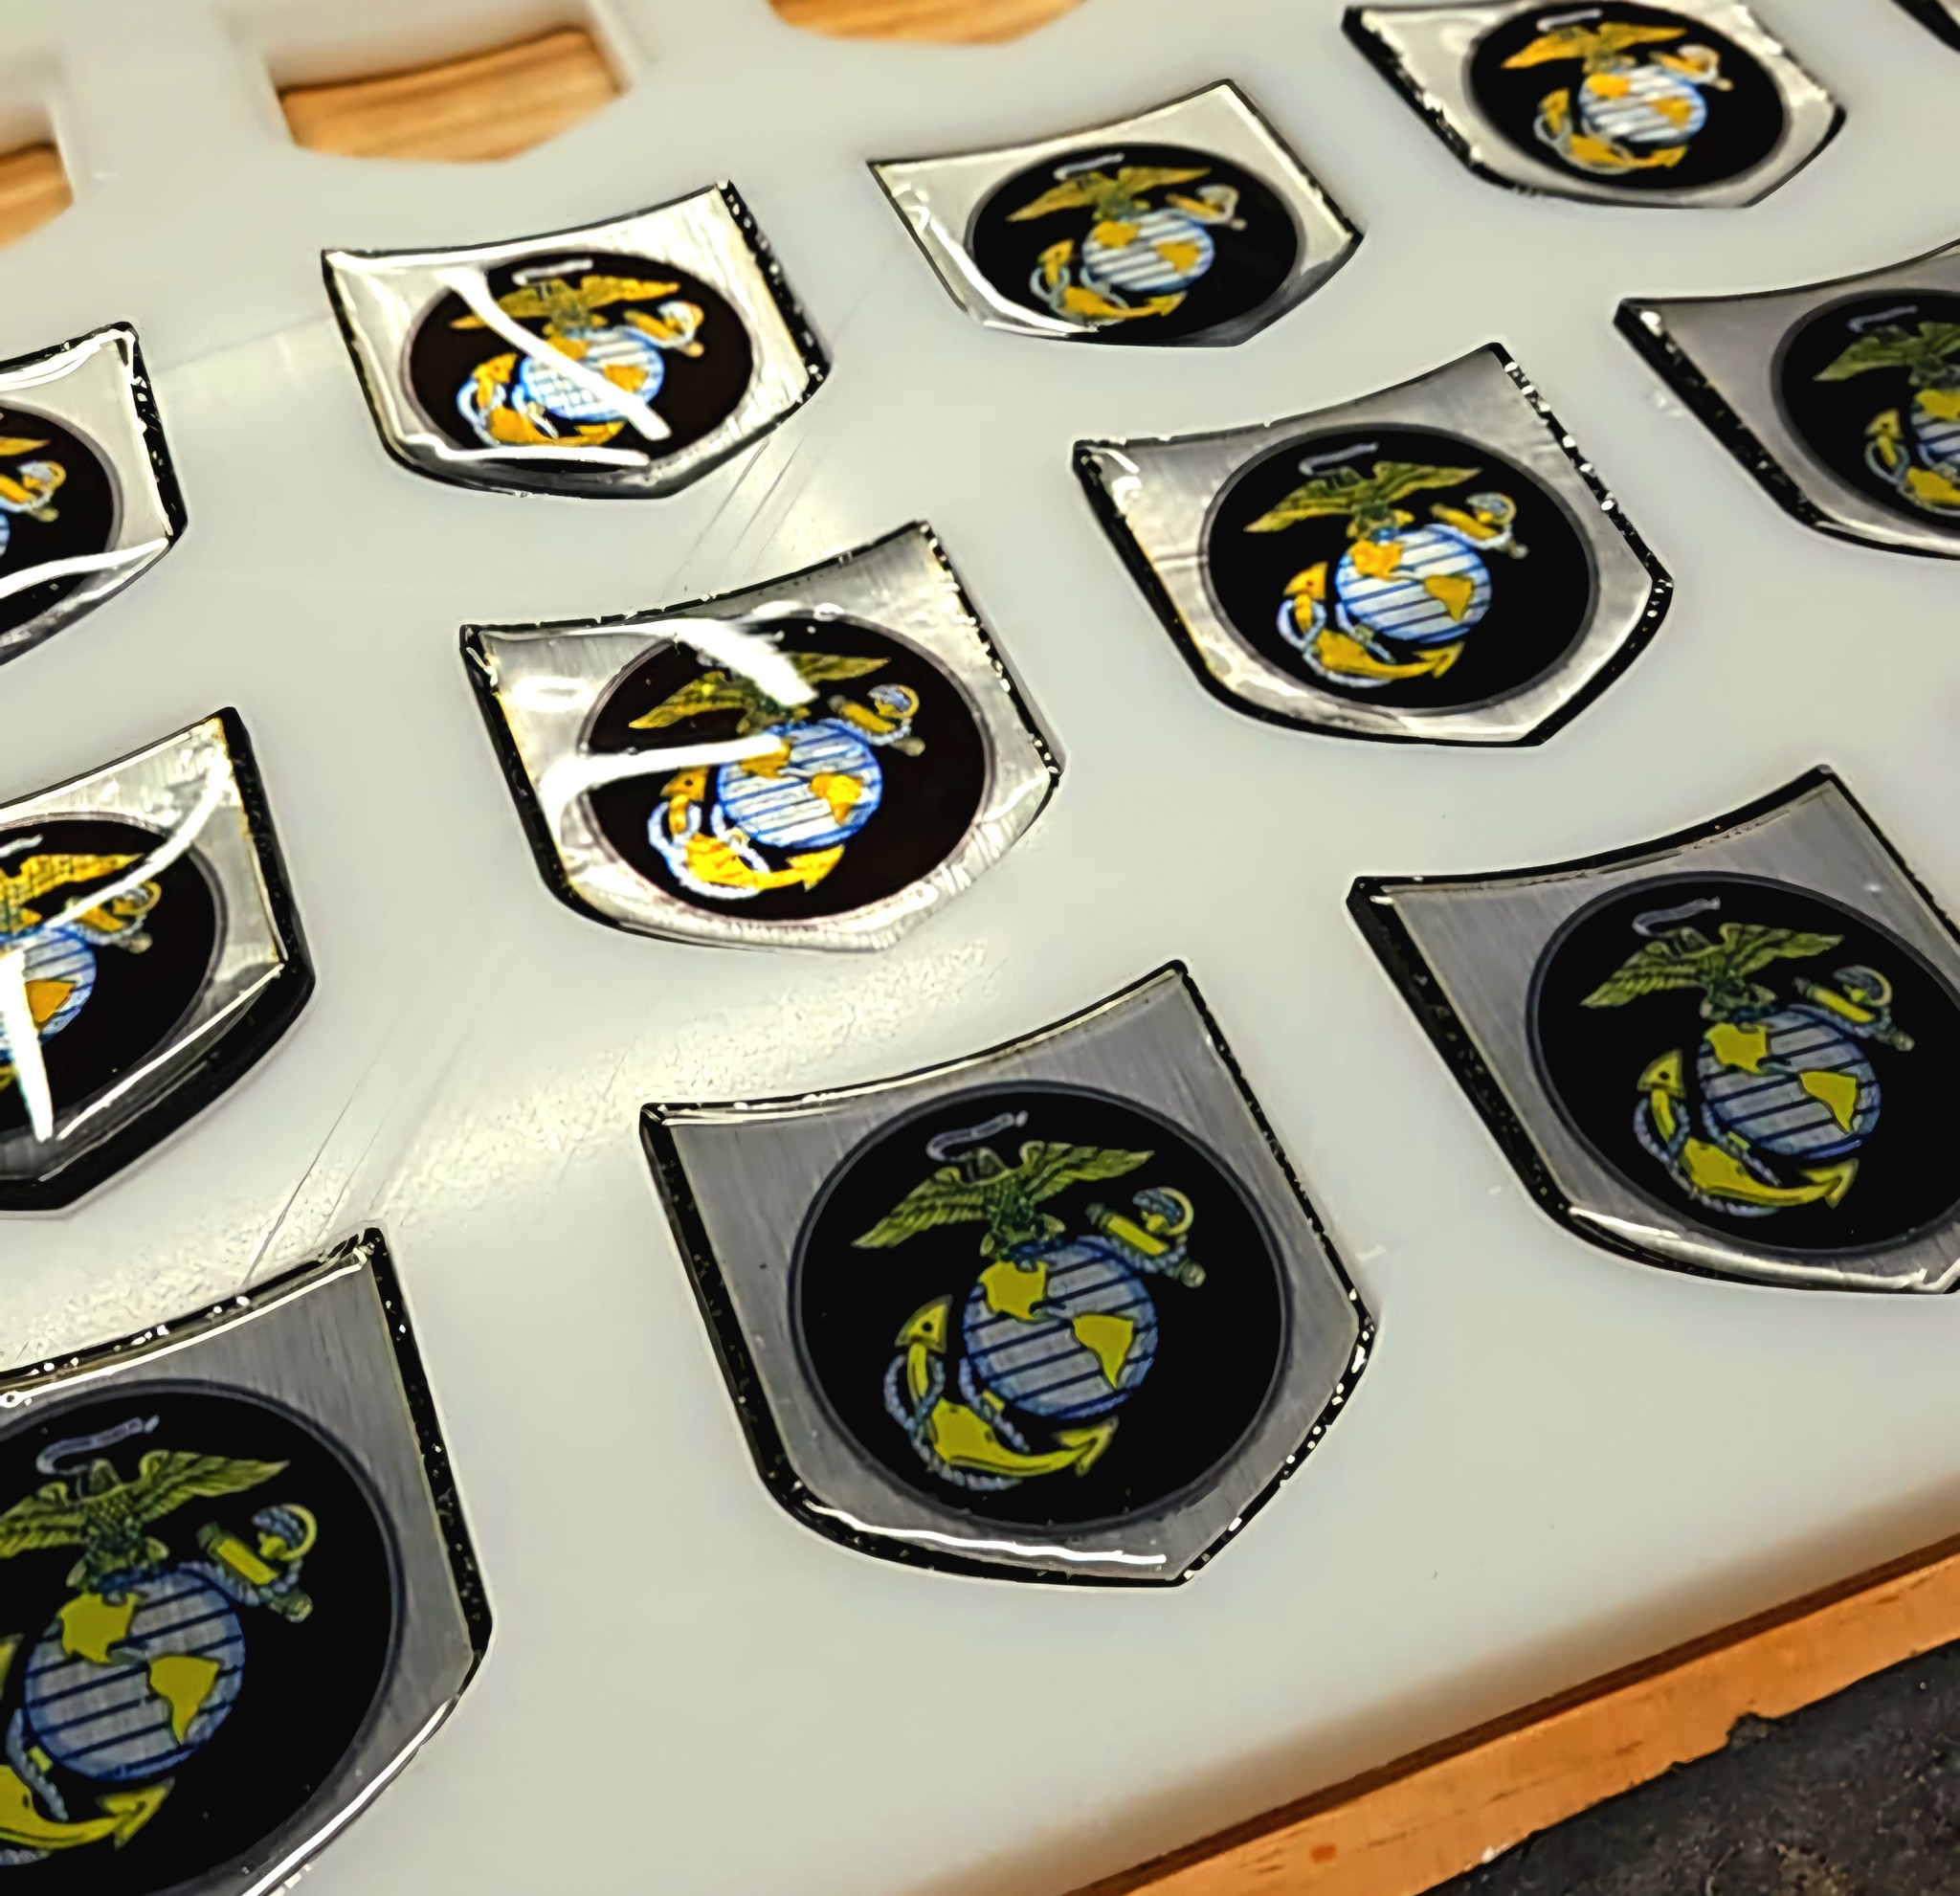
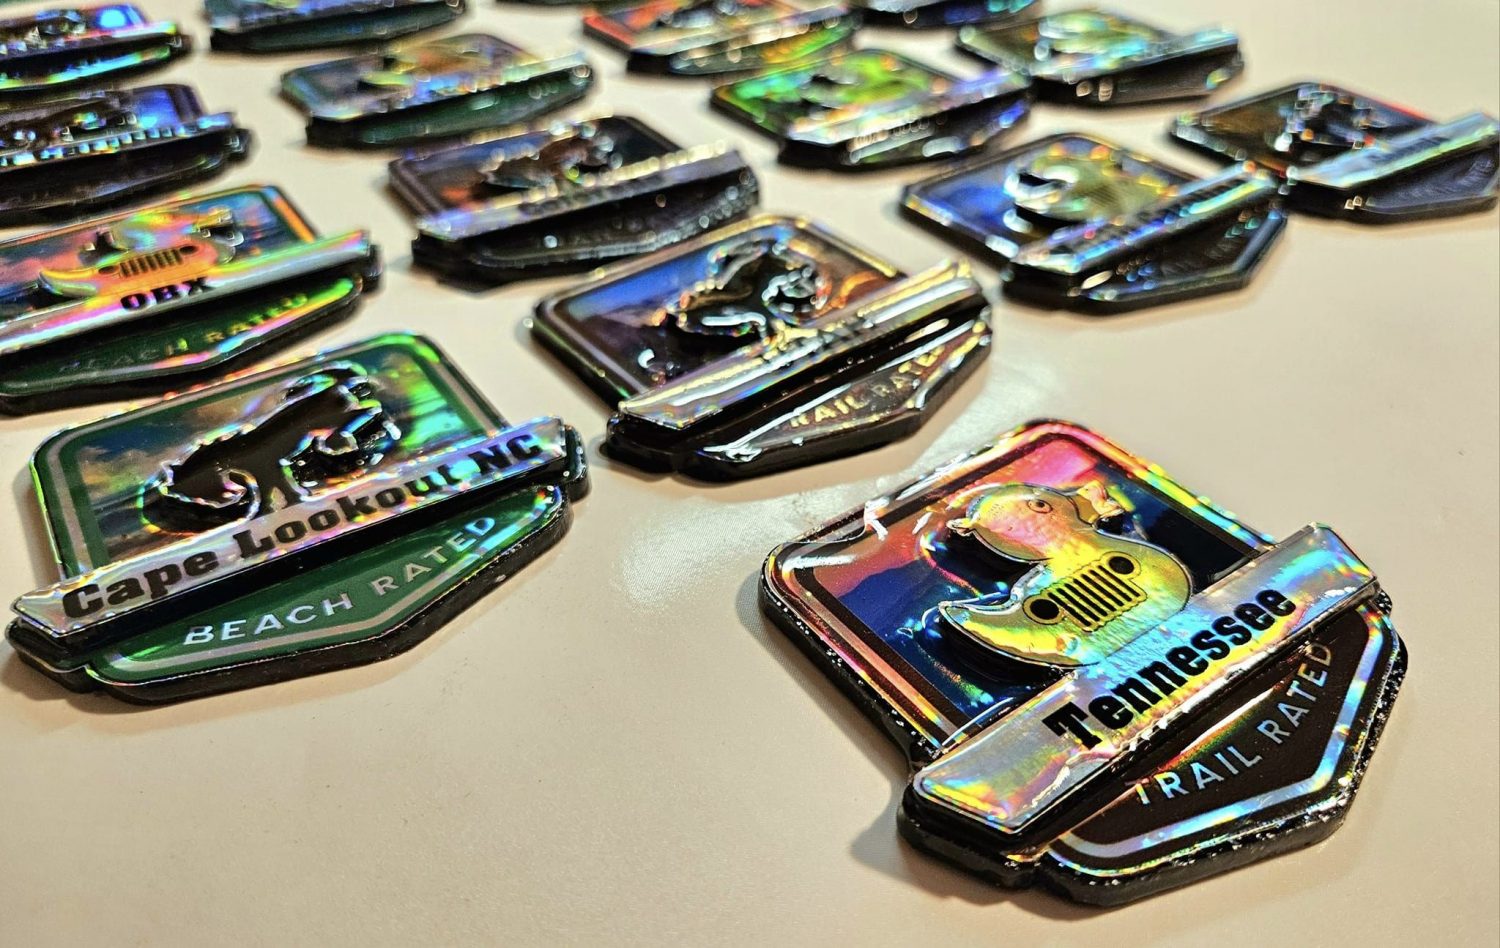
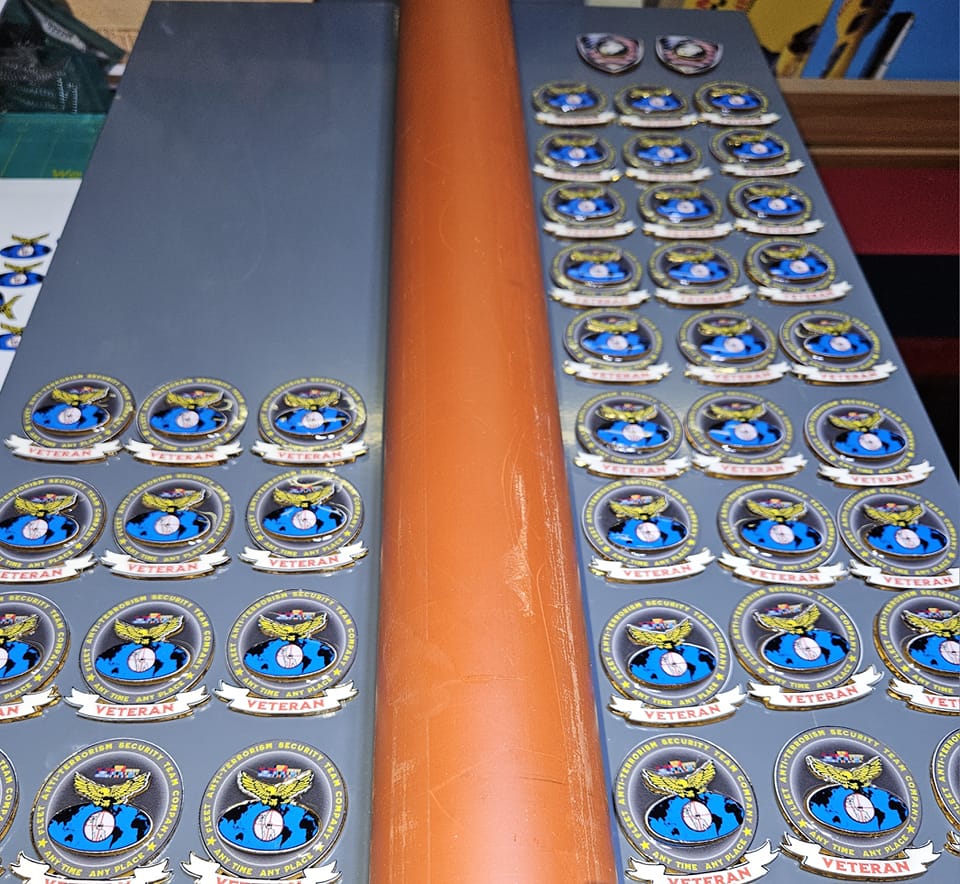
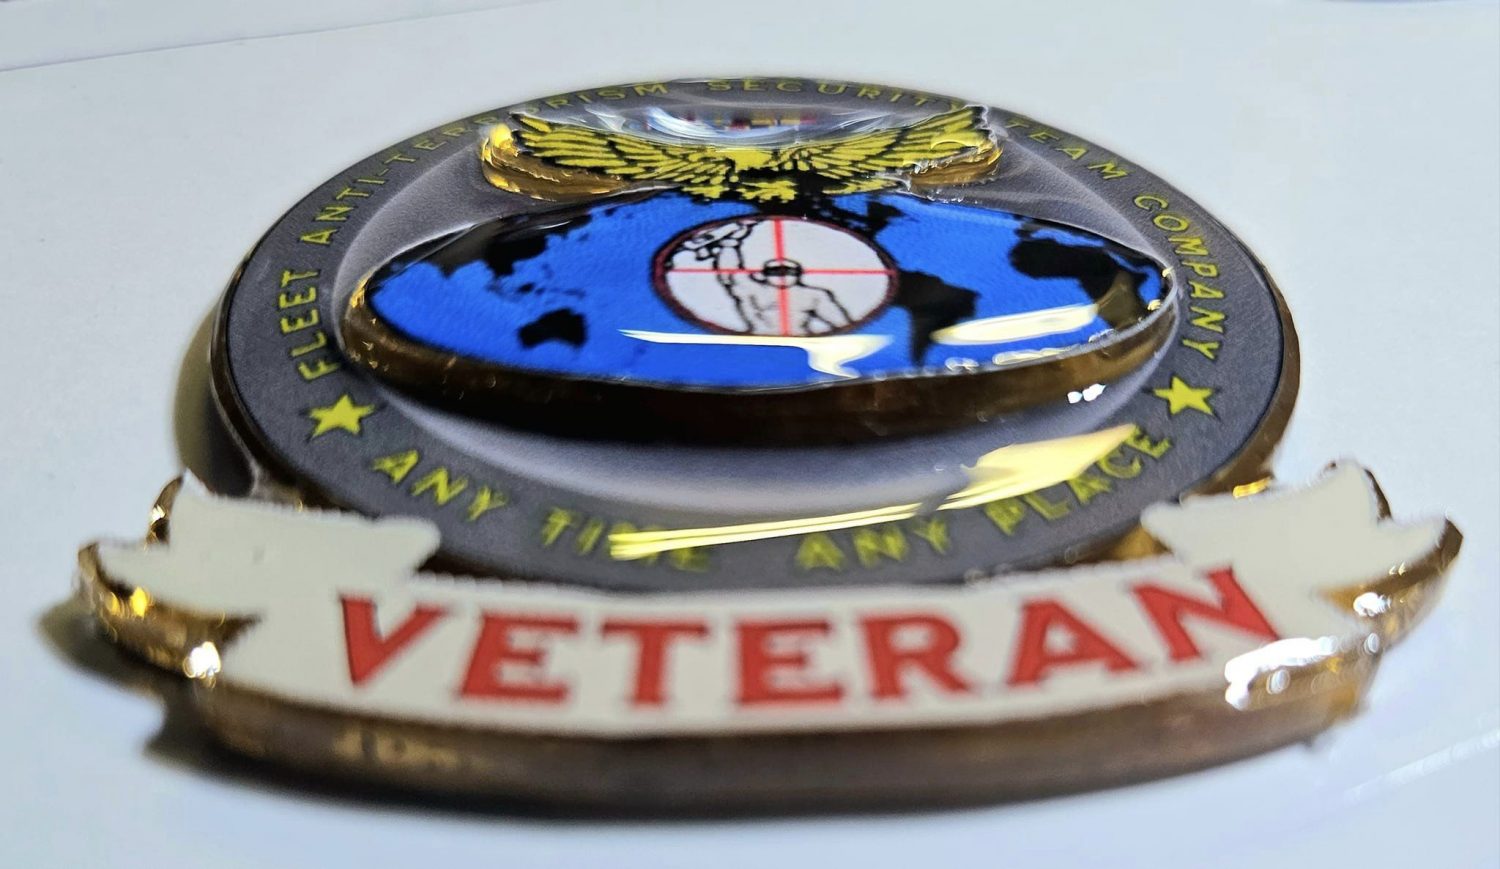
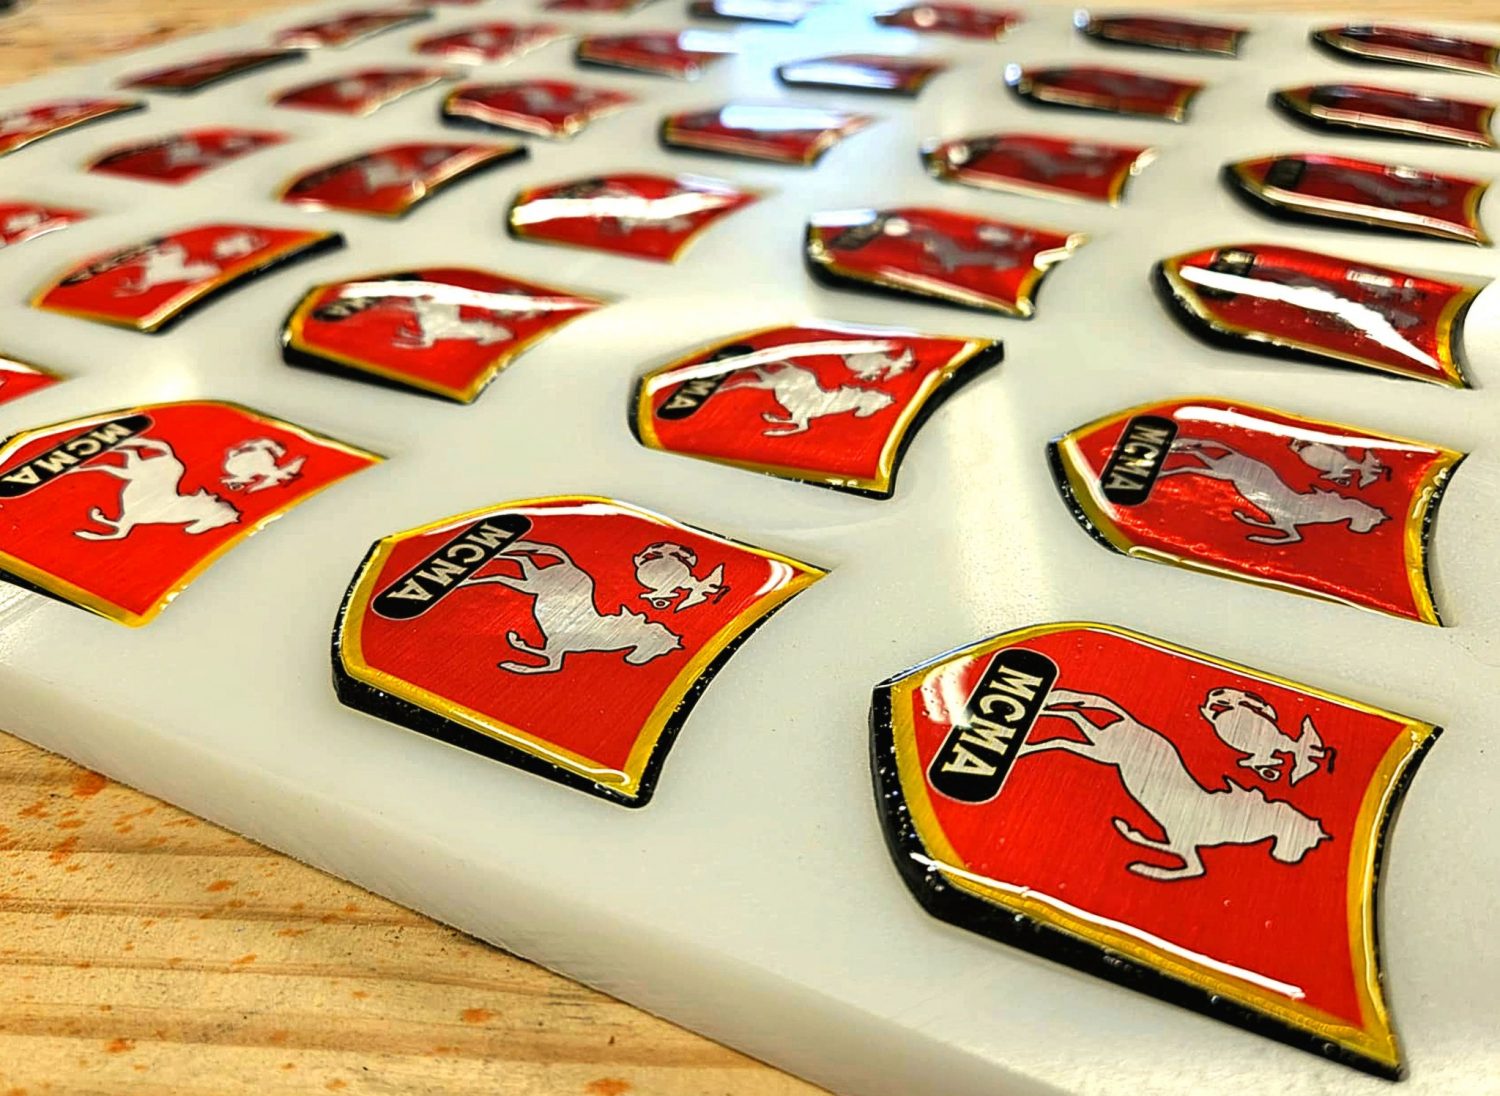
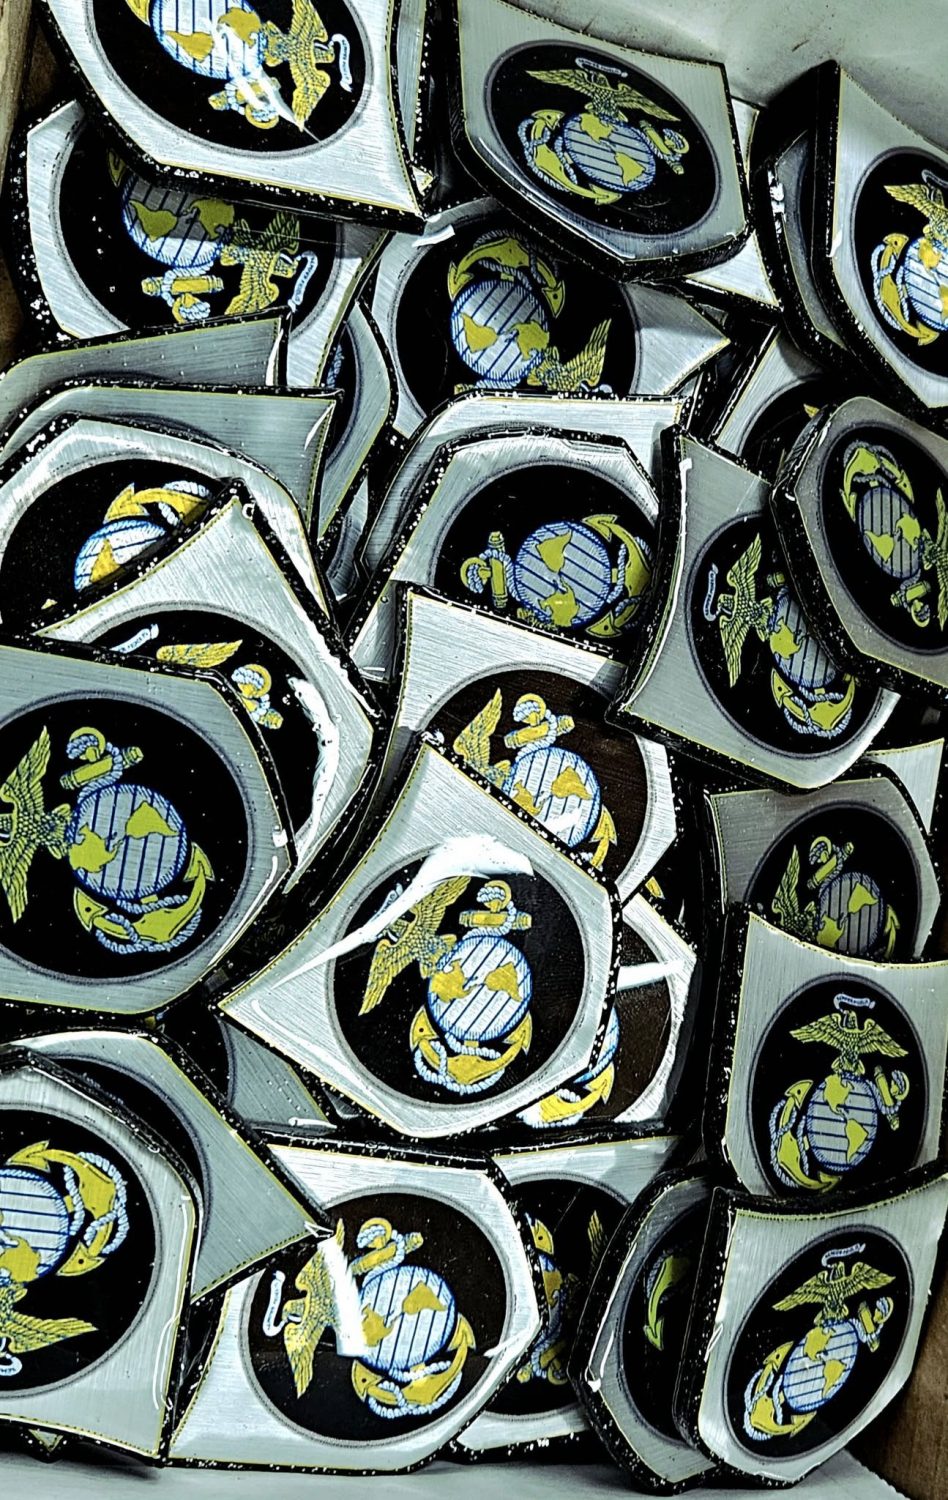
Medallions and Badges are not an invention of DWC-Shop210Craftworks, but the way we do them may very well be. It starts with a particular selection of acrylic in sheet form, and then application of graphics- often layering both the acrylic and the graphics for maximum visual impact, then application of strong shape fitting adhesives to the back- and finally, encapsulating them in resin.
The result is a visually stunning piece that is a far FAaaaAR cry from a simple decal/sticker, and which will last no less than a hundred times as long as a decal/sticker.
I can turn your project around in hours, often, as opposed to weeks. I can have a prototype in your hand as fast as it can be delivered, and I can fill orders of 500 in a short as one week from order.
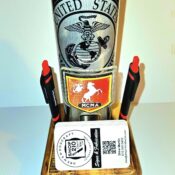
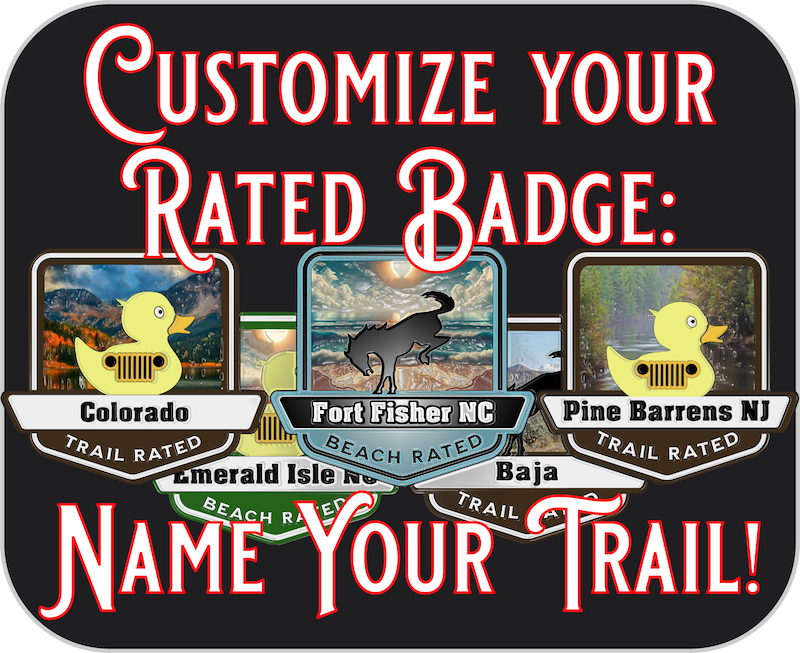
Trail Rated Medallion CUSTOM
But… there is more than that. There is a respect and regard for the little guys here, because we are ‘little guys’ too. We want to make this available for people who are pulling themselves up by their bootstraps- which I know all so well the nerve and the tenaciousness required to even think about launching something much less “doing”. So how can we make this happen?
There are several folks within the fold, currently, and little reason for you to hesitate if you’d like to join. It’s a simple affiliate program I offer. What it means to you is zero investment of cash and little investment of time- you provide the graphics that suits your needs/requirements, and I will make a medallion/badge from them. You list them on your page or through links the mechanism on the Affiliates Account page. When they sell, and they WILL sell, you get 12% commission. And I hesitate to be one of those guys who says ‘trust me’, yet I will offer with confidence after the first medallion/badge is out in the wilds and seen by others, there will be tons of sales.
This is something I do here at the shop that brings me great pride- it’s people helping people and pursuing our dreams in a way that benefits all involved. I offer a service and a product and sell it at an extremely reasonable price, and you get what you need to support your organization and reach more people. It’s a double win.
… And then there is the wholesale aspect, where there is room for you to make a substantial margin off of this product and by ordering in bulk. Another win – another partnership – and all are satisfied with the arrangement.
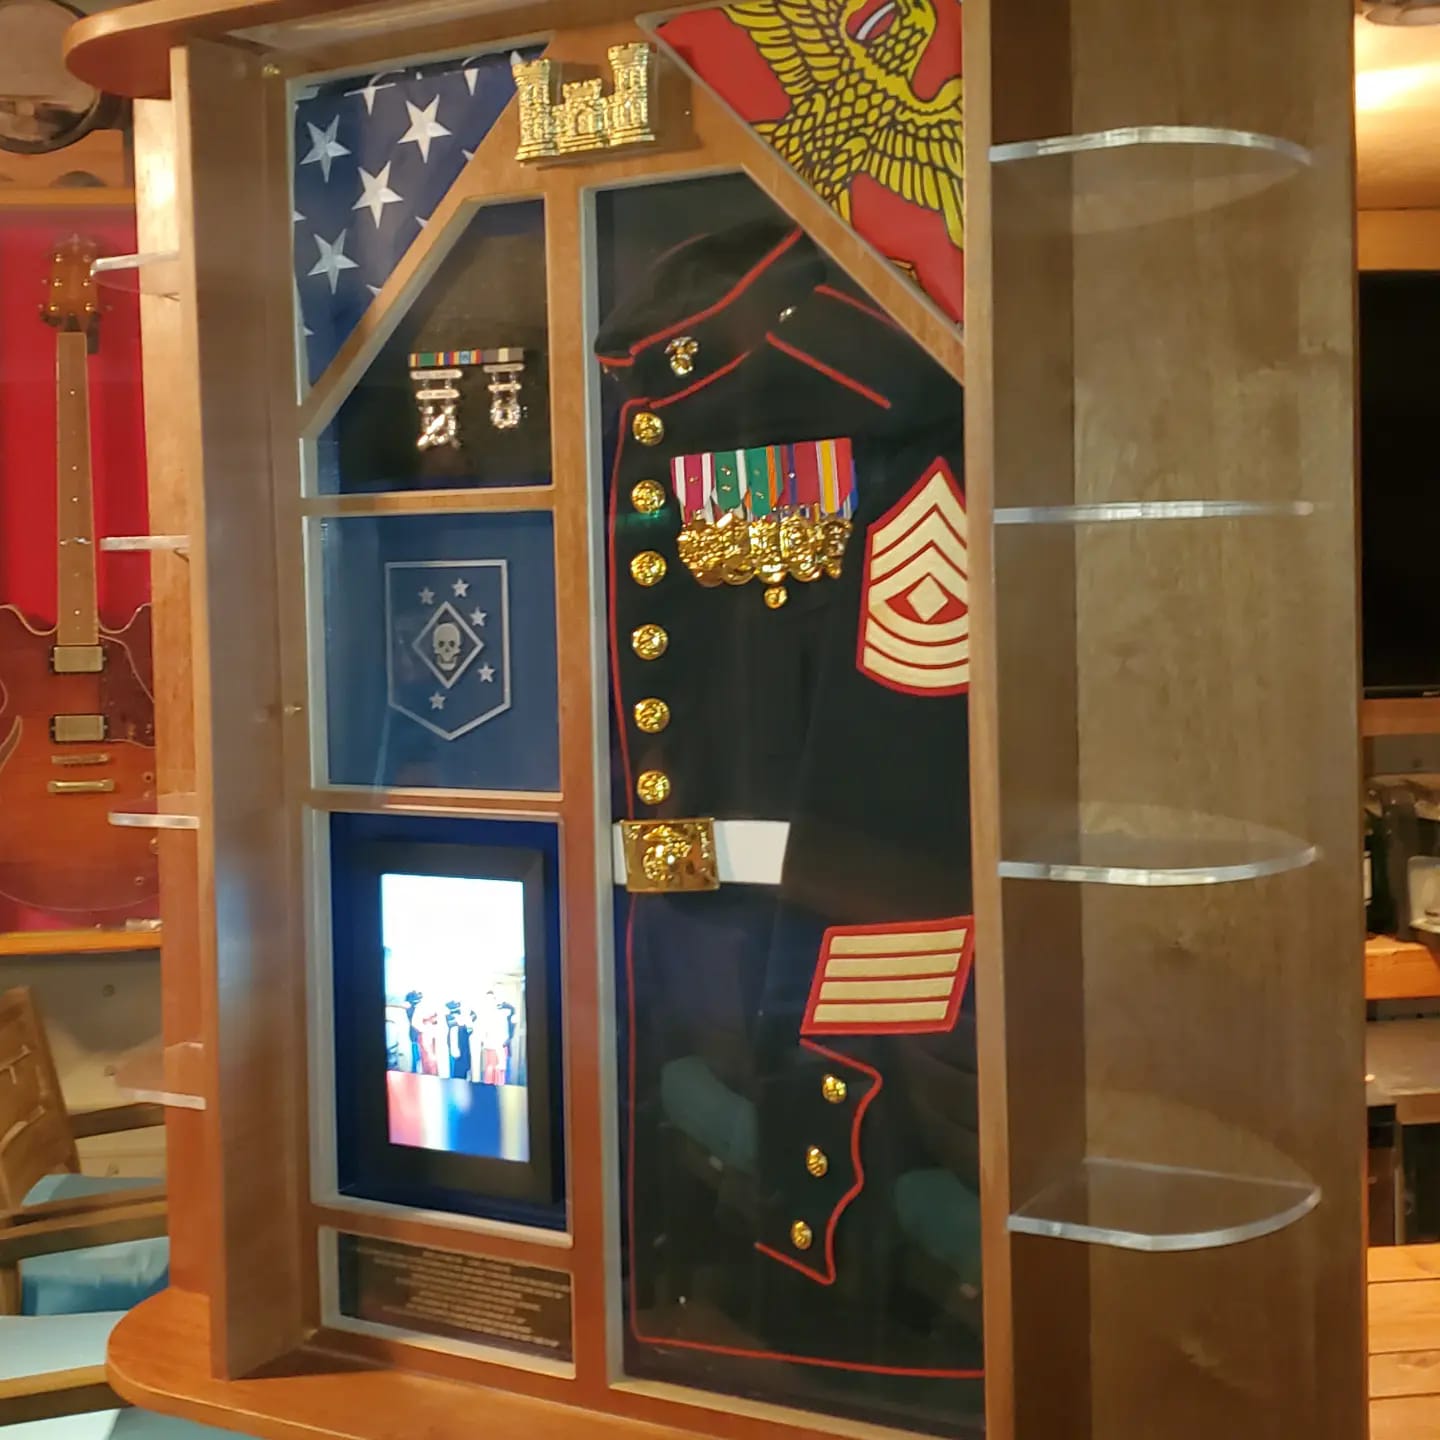
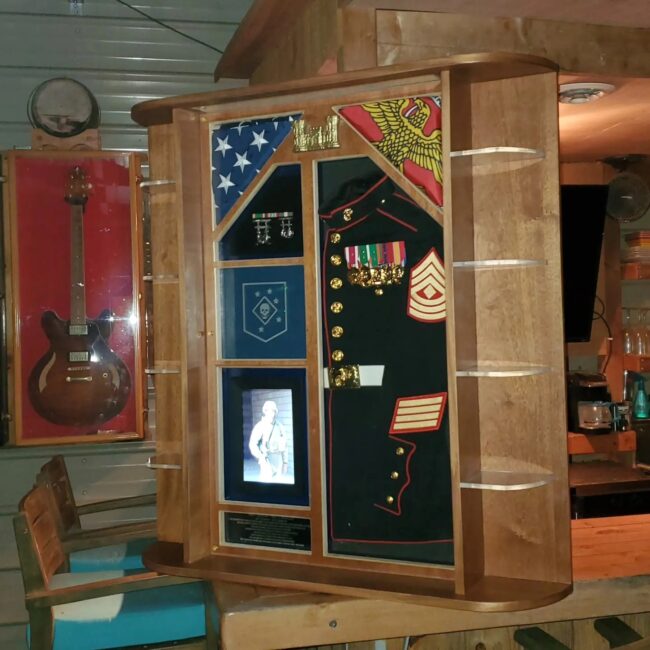
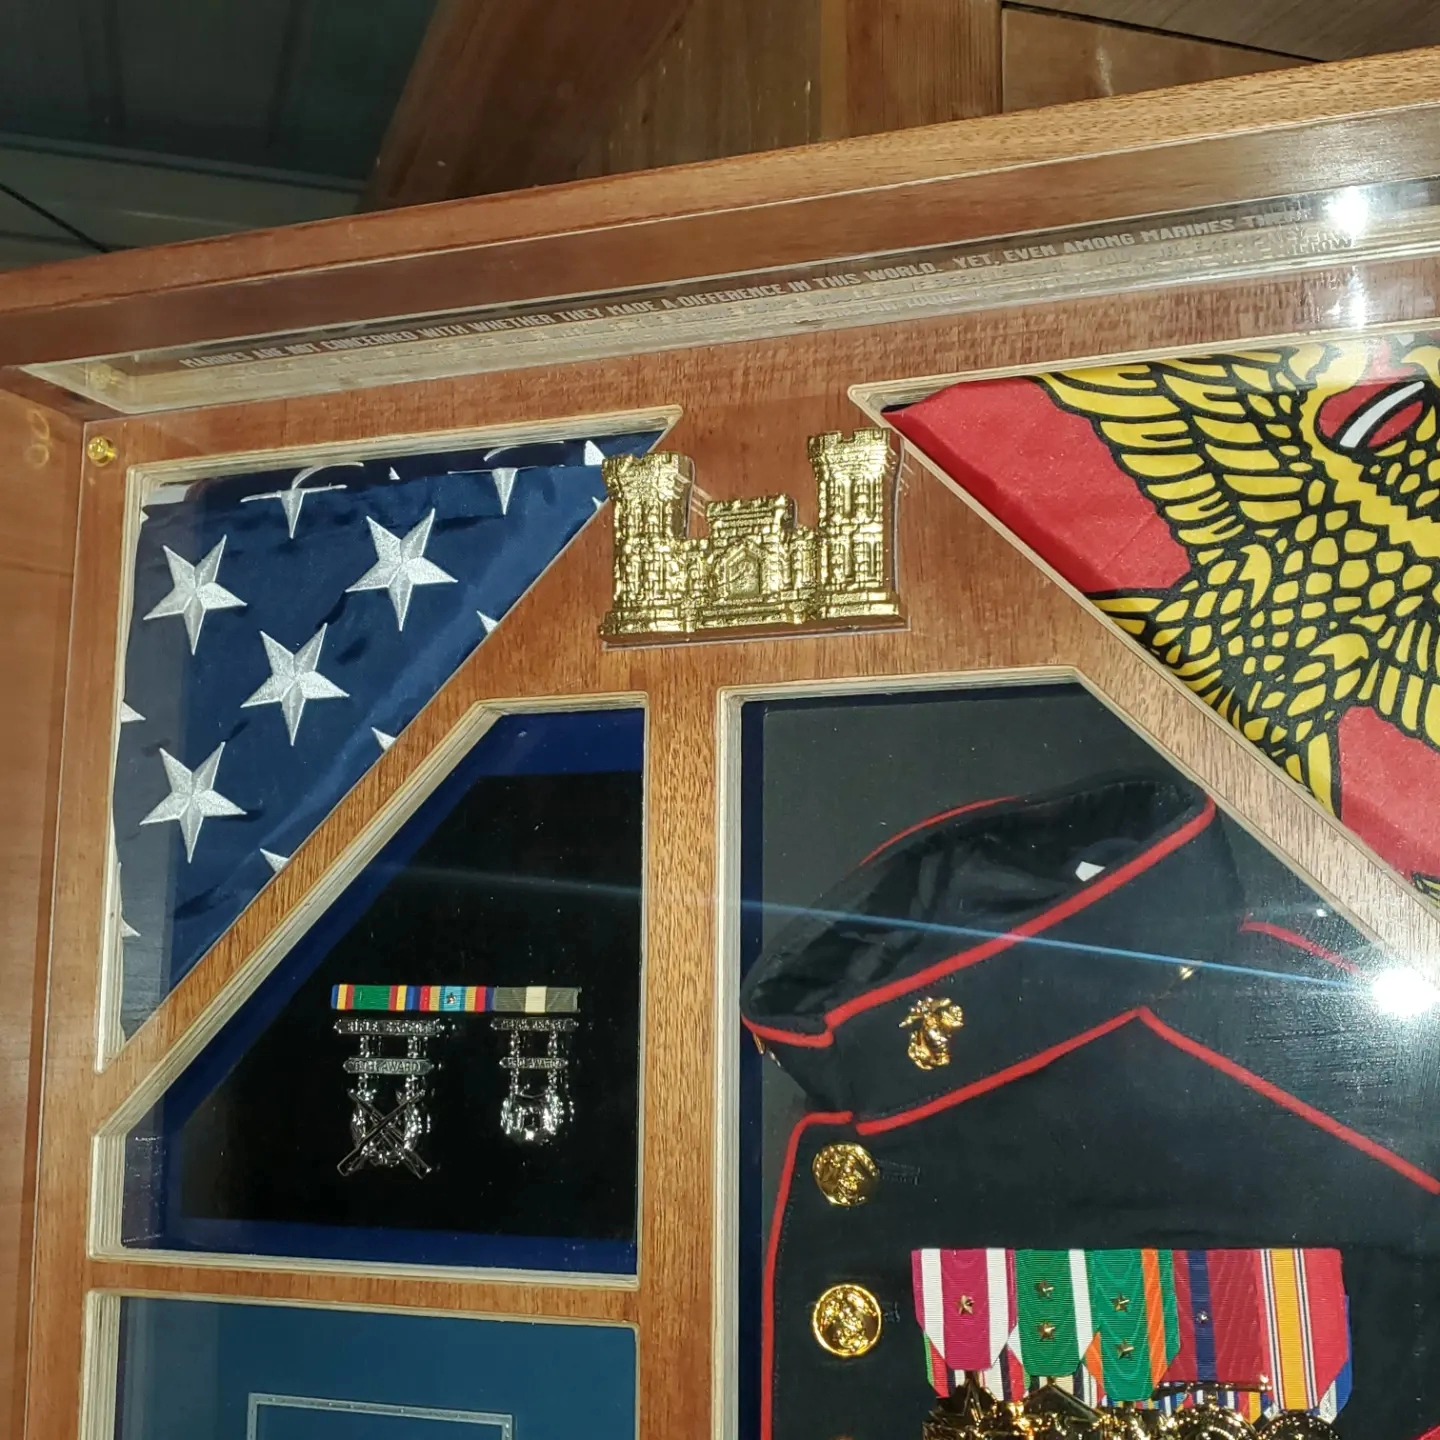
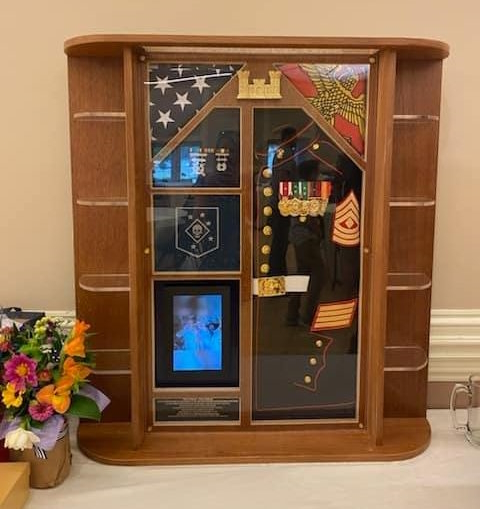
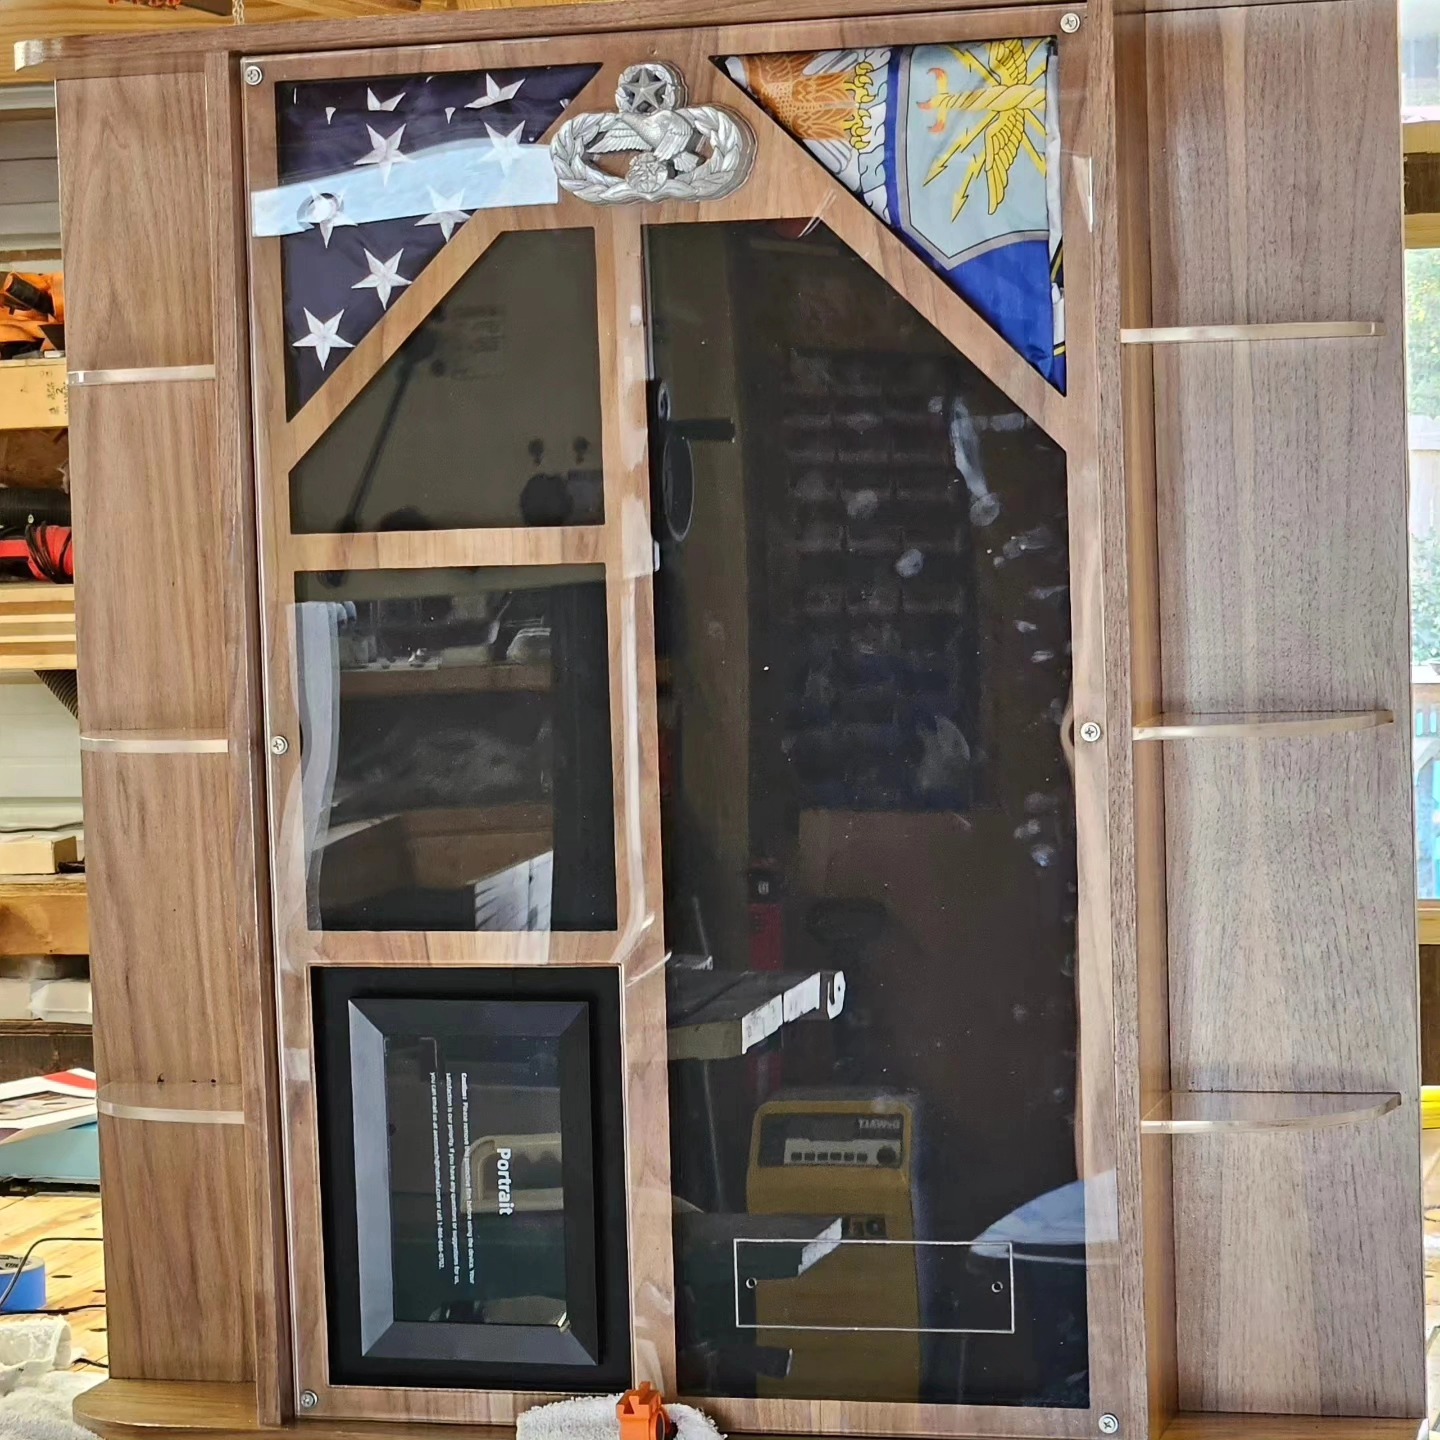
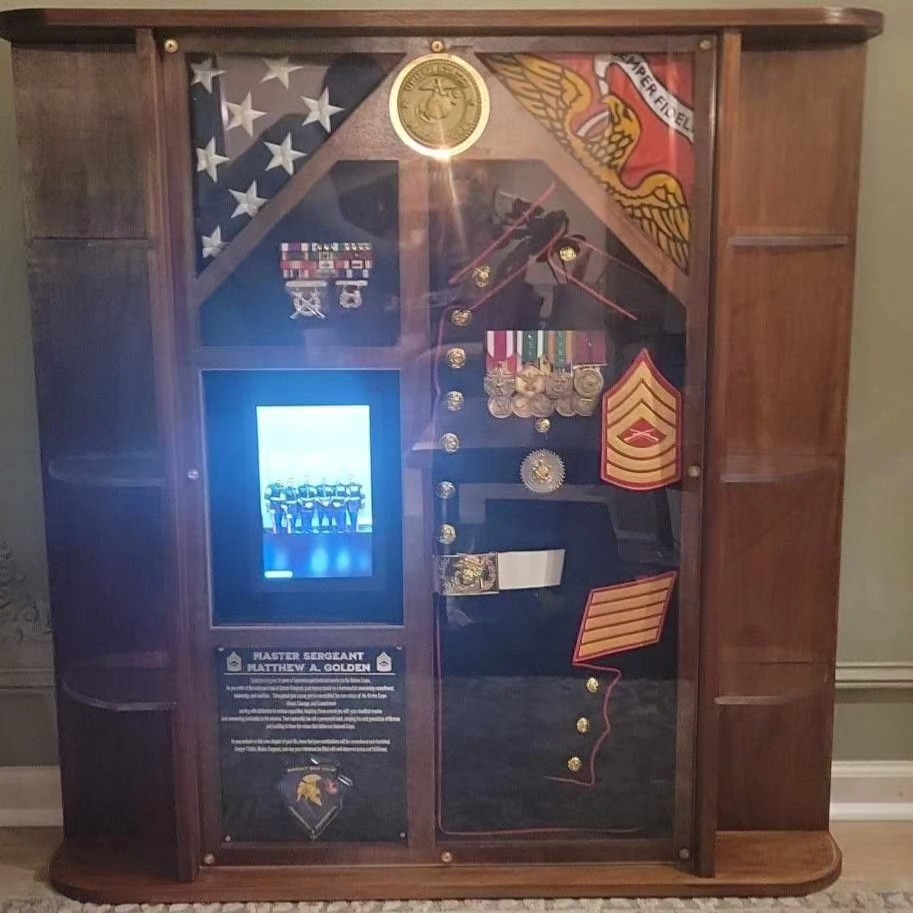
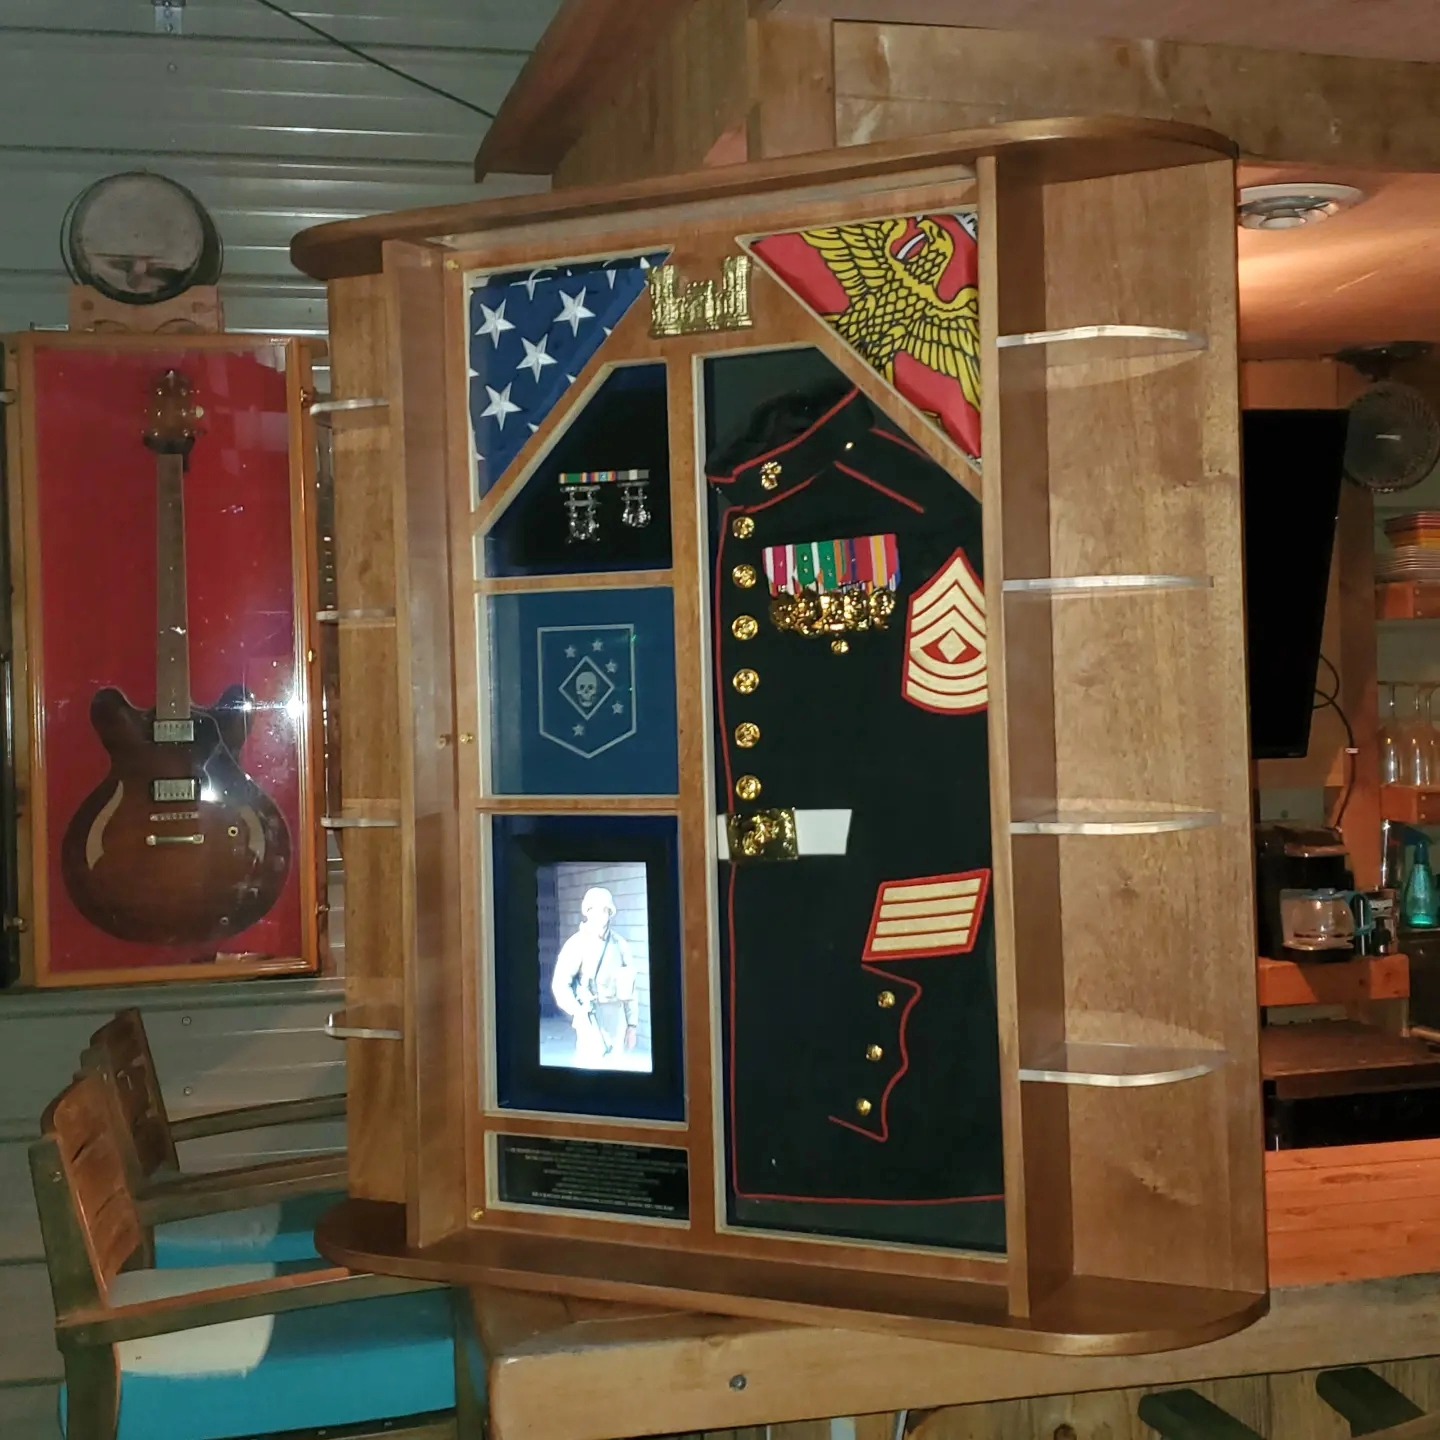
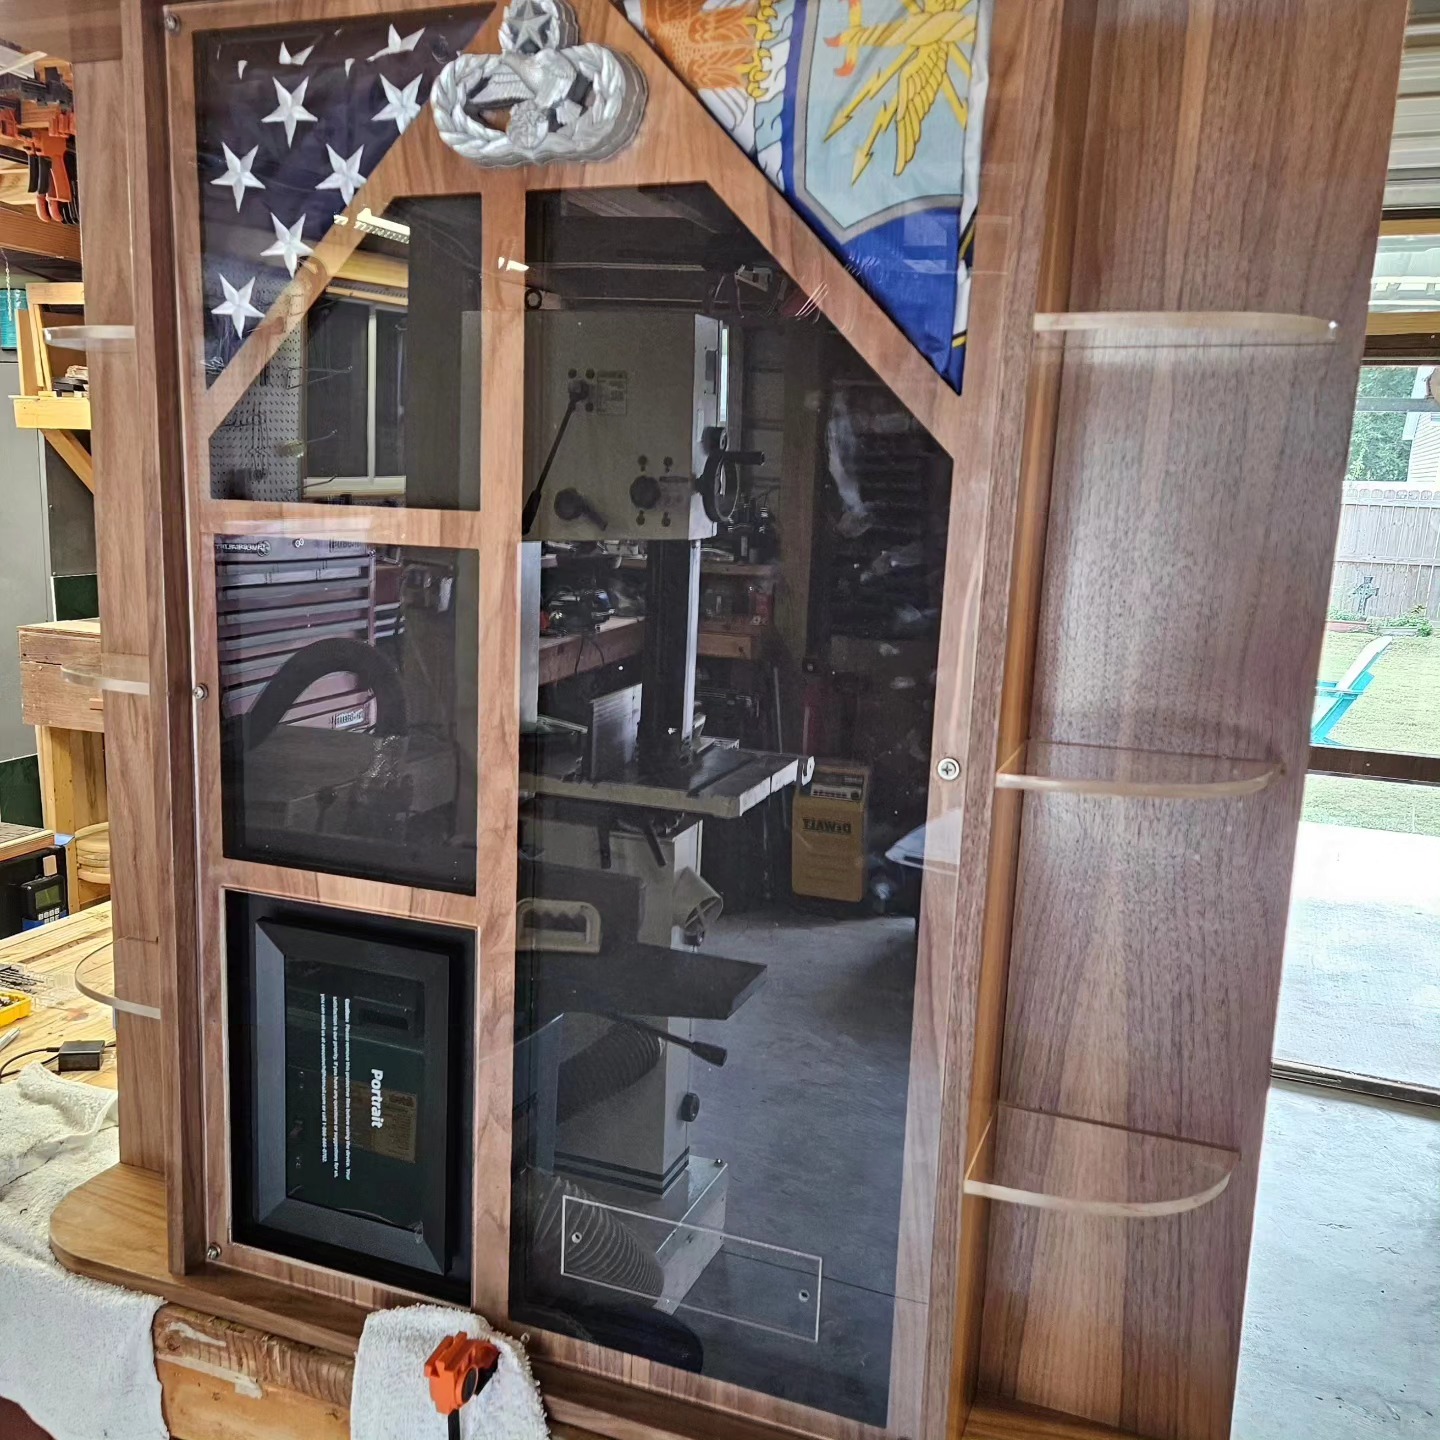
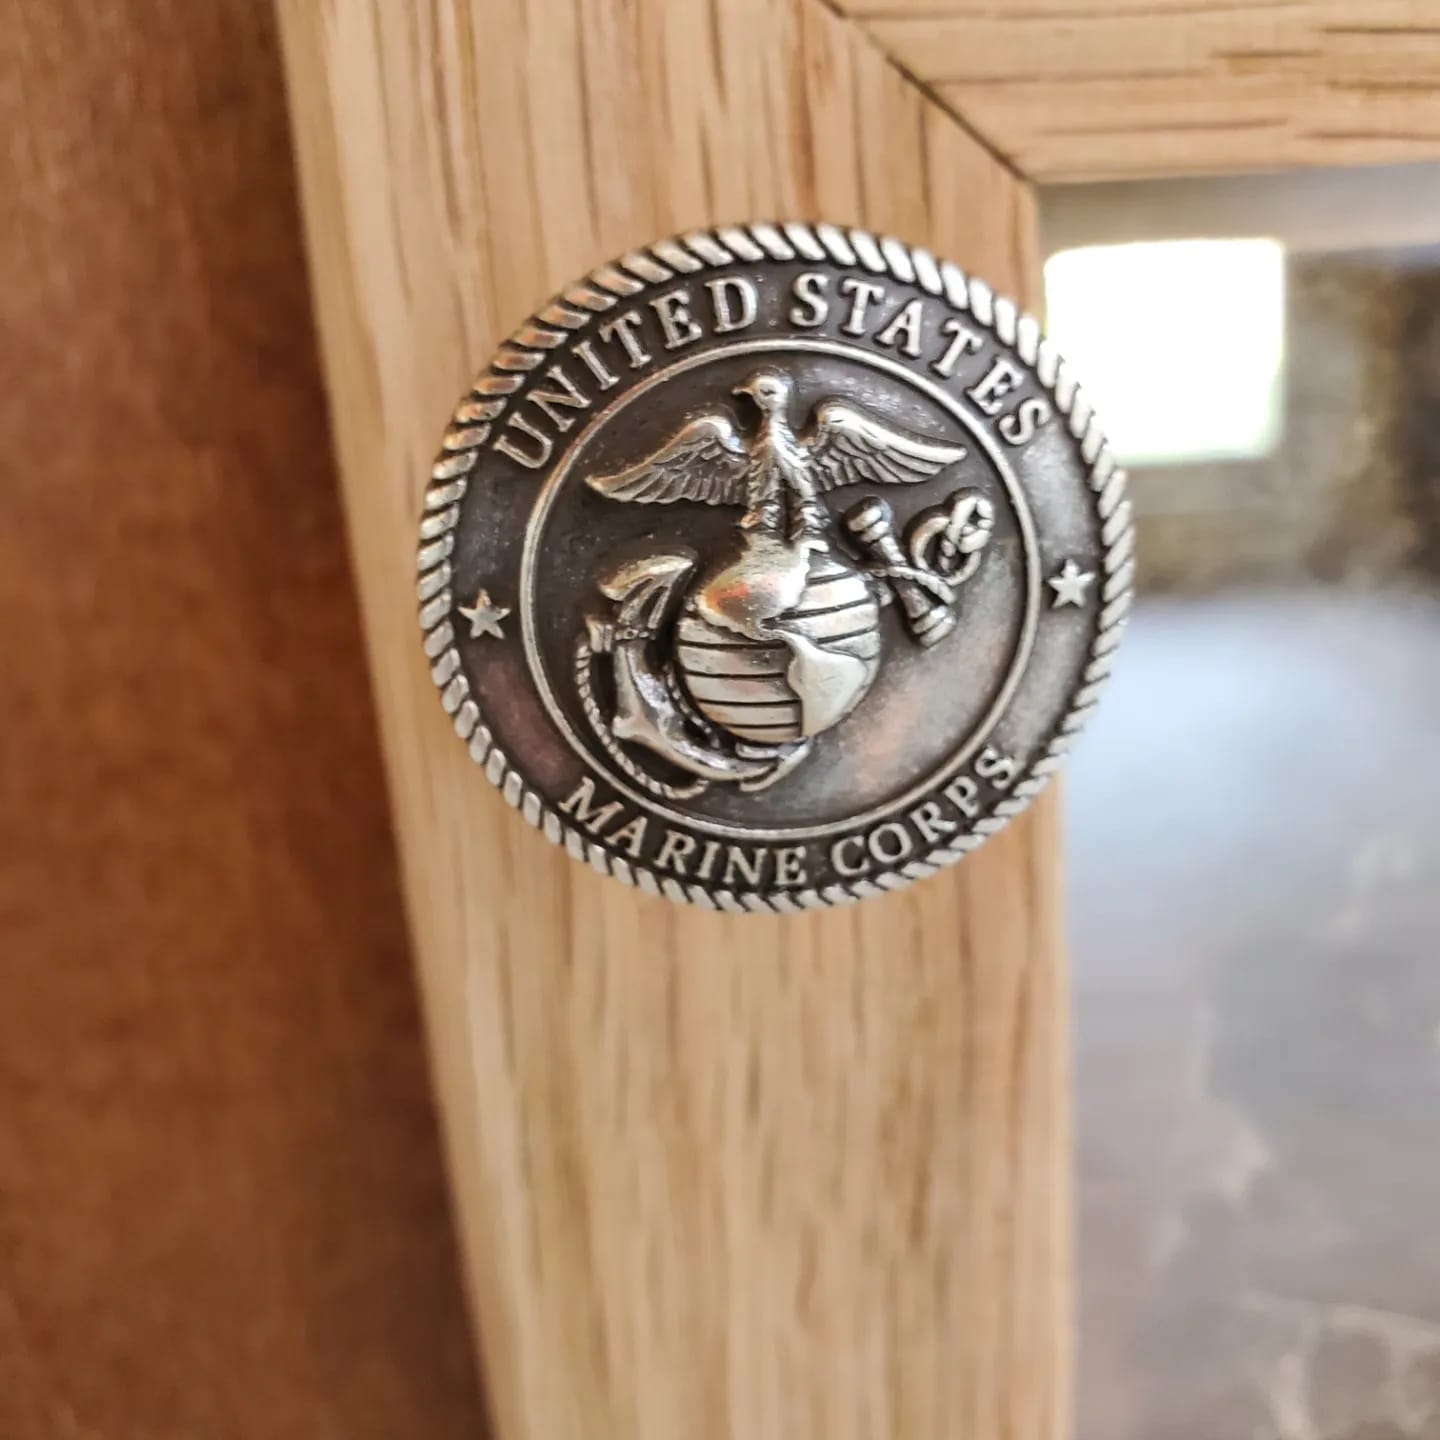
It’s a curious thing to me… A person spends 20+ years in the military, sacrificing, serving, often raising a family while absent a lot of the time, providing for their family, often breaking themselves physically and mentally, and people – even those close to them – skimp out on likely the only presentation piece the servicemember will allow – their shadow box.
Don’t get me wrong… There are a lot of guys making shadow boxes that have meaning – friends doing it for friends or family making them. Those have meaning that even mine can’t approximate, and if someone wants to do this I’ll support them as best I can by offering tips, tricks, material lists – and even plans. However, for those that just buy the shadow box, that is kinda a shot across the retiring servicemember’s bow.
(note: I DO offer ‘kits’ allowing folks all they’ll need to make a box duplicate to any of mine, which allows them to take part much like making one from scratch and with the same meaning.)
anyway….
A few things to know about my Shadow Boxes:
They are made with the finest quality material found.
They DO NOT require butchering a uniform; It fits into the case and could, conceivably, be removed and worn.
They are not toys – they are museum quality and I can say that NOT as hyperbole, as there is at least one of mine found in that very setting, as well as in offices of some names you’d recognize.
No, they are not monetarily ‘cheap’, but I offer them as inexpensively as I can.
These are HEIRLOOM quality pieces – they’re generational – grandkids can show their grandkids of their great great grandfathers exploits, and live on.
These are something I take great pride in making, and because I want the recipient to be just as proud of them as I am.
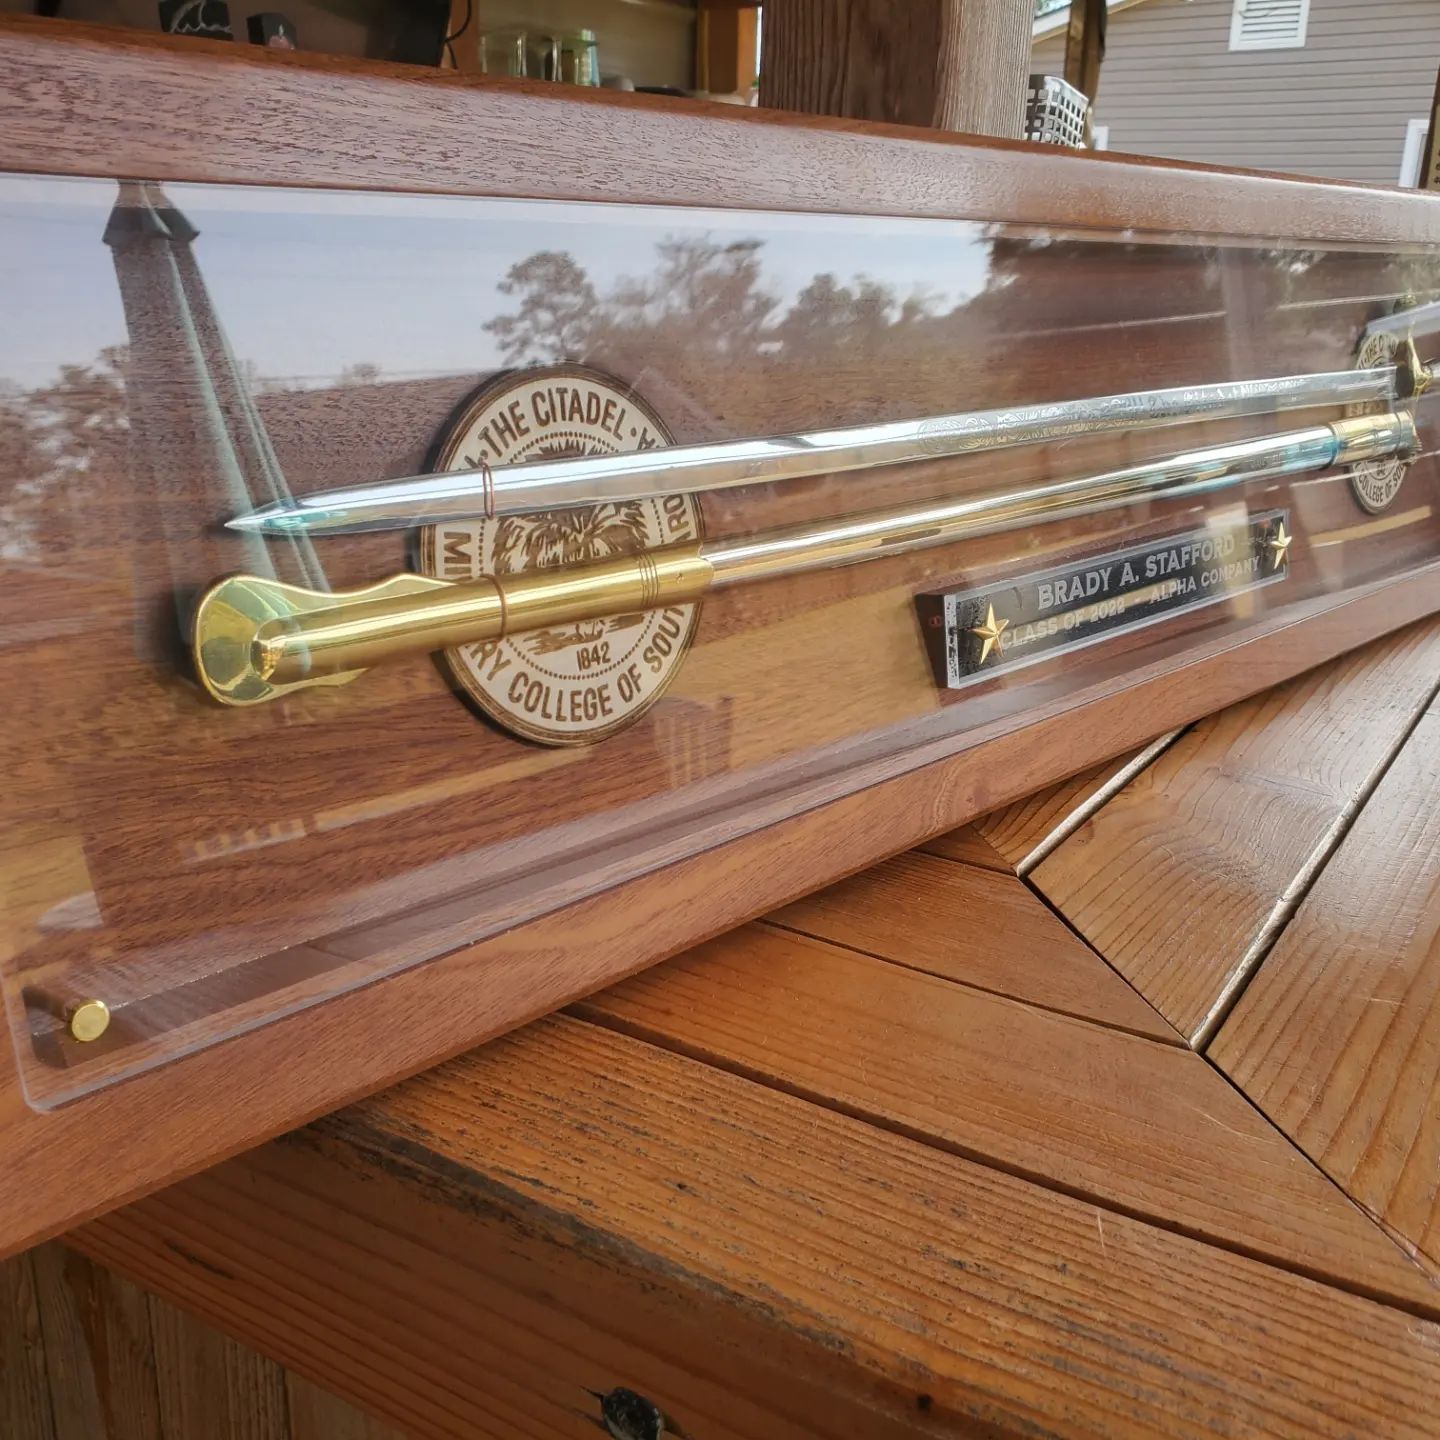
Each Shadow Box is built for the recipient using similar framework. For instance, each medallion (top center adornment) is different and usually representative of the recipients most memorable, favorite, or most memory provocative duty station.
Each is made to size- A uniform coat will never be ‘crammed’ in or have lots of empty space around it. It’s built around the build, so to speak.
If you’re in need of a shadow box of the quality I make them, please drop me a line. The only way anyone is going to know this is if they have read this far, and that is: My prices aren’t as steep as shown here. The prices are shown in that manner to stiff arm anyone who isn’t serious about what they’re doing. The only time one has reached that price is when it had to be shipped halfway across the country, and believe me when I say “the shipper made more than I did”.
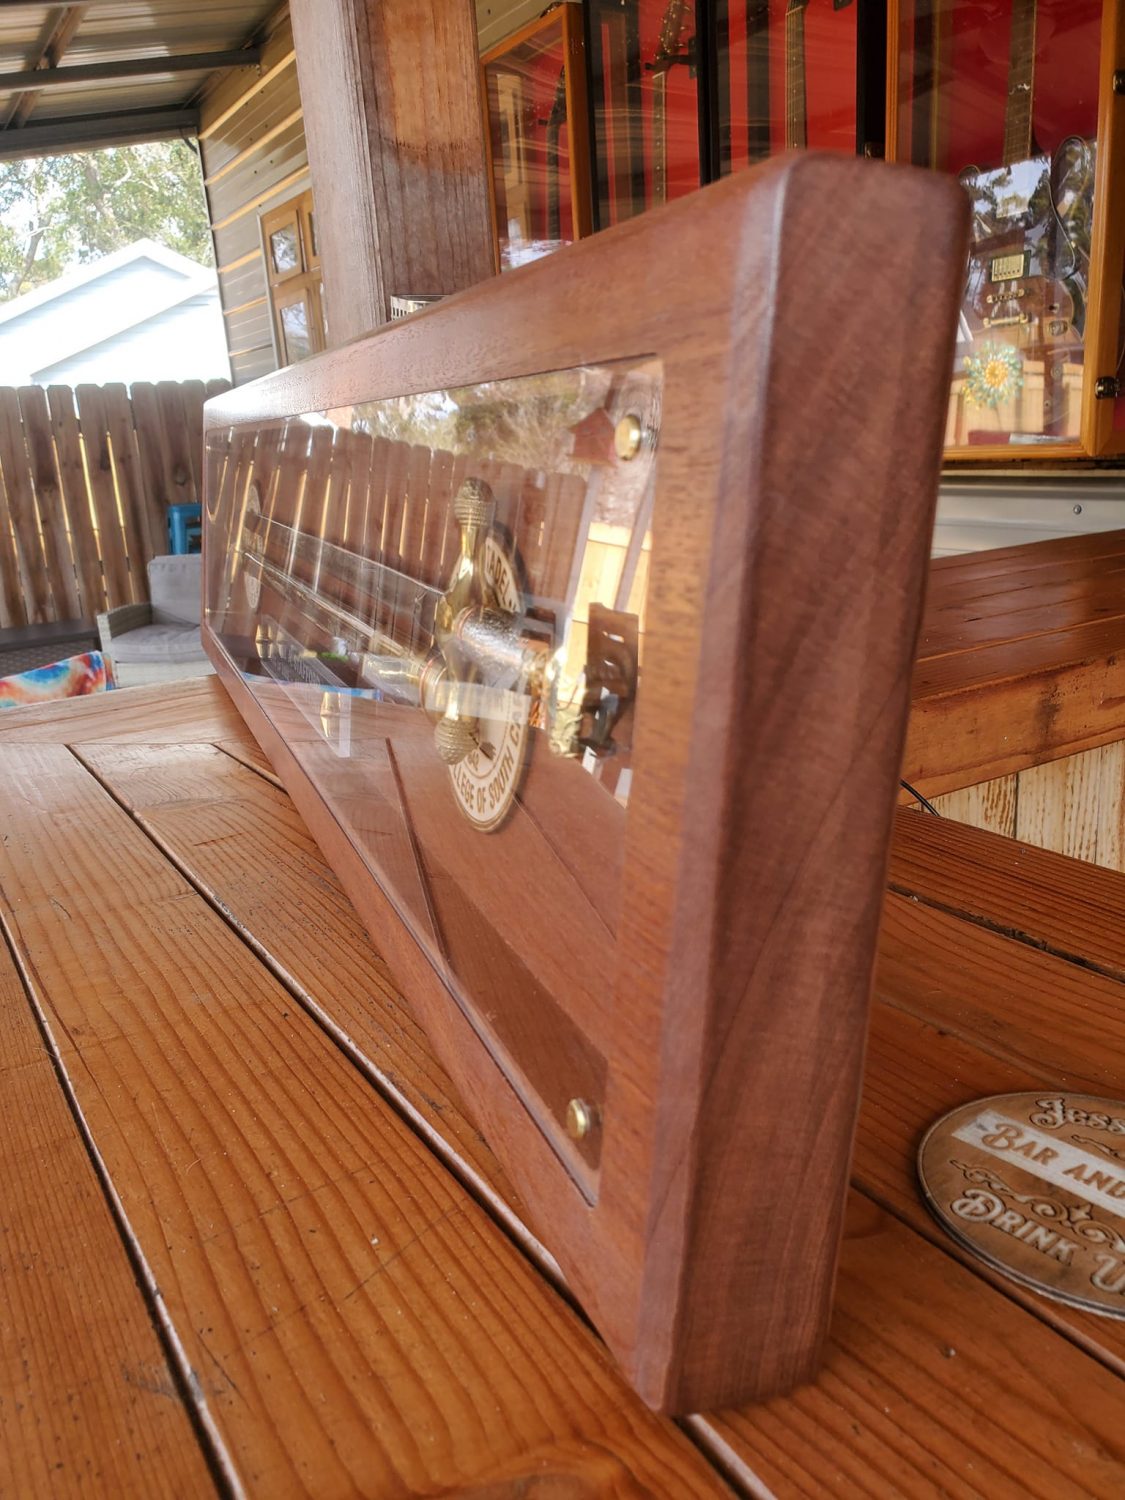
Oh, that^ brings me to this: These are substantial pieces. They weigh in well over a hundred pounds. They ‘can’ be set on a table and remain stable, but they’re generally hung- and for that you’re going to need to secure it to a wall stud (or two). I make and have sent several out the door with bolts, and have sent several out the door with french cleats- which basically entails attaching a hanger to the wall (a small board) which has a 45 degree cut down its length with the shorter side of the 45 toward the wall, and a matching cleat on the back of the shadow box which carries the weight of the box with ease.
The height and width are both over 40 inches, most often 46″ wide by 42″ tall, or somewhere close to that… The overall dimensions are based on the size of the uniform coat that’s usually hanging in them. We want it to look as it is- custom made to fit. Generally, there is at least two inches behind the lens in the smaller more shallow compartments, and up to 5 inches for the deeper ones. The shelves on the side are functional- carrying substantial weight if needed, and extra/added space for memorabilia.
The LED picture frame is a modern touch and brought on by a client who couldn’t decide who’s picture rated passage into his shadow box and who’s didn’t – and he didn’t want to offend any of his battle buddies… So… We figured it out by using a wifi 11″ picture frame which allows him something like 2k pictures to rotate through. I liked it so much I offer them on all of these and it’s more rare I don’t send them out with one that it is with them.
If you have want or need for one of my Shadow boxes, please drop me a line. We’ll make it happen!
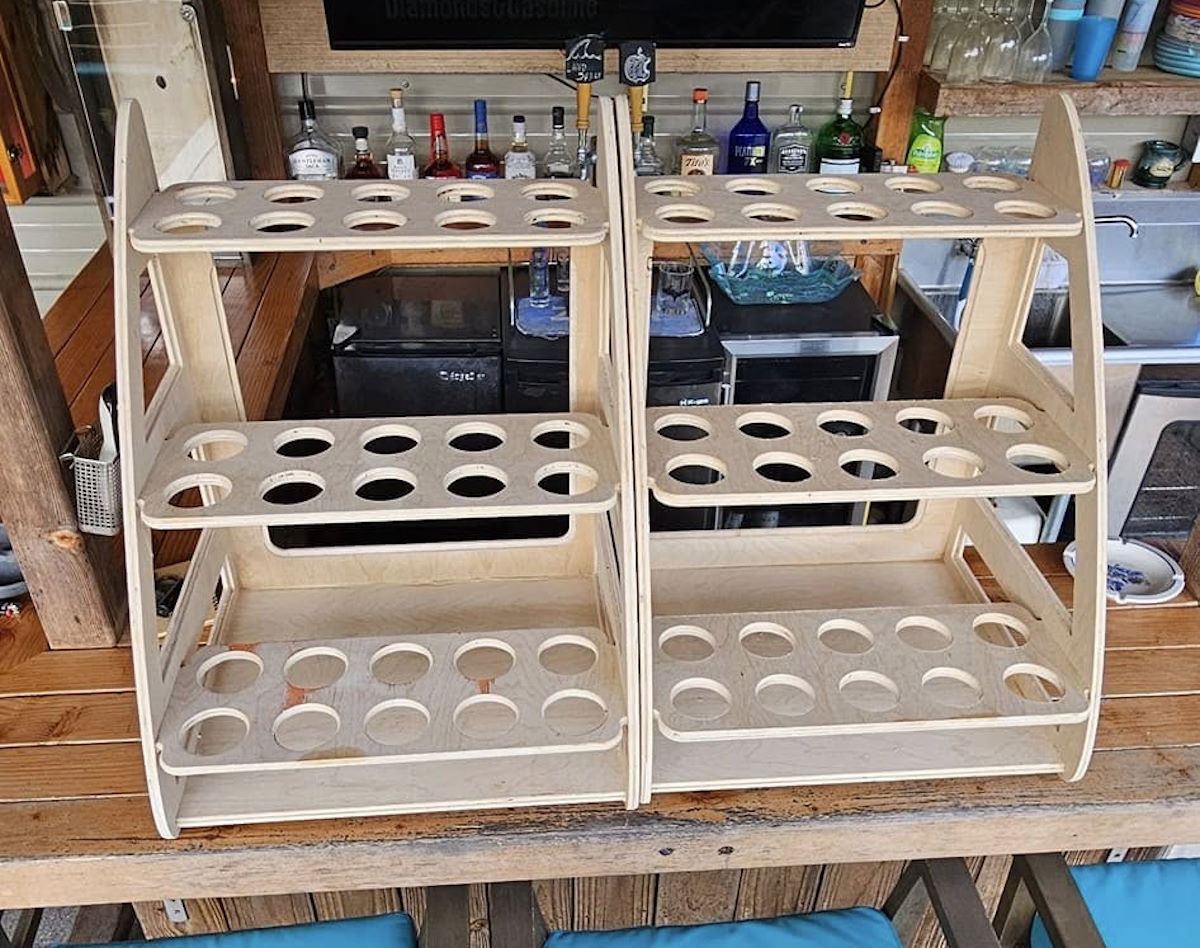
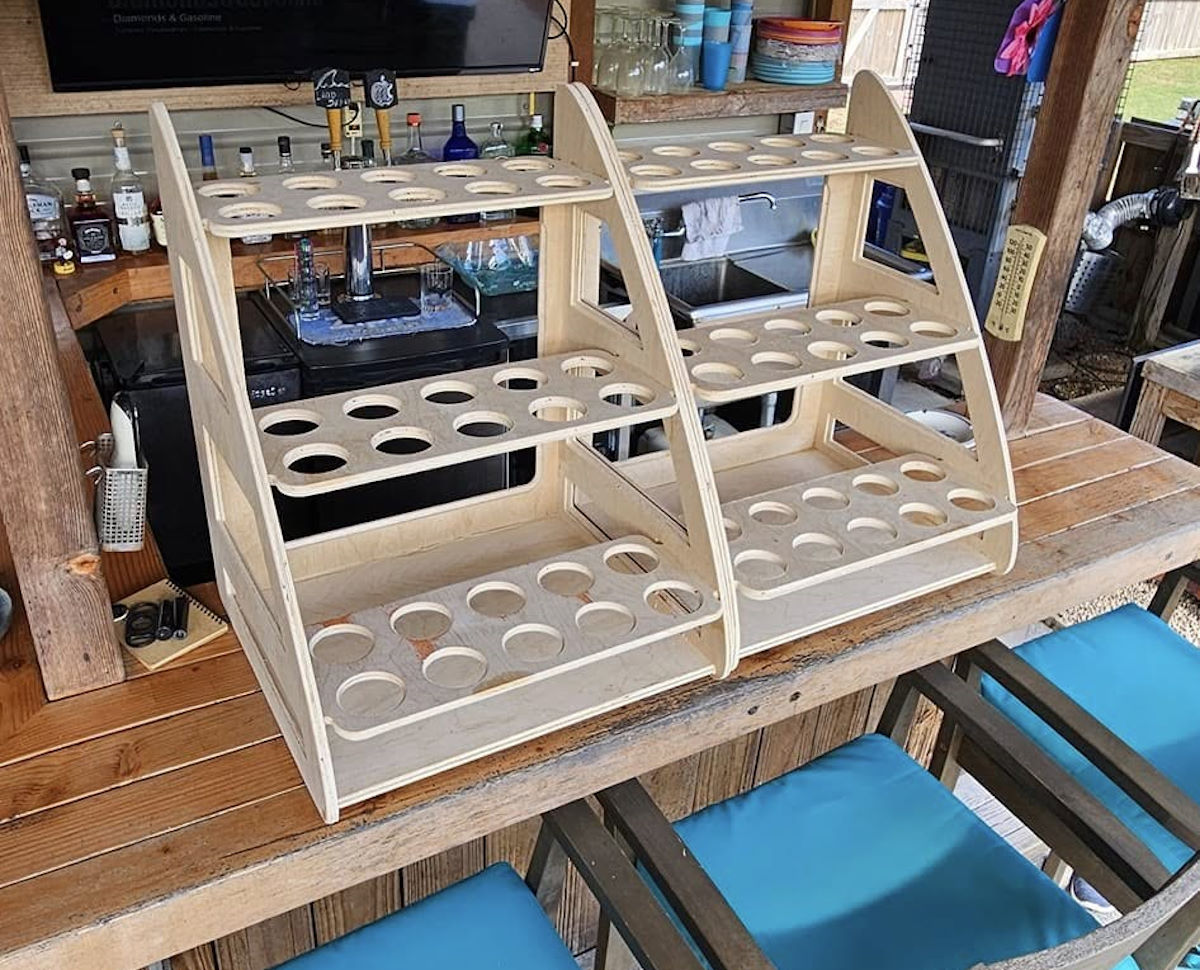
Charcuterie cups are a thing, I’m told. I wouldn’t know for sure. I’m in the shop too much to have a clue what people are doing. The lady who needed this is a smart lady – she has business sense for days and weeks, and something I’m supremely jealous of her for. 🙂
She needed a couple items, and I thought it may be worth sharing if only to demonstrate the shops capabilities.
First up is a charcuteries cup stand. charcuterie on kabobs, and using a cup to hold them allows for a great thing to serve where seating isn’t abundant. This was made with effort to keep it simple and most important portable. She can use it, then pop it apart for transport- and then reuse it whenever it’s needed. Like I said – she’s smart. She also painted them and will repaint them to suit the themes it finds itself. Did I tell you she was smart?
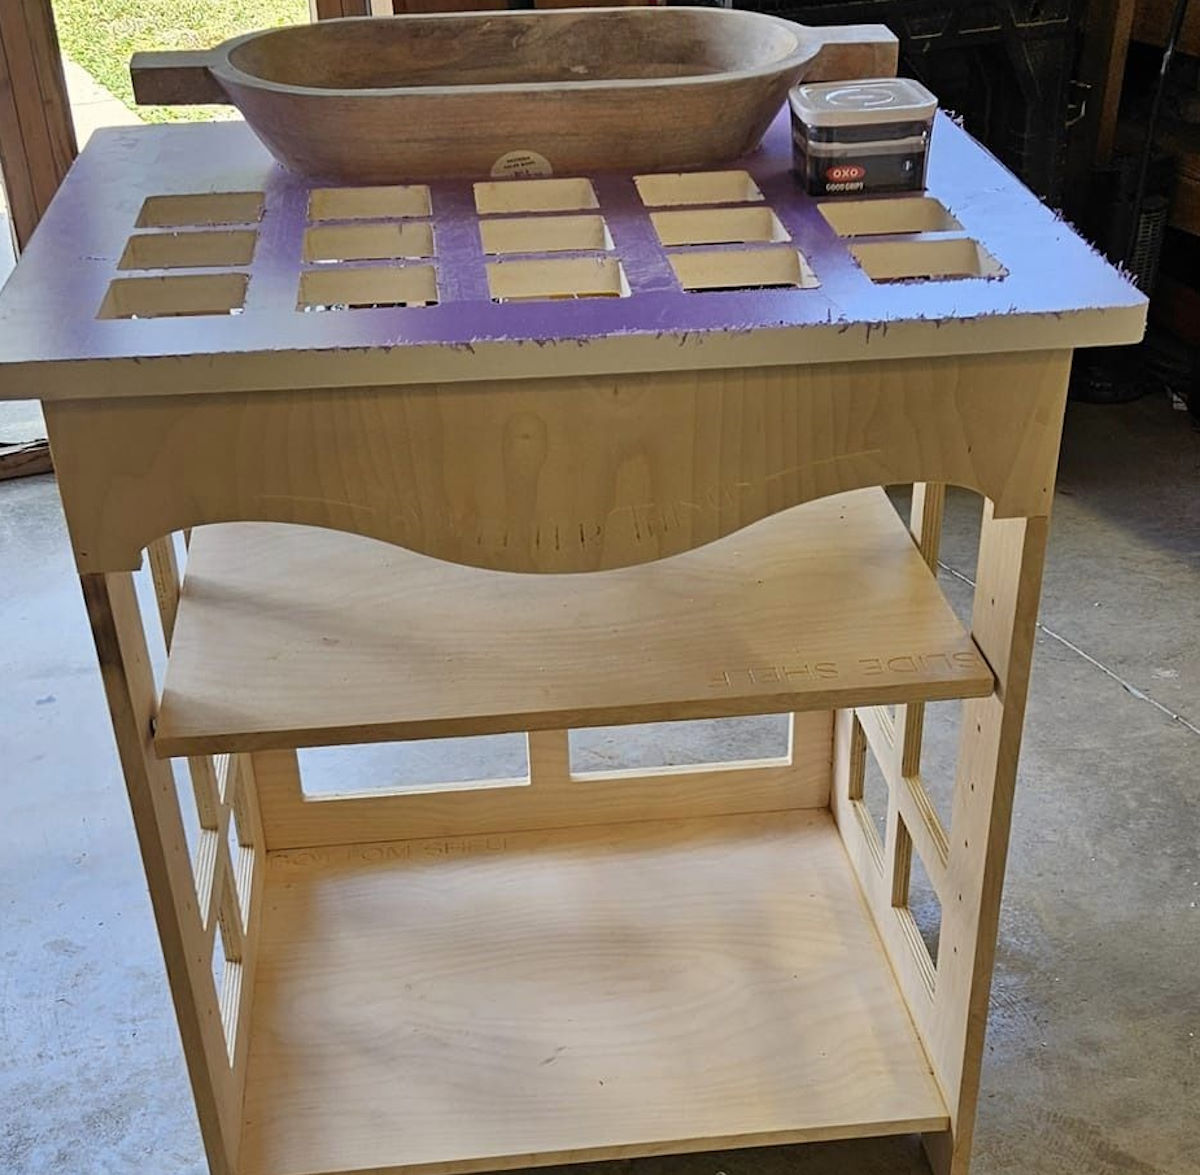
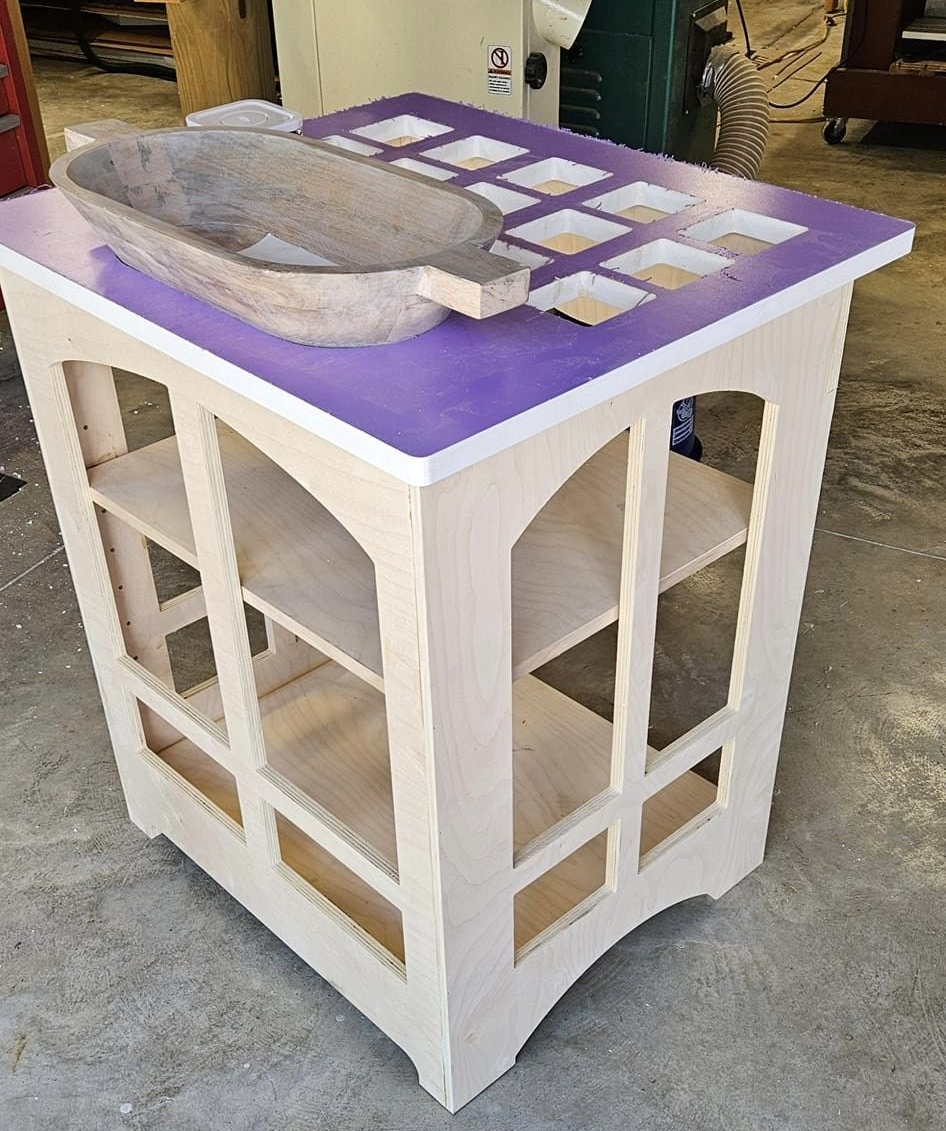
Next up is a self serve topping station. The need for this was to allow vacuum capped containers she already had to fit into it without passing through. The containers are/were slightly tapered which made it easier, but I hedged my bet by adding my own taper within the cuts. They rest snuggly and securely, and require some effort to remove- which is just what she needed. She also needed the basin to hold the base item, or that which would be adorned with the selection within the vacuum containers.
I laid it out on the cnc and cut it right out, taking no time and providing precision cuts that fit just right. The surface is an inch thick synthetic material which has a channel cut into its underside which the sides slip about half an inch into- making it silly strong and durable.
She also painted this to suit, and will continue to repaint it as needed. It is just as easy to store as the charcuterie cup racks. … a big win.
…notice the adjustable shelf and pins – an added little touch that gives plenty of storage area for items needed to support this thing out in the wilds.
If you need a retail fixture such as either these charcuterie cup racks or a self serve topping station, just drop me a line. B2B is my lifeline and interest – we keep communities and small businesses rolling!
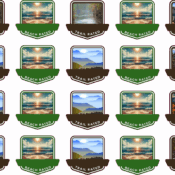
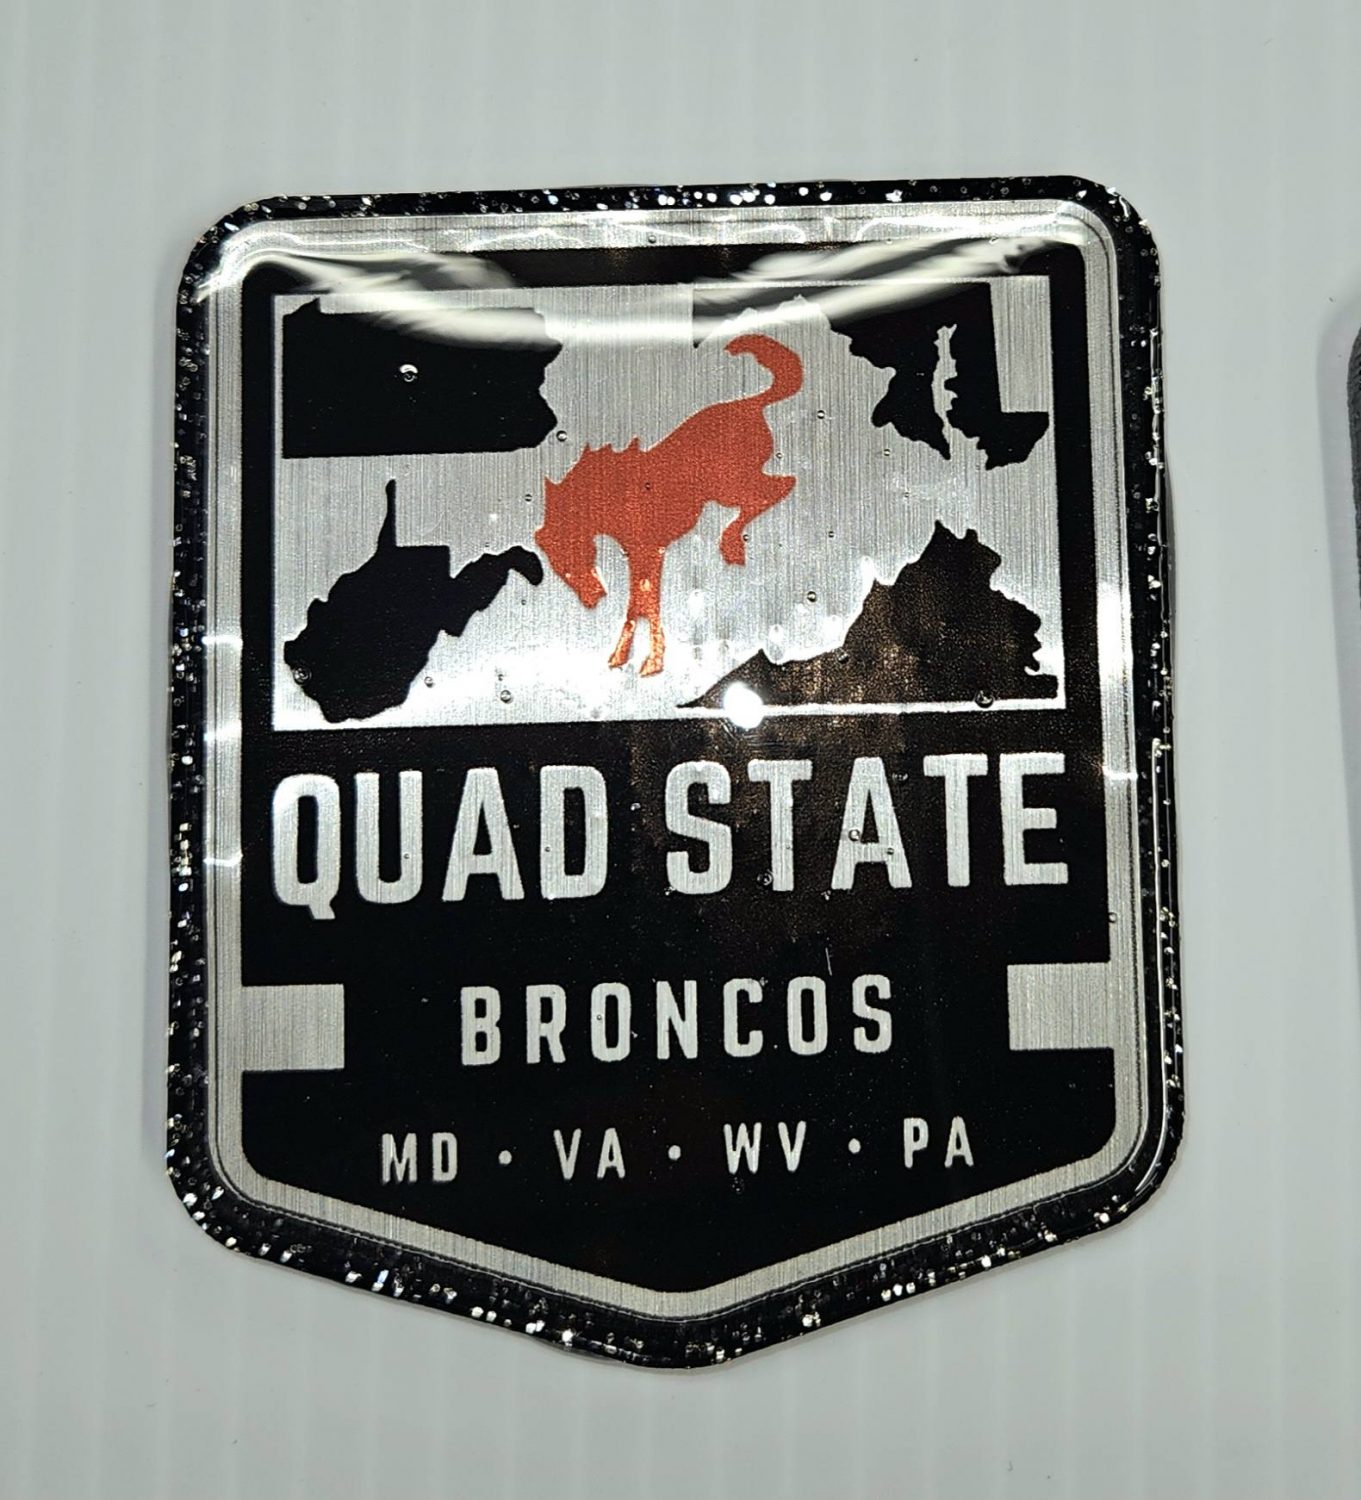
Who among you would have ever guessed these hands would be making such a thing? They’re beautiful in their simplicity and as detailed as you’d like. From a simple logo to fine details can be made, because they’re primarily printed.
The foundation is cast acrylic, though it be cast acrylic infused with steel chips. They are then carefully printed on thin vinyl coated brushed steel, and affixed to the acrylic – all by hand. After this process is complete, they are layered if that is what the design calls for, and then encapsulated in a resin which is UV resistant.
We’re now almost done. The last step is to affix adhesives to the back form cut to shape. It’s not ‘just’ an adhesive, either – it’s the real deal. The stuff auto makers use to attach badges; the stuff used to hold windows in frameless mounts that hang hundreds of feet above your head in high rises – good stuff, in other words. This feature makes them very useful for both the purpose of decoration – and also more. More on that in a few….
The final product will last years and years. As a for instance, if they’re affixed to a vehicle as they usually are either on the windows, a body panel, or a bumper, they’ll last as long as that vehicle. They won’t fade nor deteriorate, and they’re as easy to care for as simply washing your car.
Think a little outside the box, now, and a little further than simple decoration. These can be used as identifiers- for towns for things such as re-entry badges, or golf cart or boat ramp passes, or golf cart registration. They can be used by gated or controlled entry businesses, residences, or parking garages as registration, too. There are sensible car sales organizations that have ditched the cheap stickers and opted for these- they are a class above stickers.
There are a lot of other uses, too, yet all uses just want them to send a message. And, they do. It’s loud and clear while remaining refined.
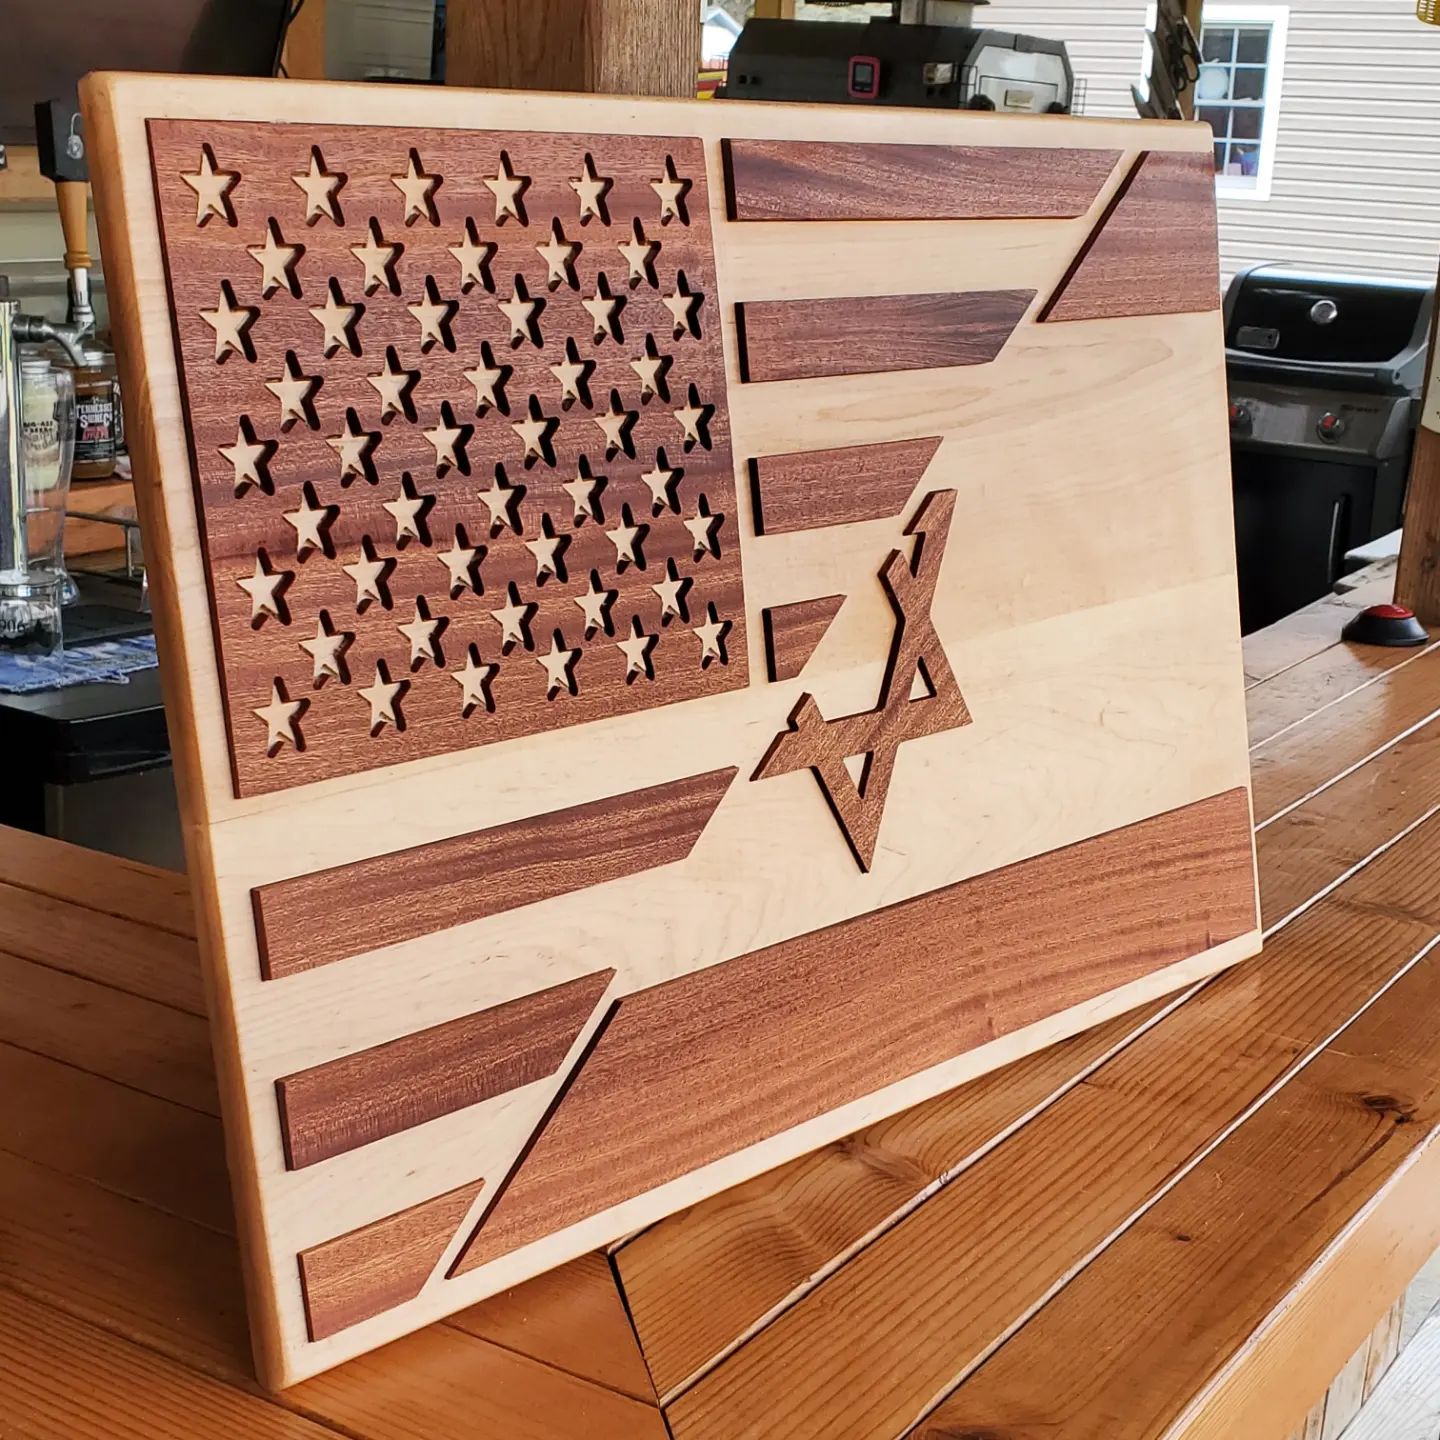
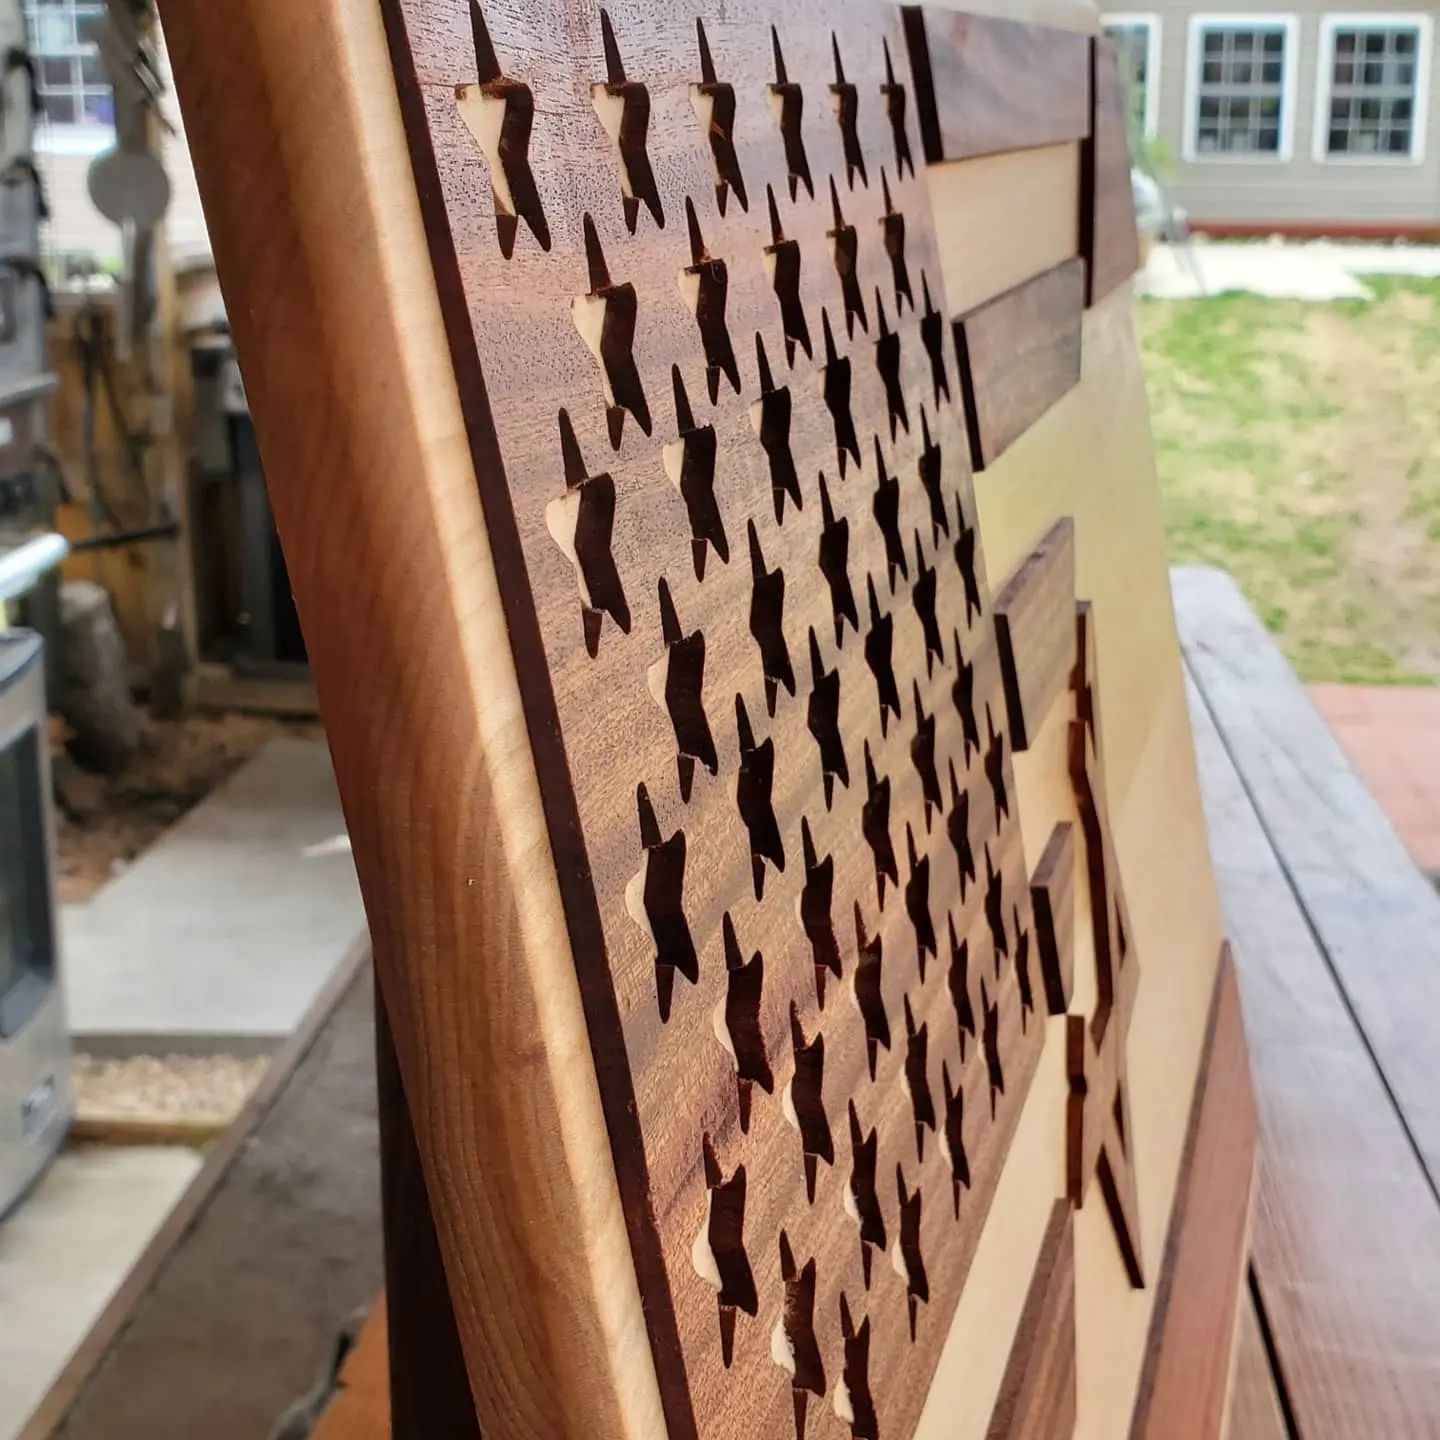
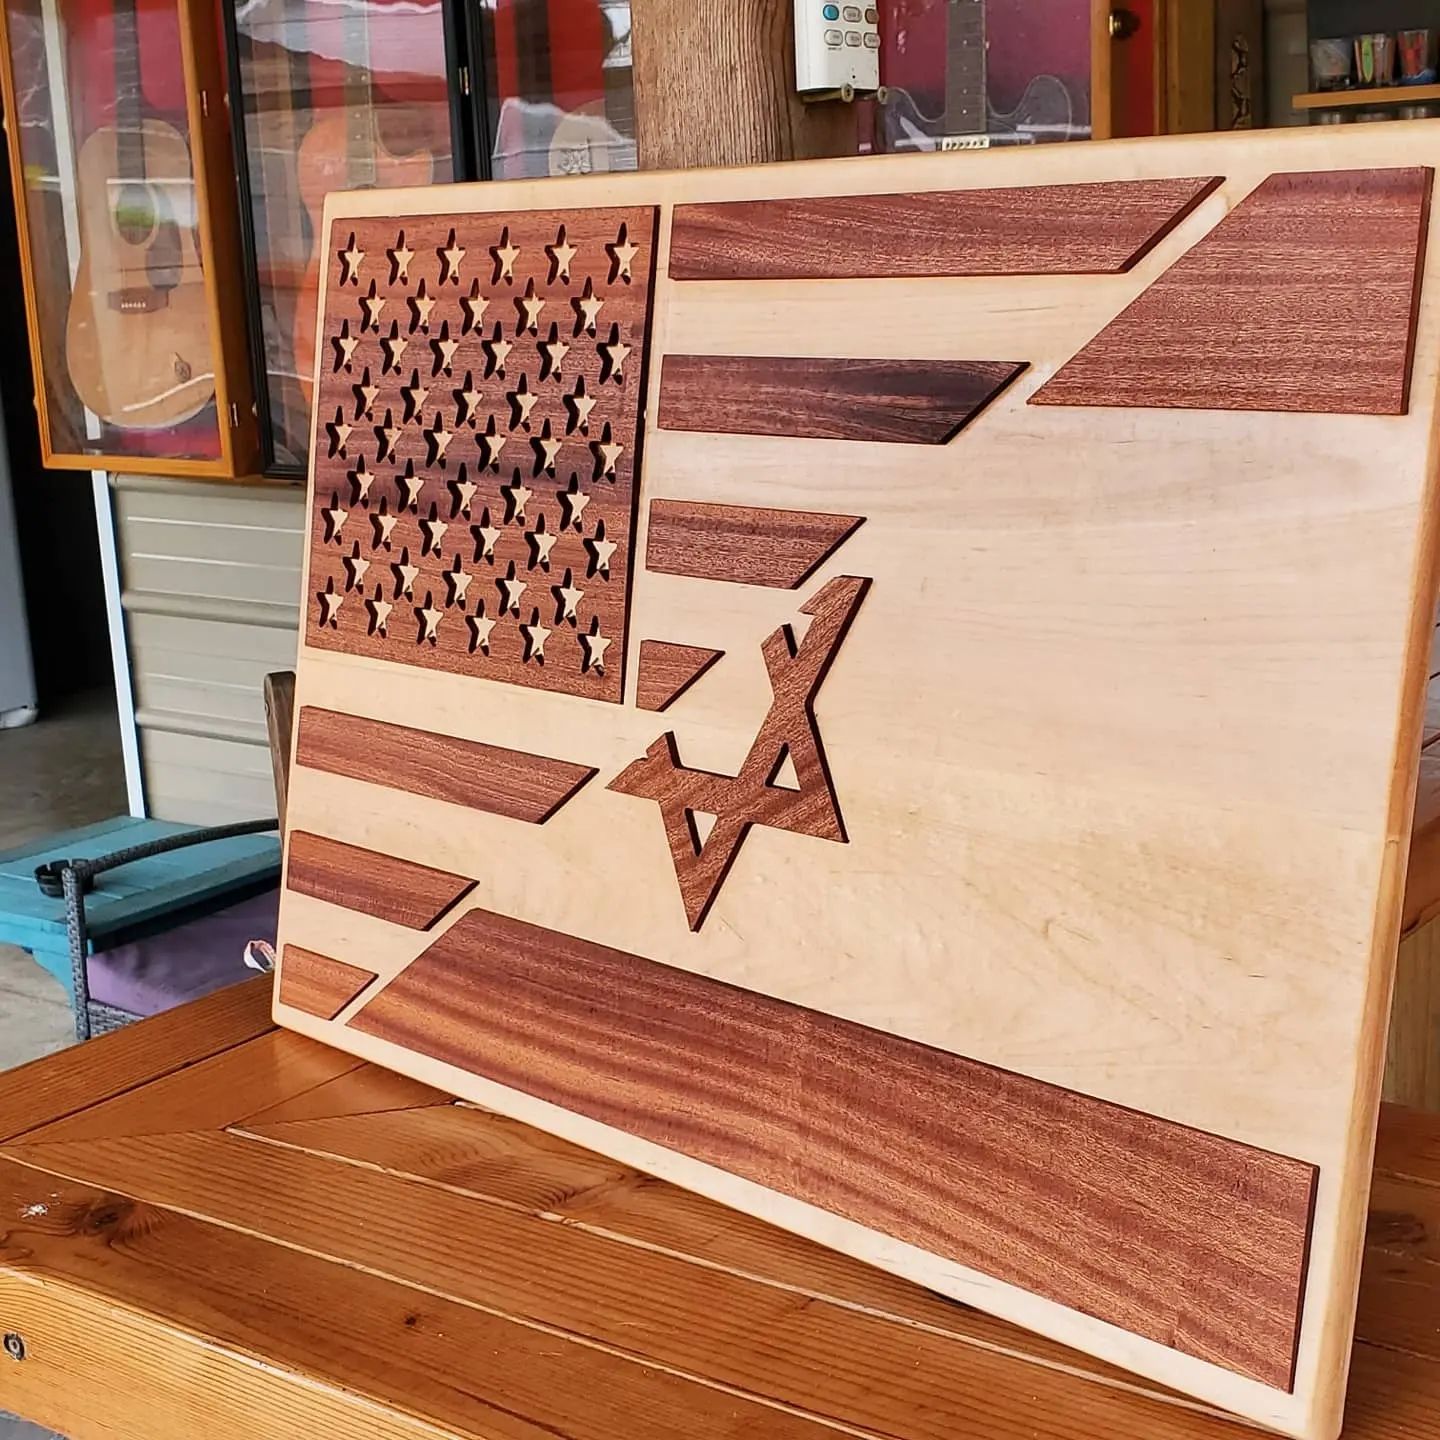
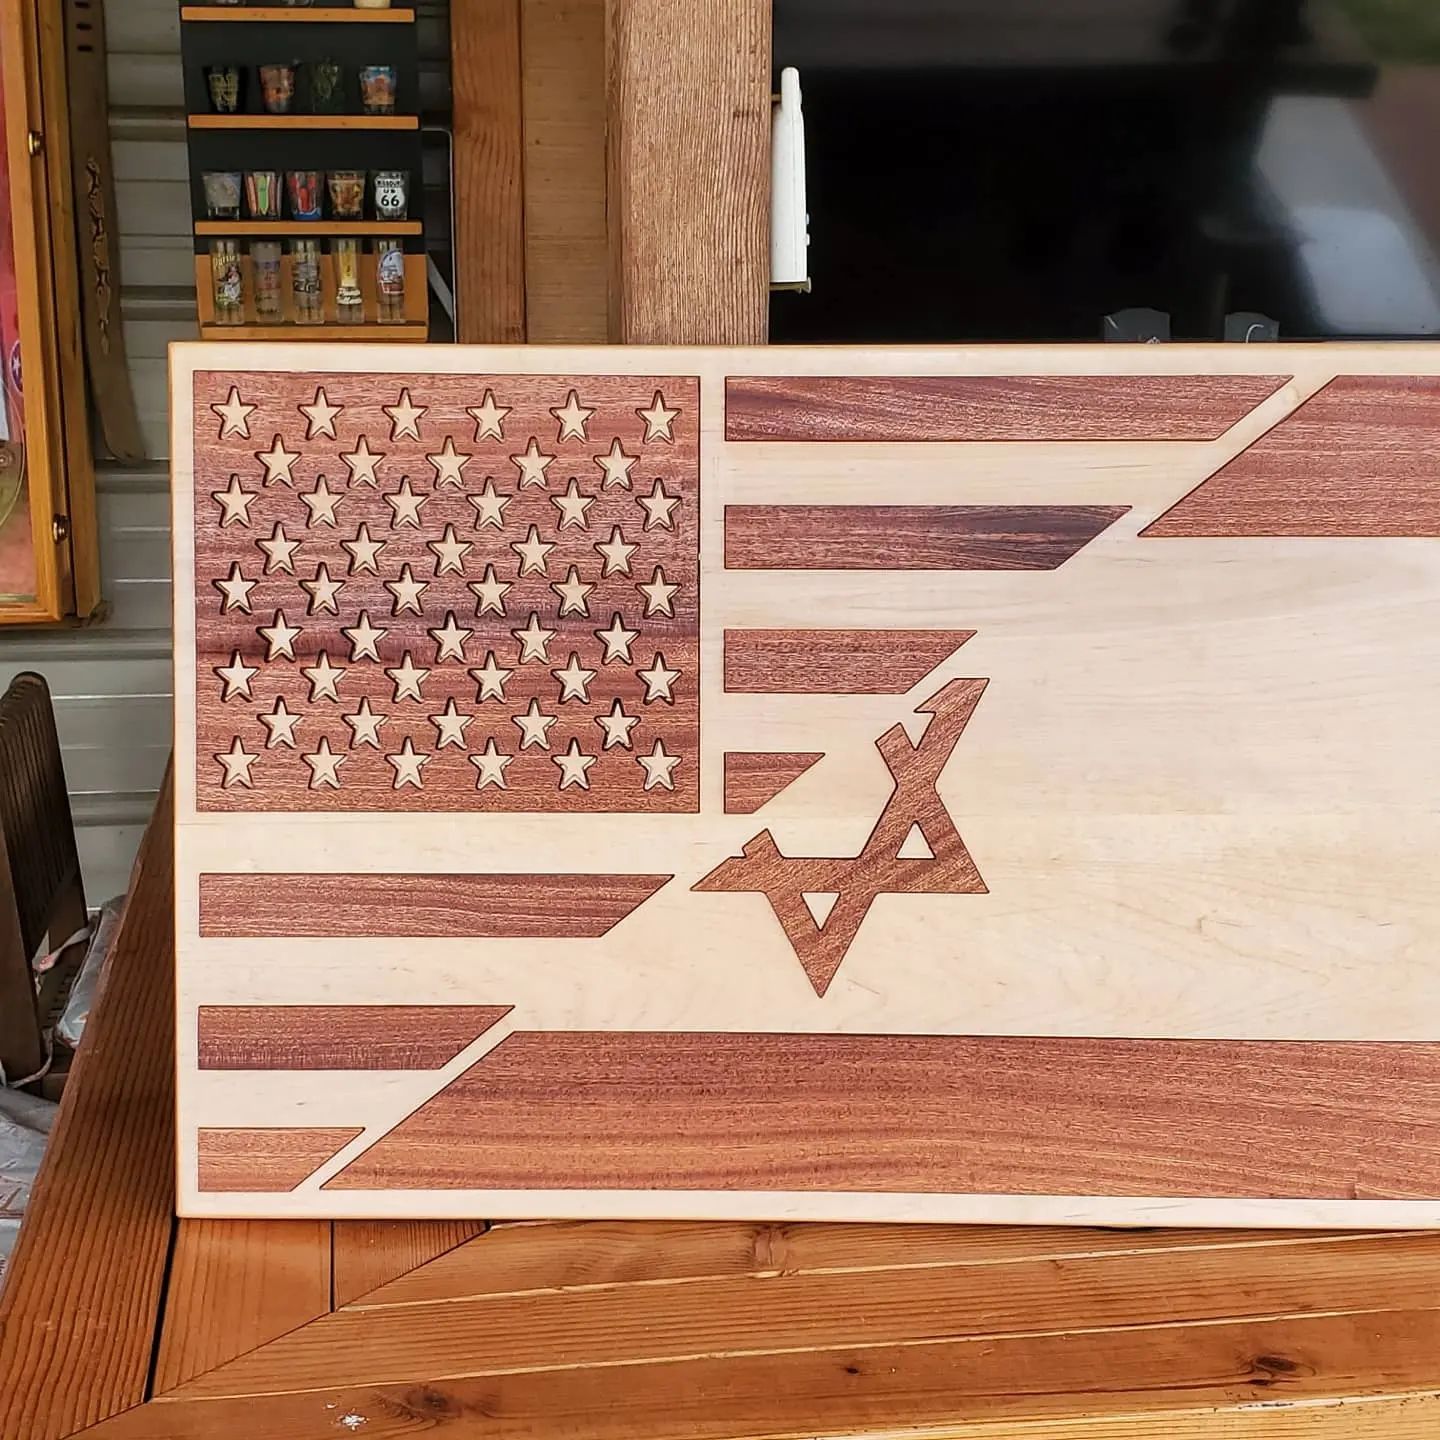
This was #1 from a total of 18, and which were shipped to Israel in support of a joint operation, and which are hanging in the offices of some pretty important people – and they chose ME to do it for them!
The flag is created from soft maple, albeit the hardest soft maple I’ve ever worked with (that tree must have had a tough life?) and has insets of sapele. The rest is pretty obvious.
It was an honor, ladies and gentlemen, and I appreciated the opportunity tremendously!
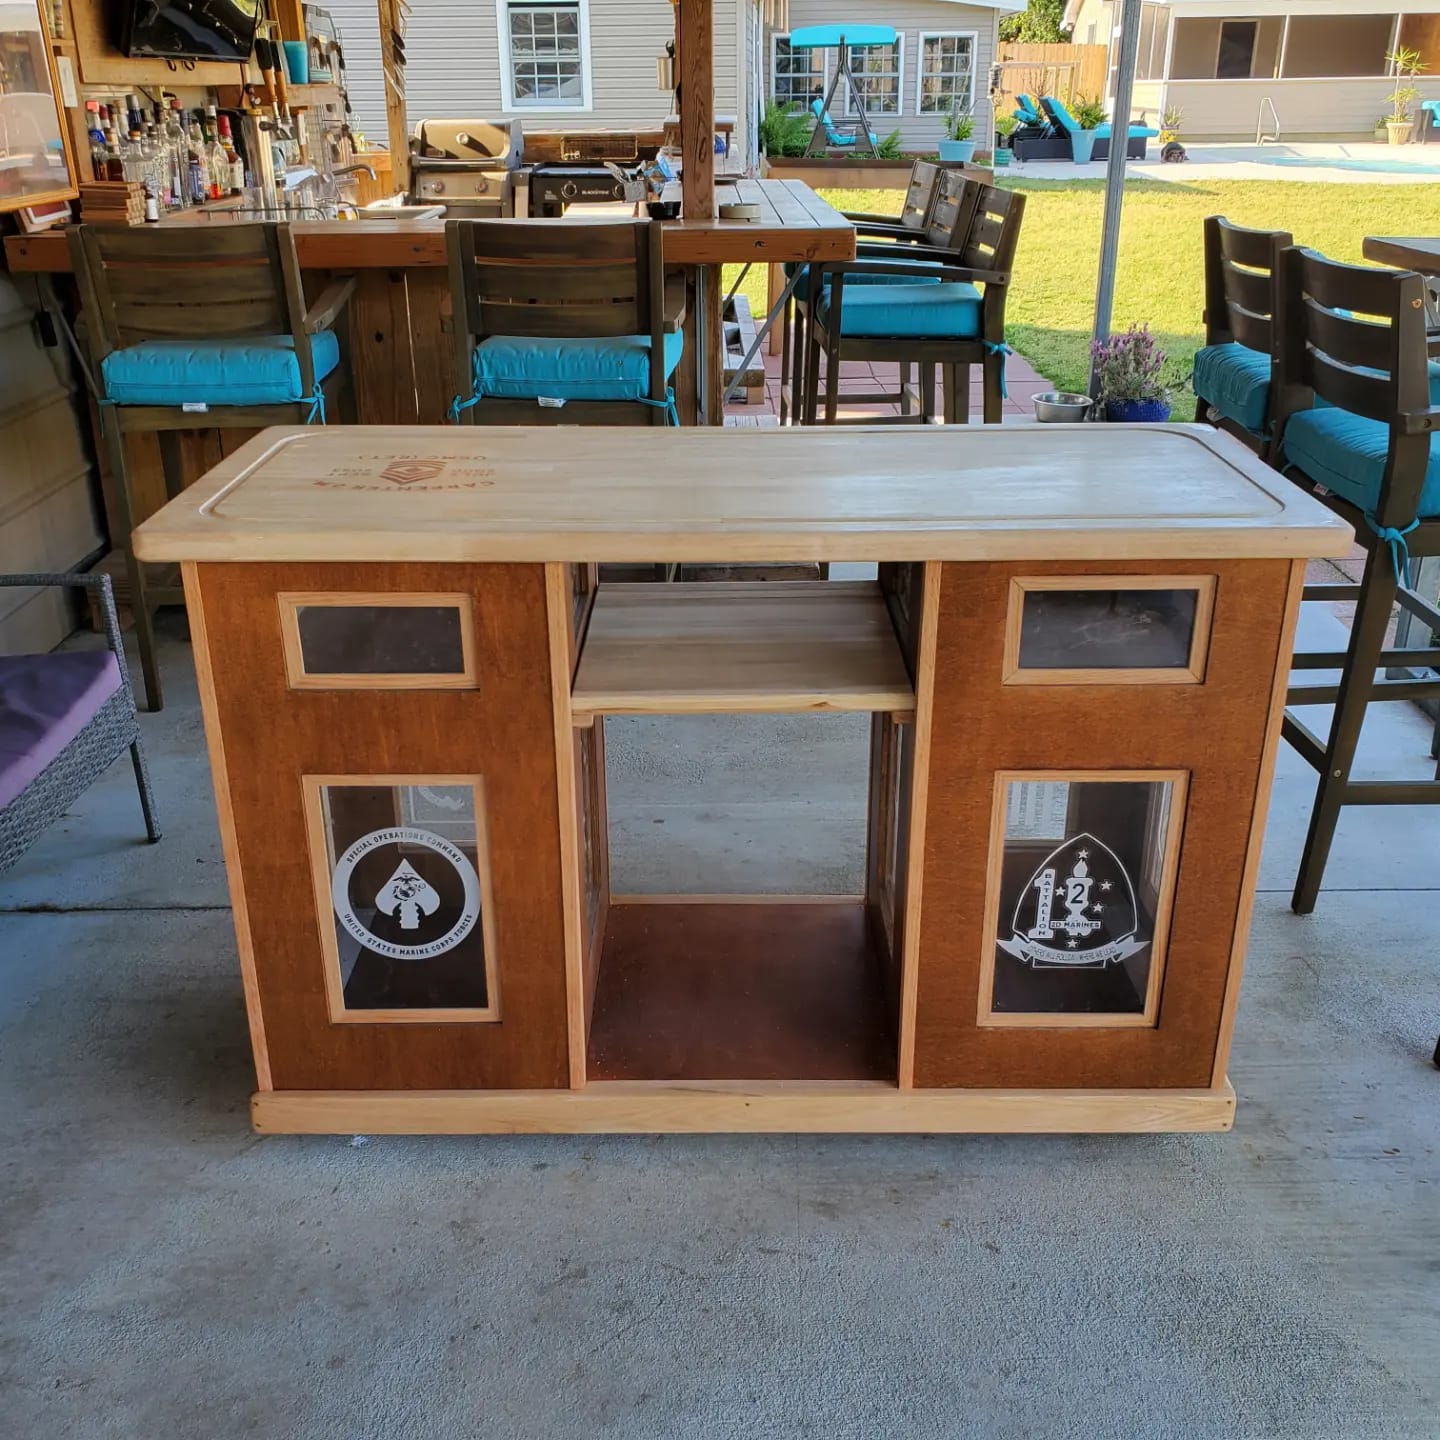
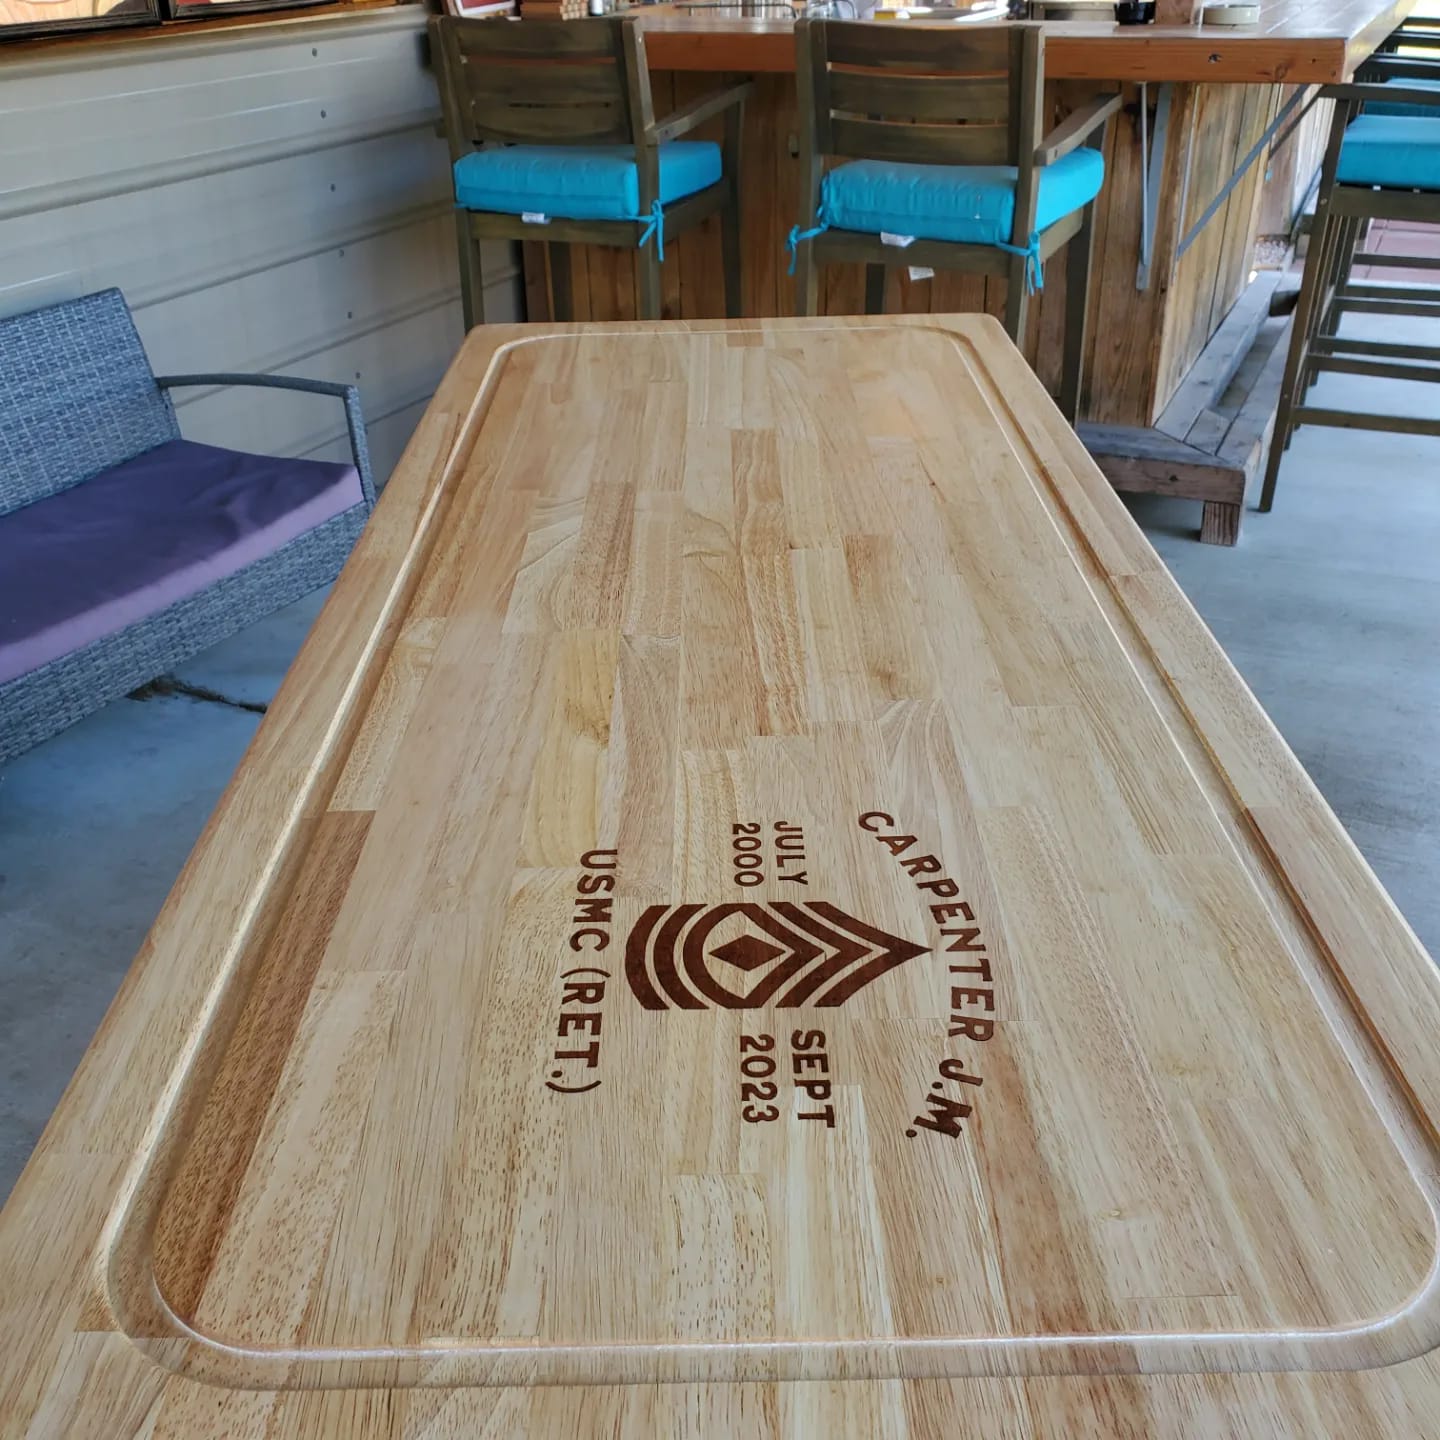
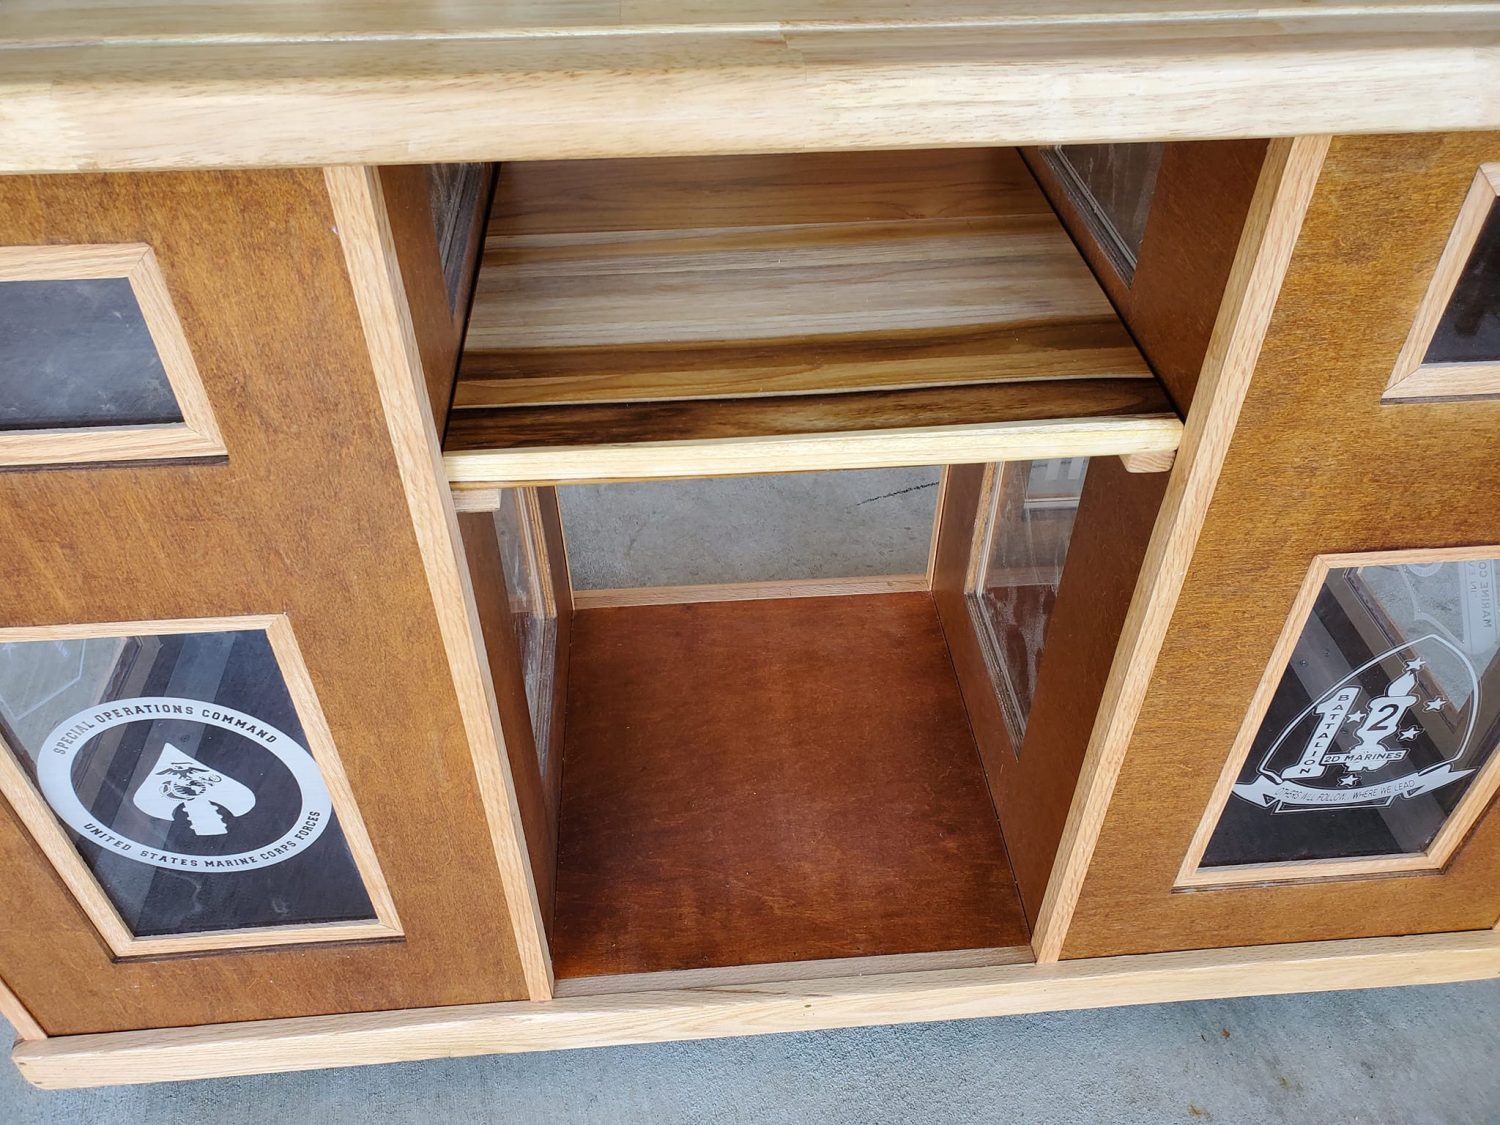
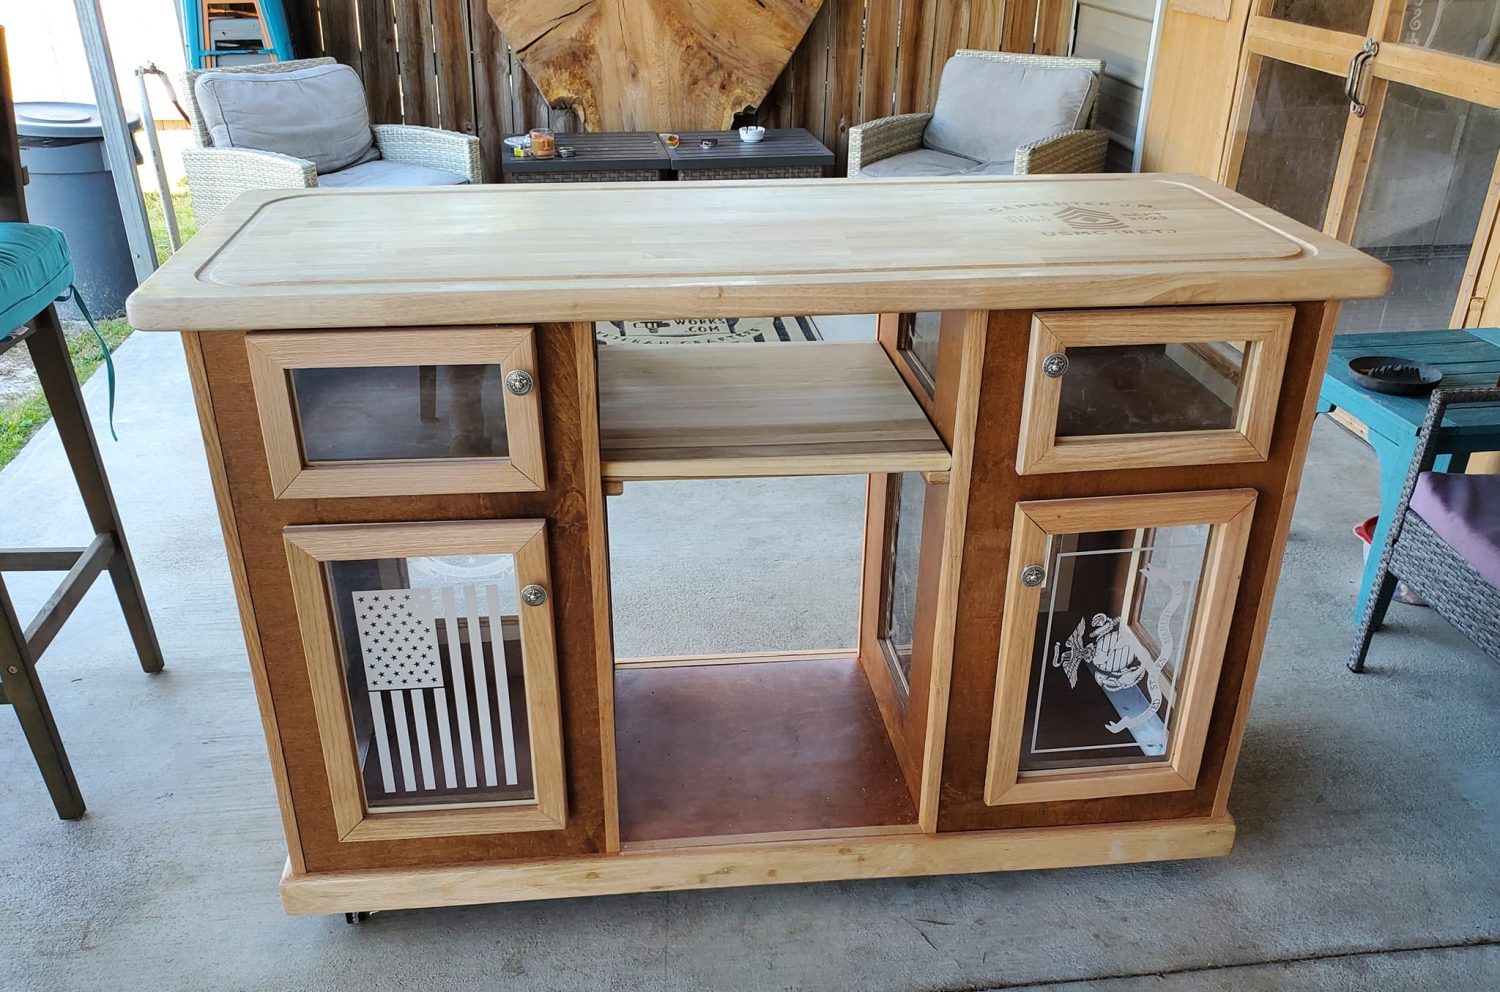
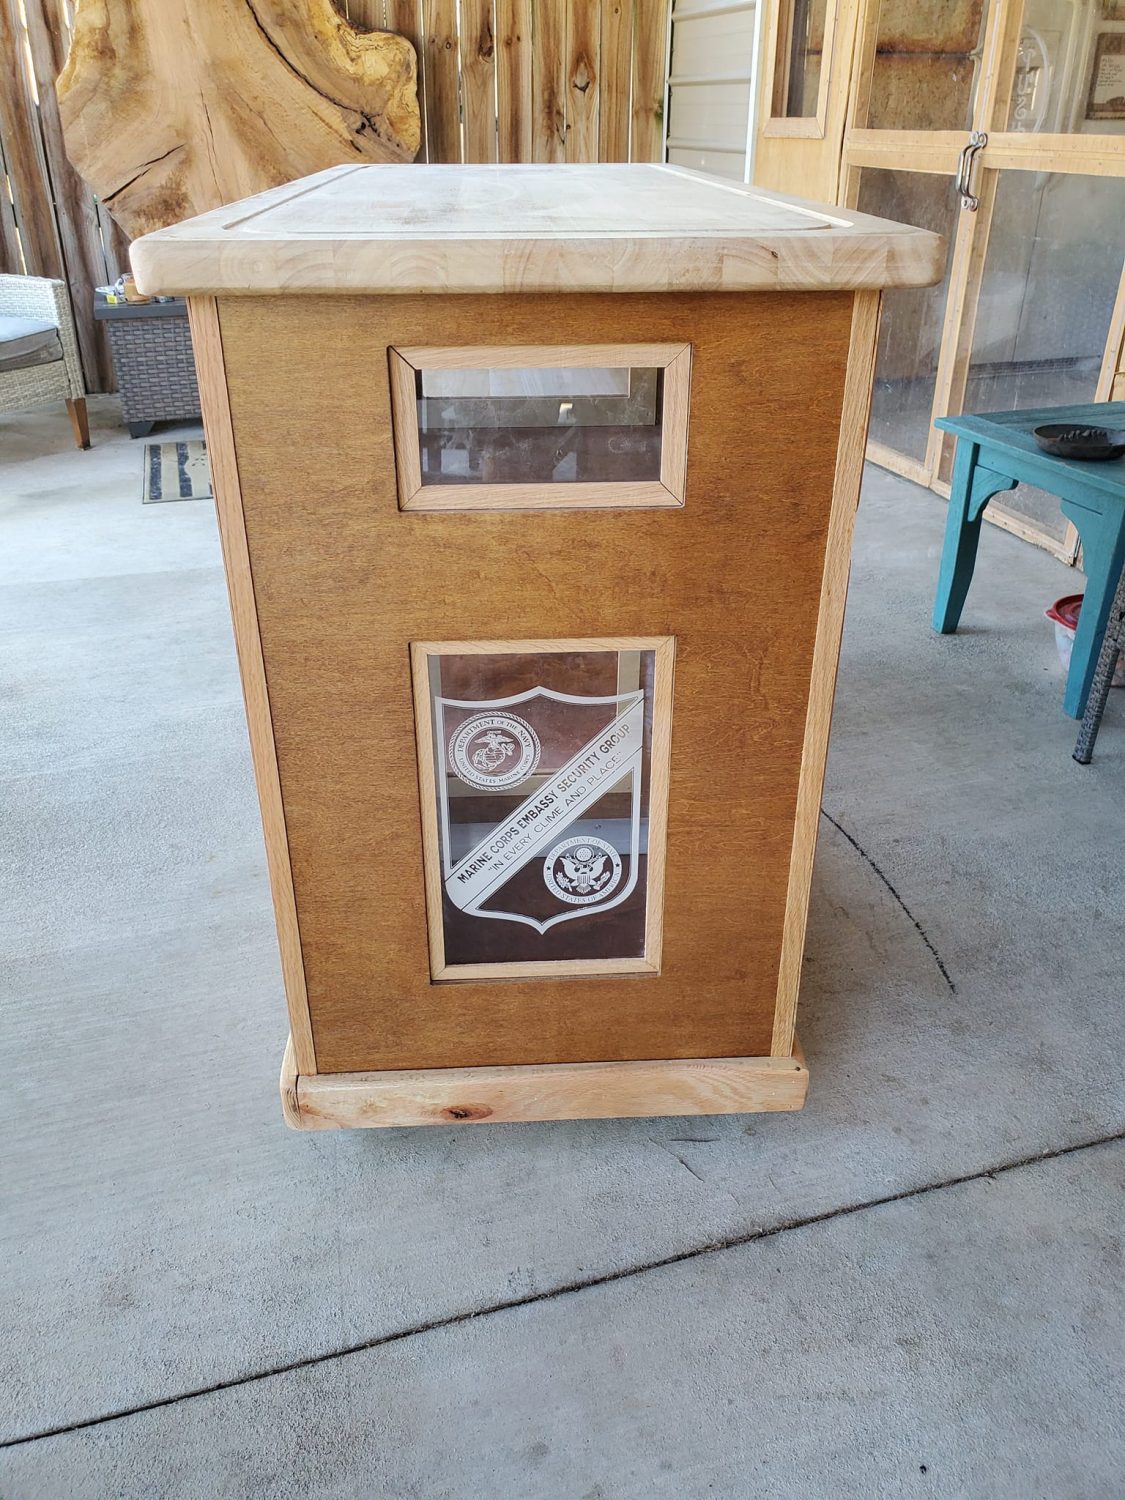
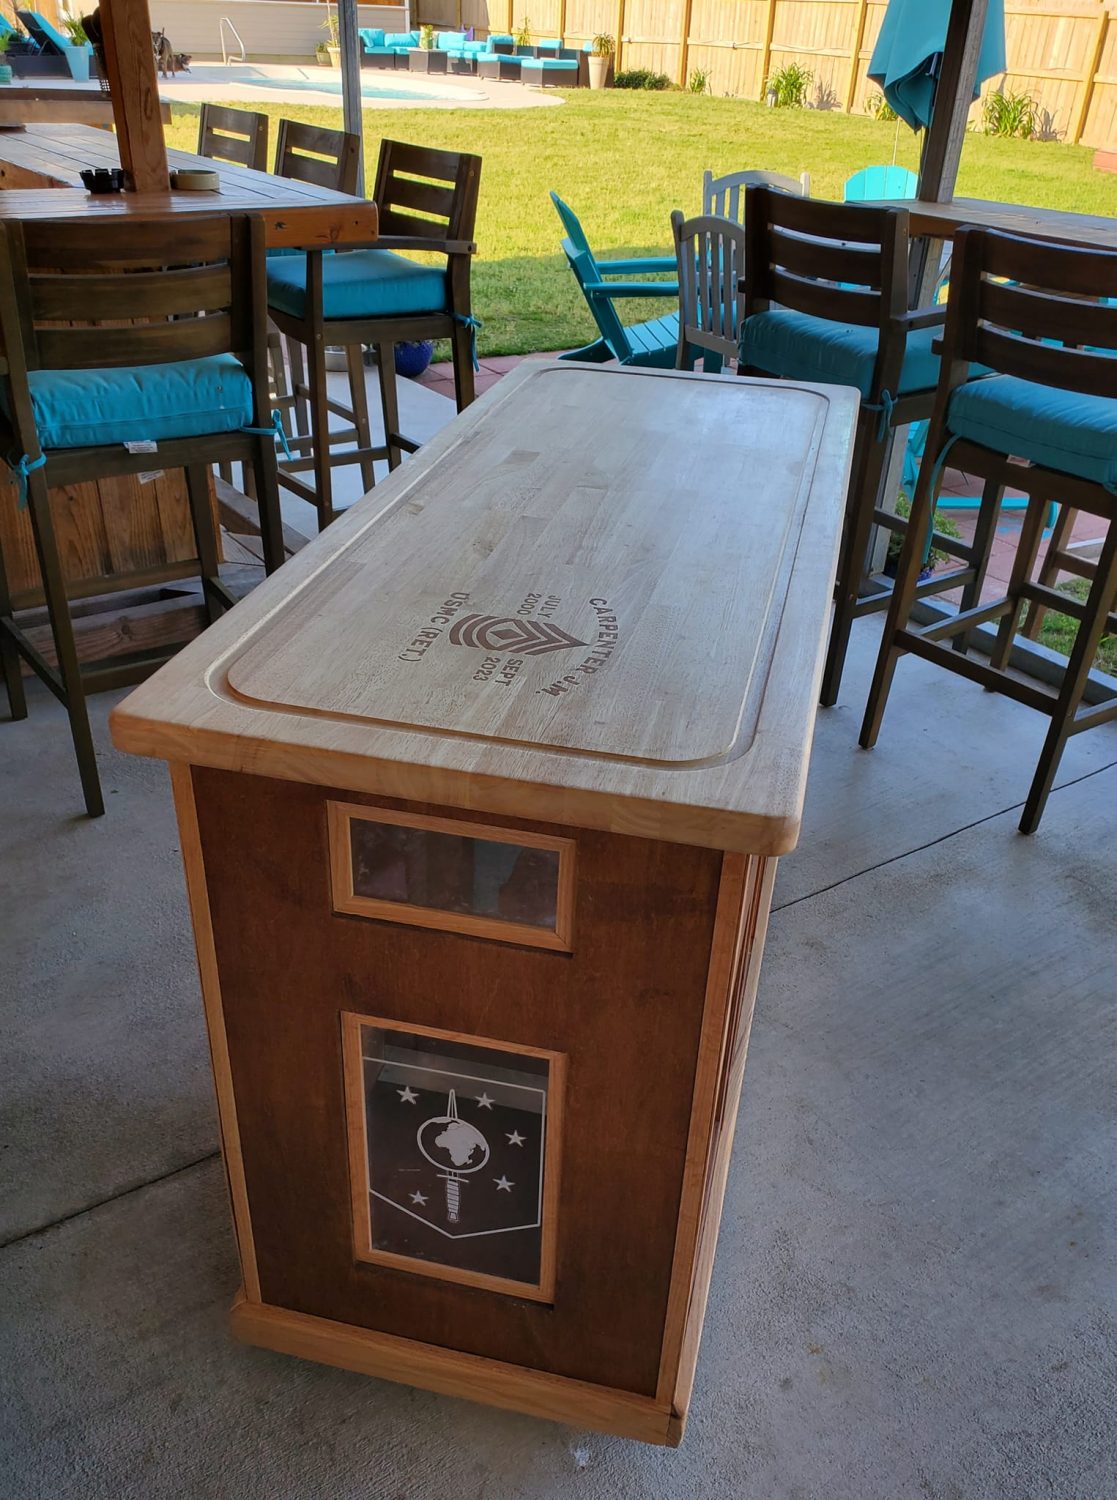
The requirement is to create a cart that can be pushed around the restaurant / smoke house, and serve people. Patriotism is the theme, and the owner of this cart received it both as a ‘graduation’ (retirement) gift as well as a functional piece for his new endeavor.
Now, he can load this cart up with all the needs for the table, and roll it out there- carve the order right in front of them and have all he needs to serve them properly- and with a helluva lotta style!