This Shadow Box is a pleasure to make as it’s always going to be a centerpiece for someone’s keepsakes and memorabilia. That alone makes every one that the shop turns out special.
But, let’s talk some more about it so you’ll understand why this piece is so valued.
To begin with, a special mahogany plywood is selected for use as it is 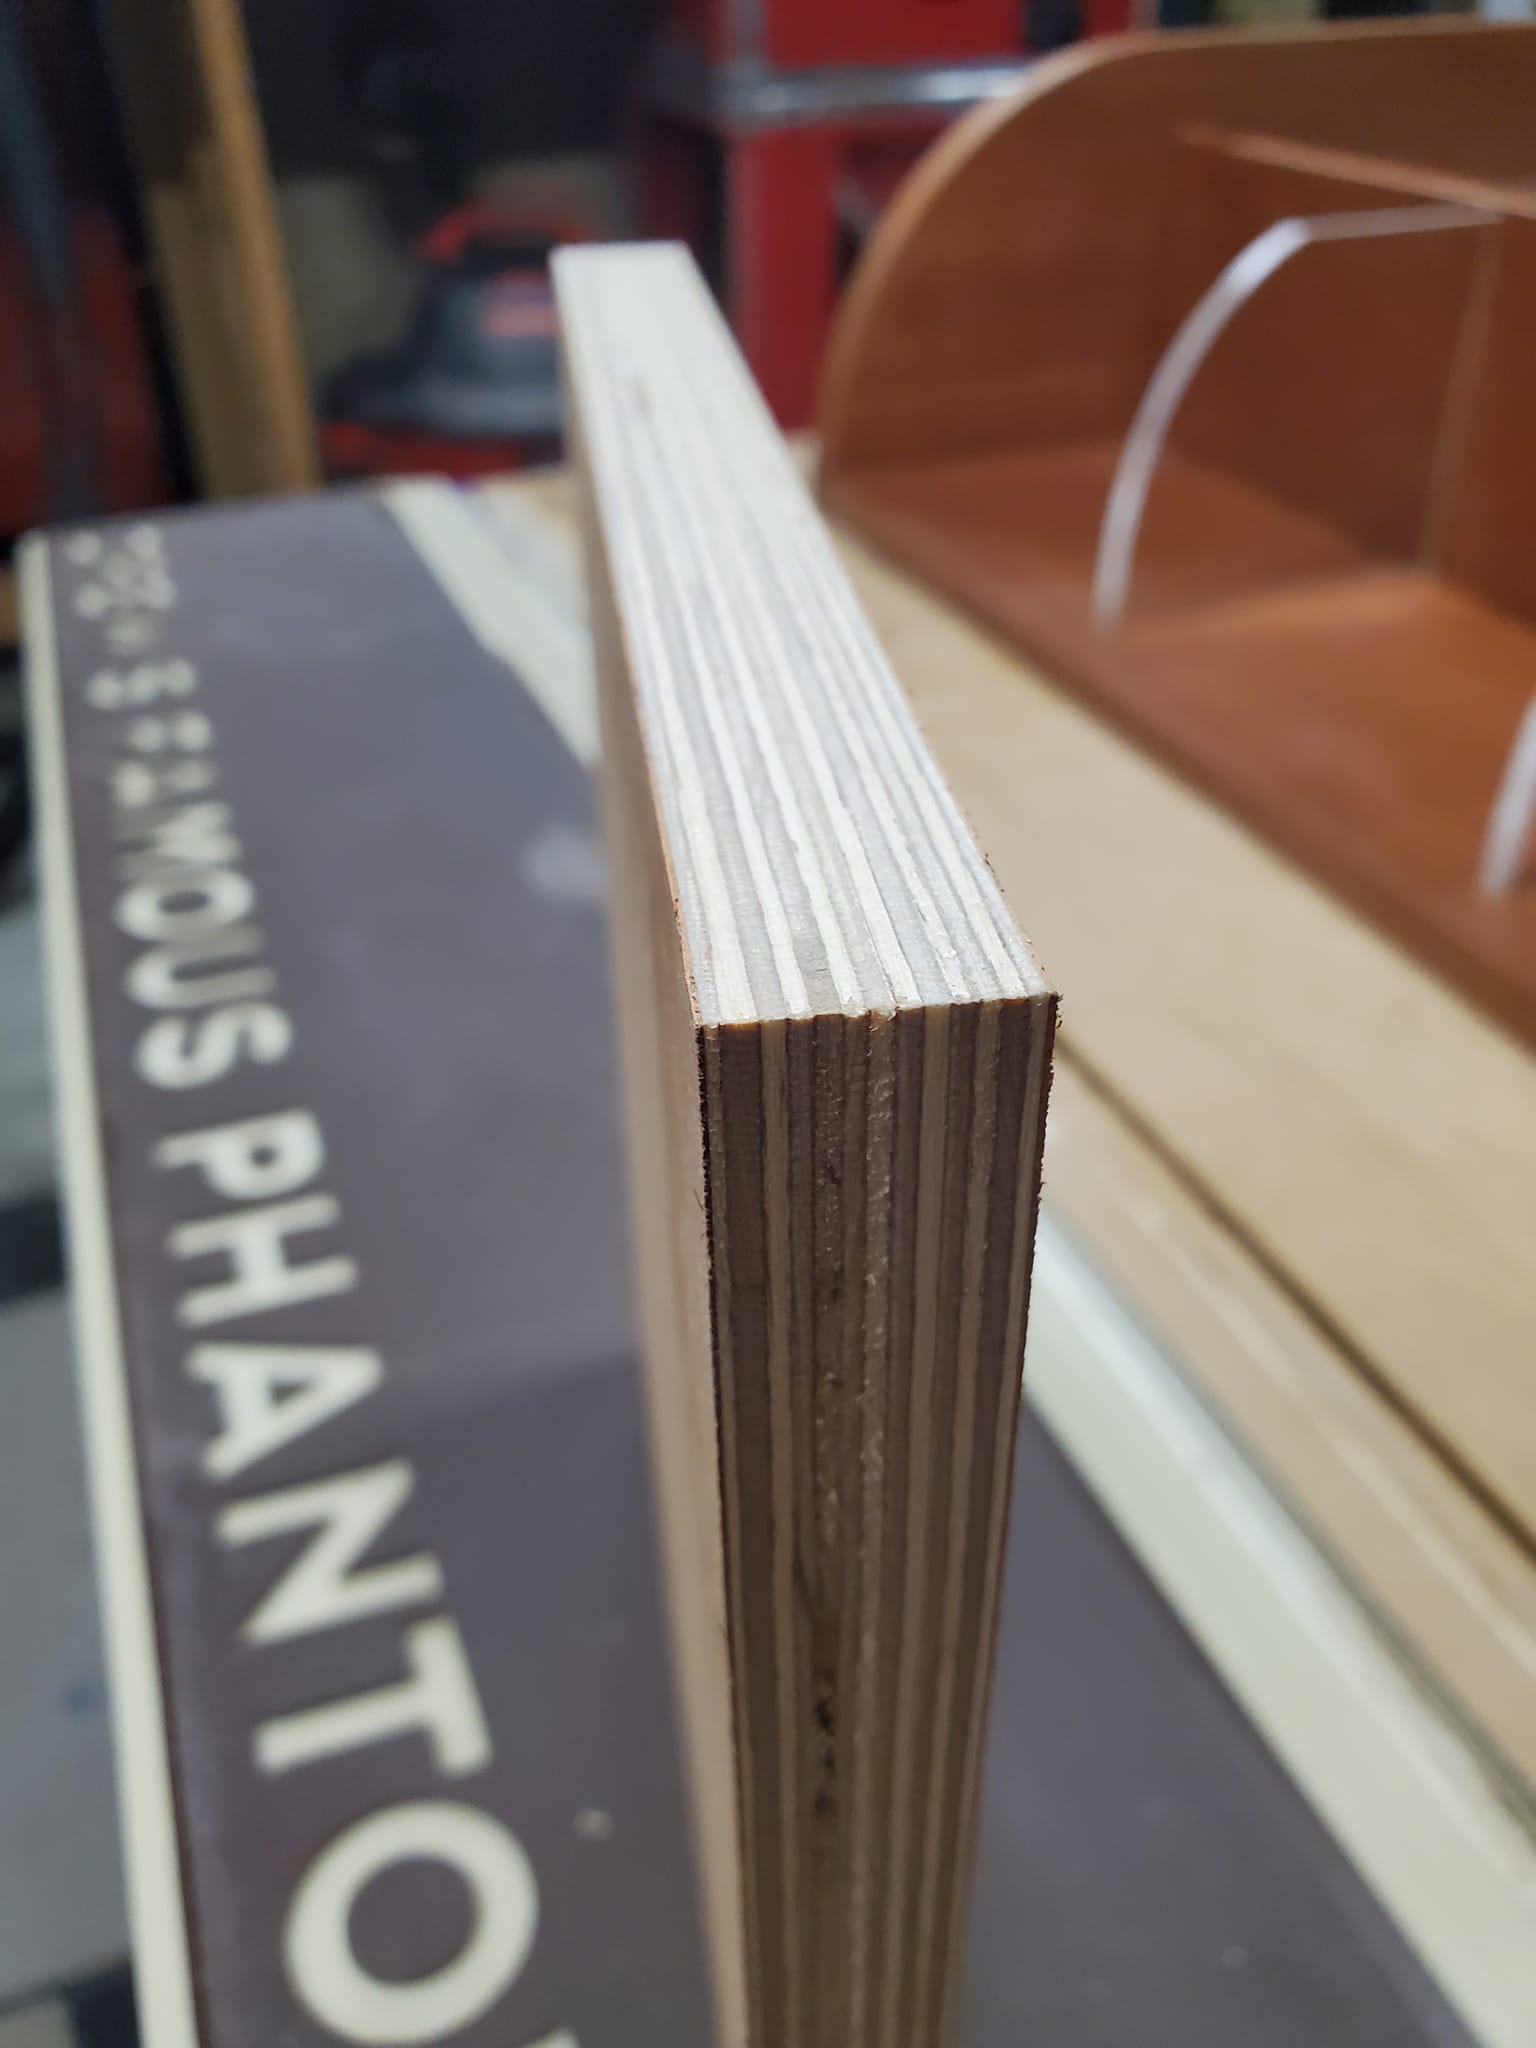 extremely stable and won’t warp or twist on the recipient. This plywood is intended for the custom yacht industry where $5M+ yachts use it for their cabinetry. It serves this purpose extremely well, too.
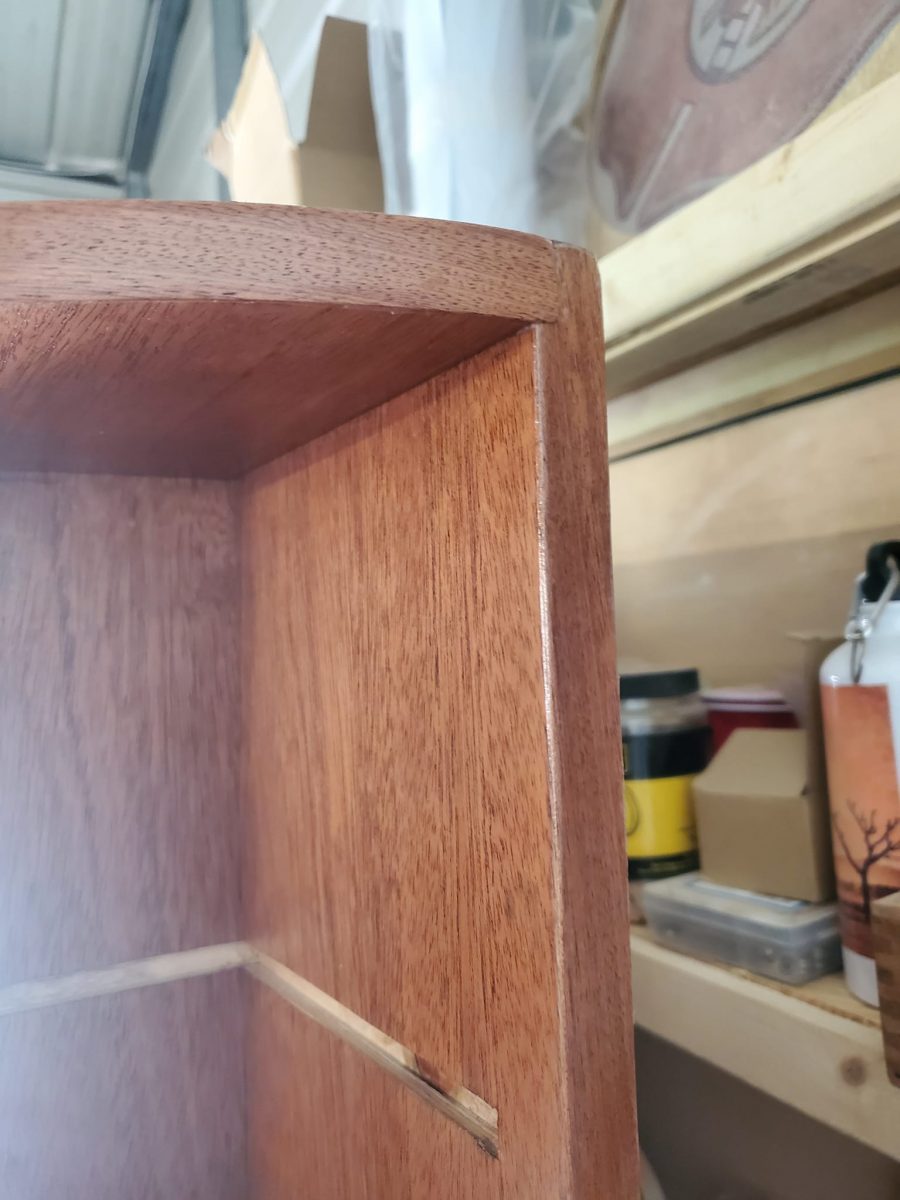
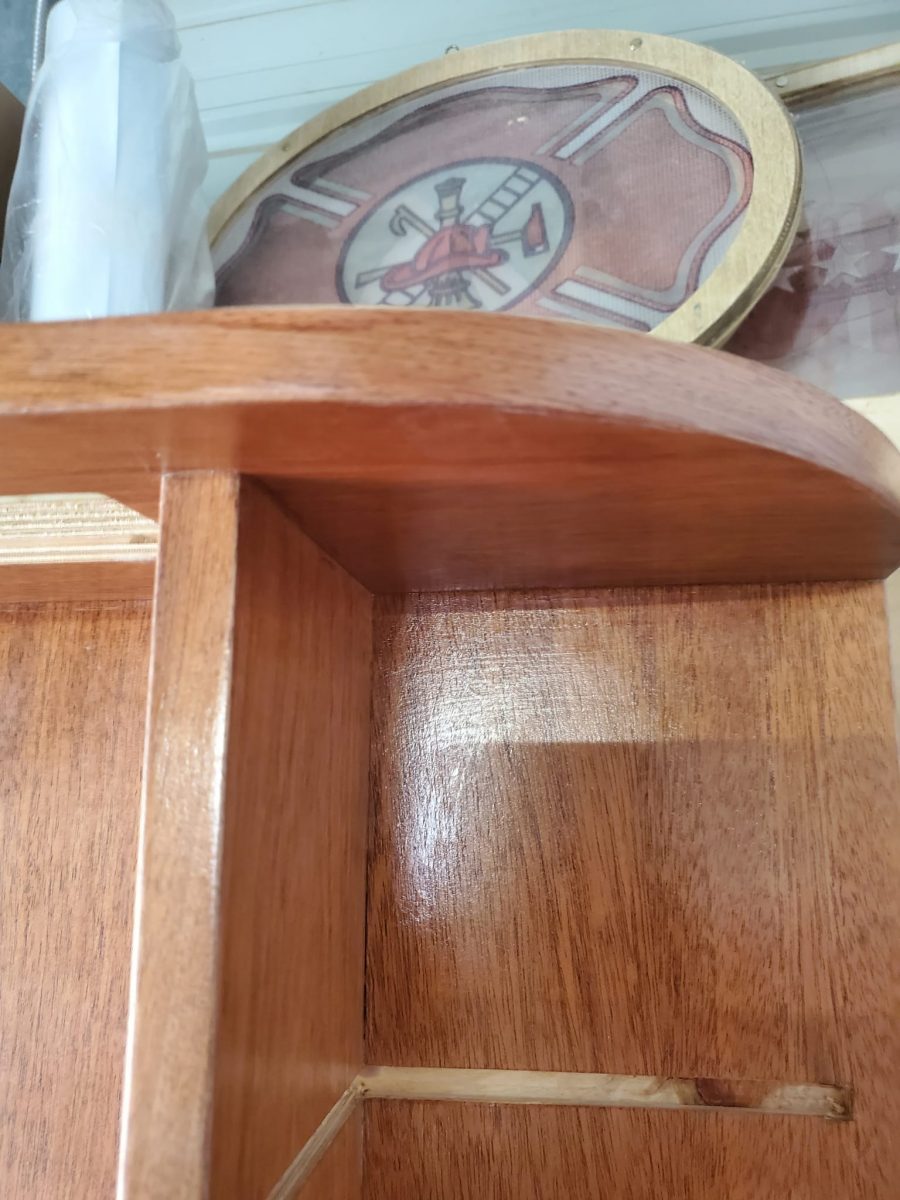
The Mahogany is precision cut for all the parts to fit extremely snug- to the point a mallet is often used to assemble them- and then edge banded with a matching real mahogany veneer to give the appearance of a solid piece of furniture. The plywood is superior to solid wood- I can tell you this without reservation, because countless shadow boxes and fixtures have been produced and the Plywood is far more stable and uniform than any solid woods could ever be.
The design and production plans are made with absolute precision in mind- 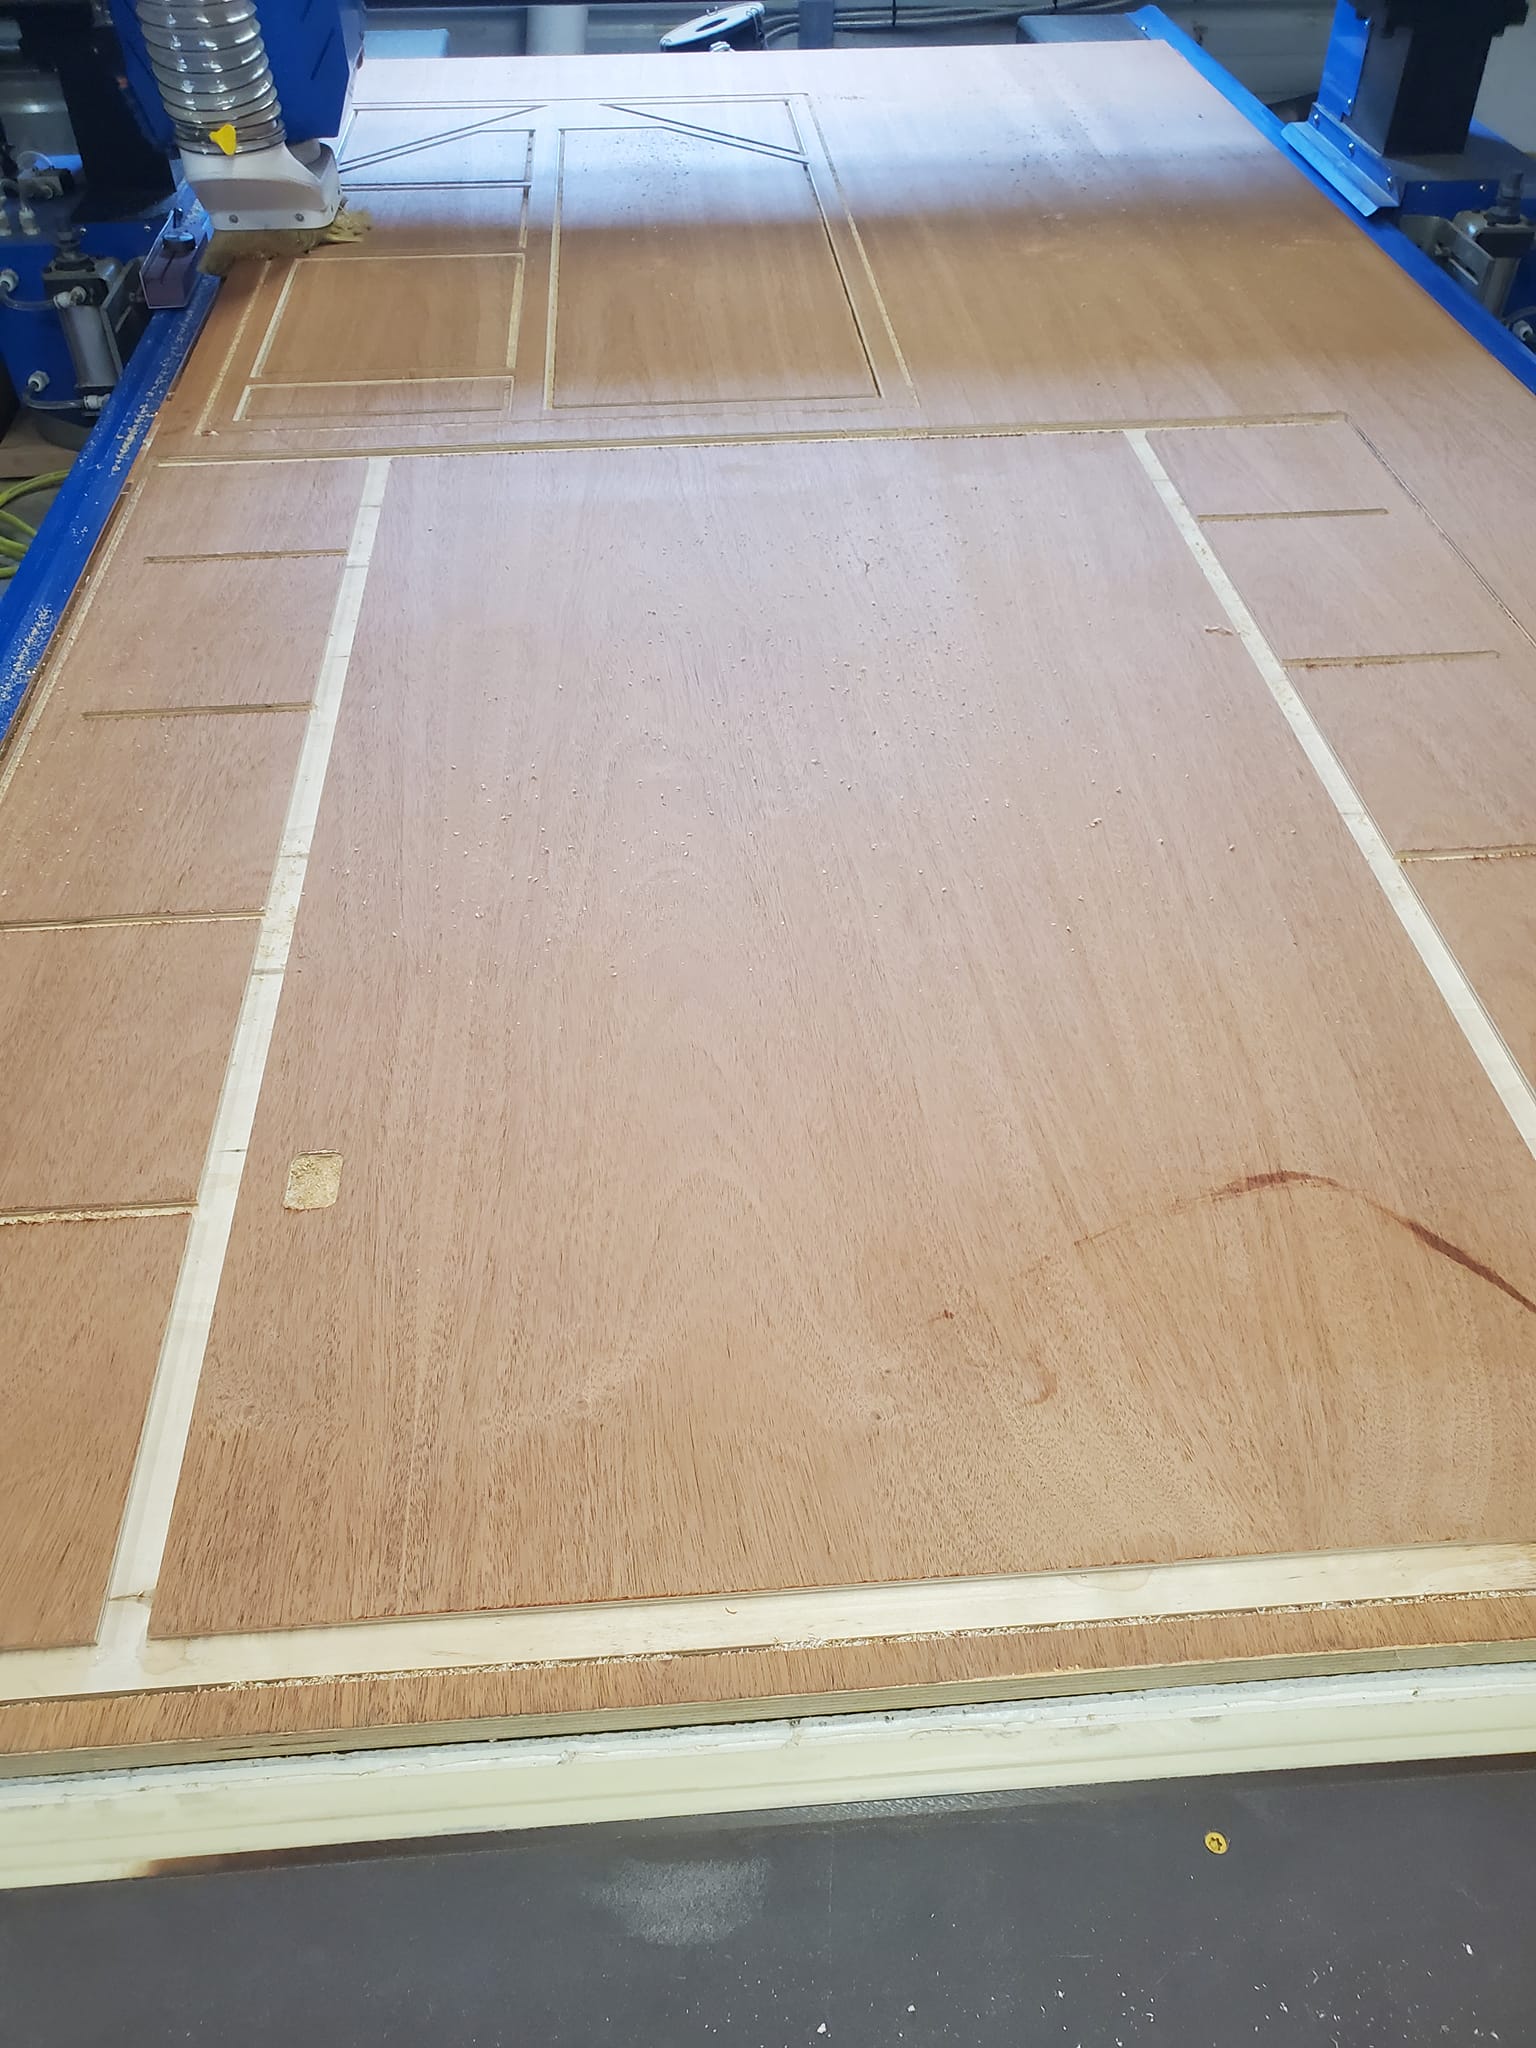 this is to fit together in such a way that all of the parts move as one. They’re going to move- it happens. It happens with changes in humidity and temperature. The trick is in the design and that it isn’t impacted by these movements and if there are movements that it moves together as one and retains it’s integrity.
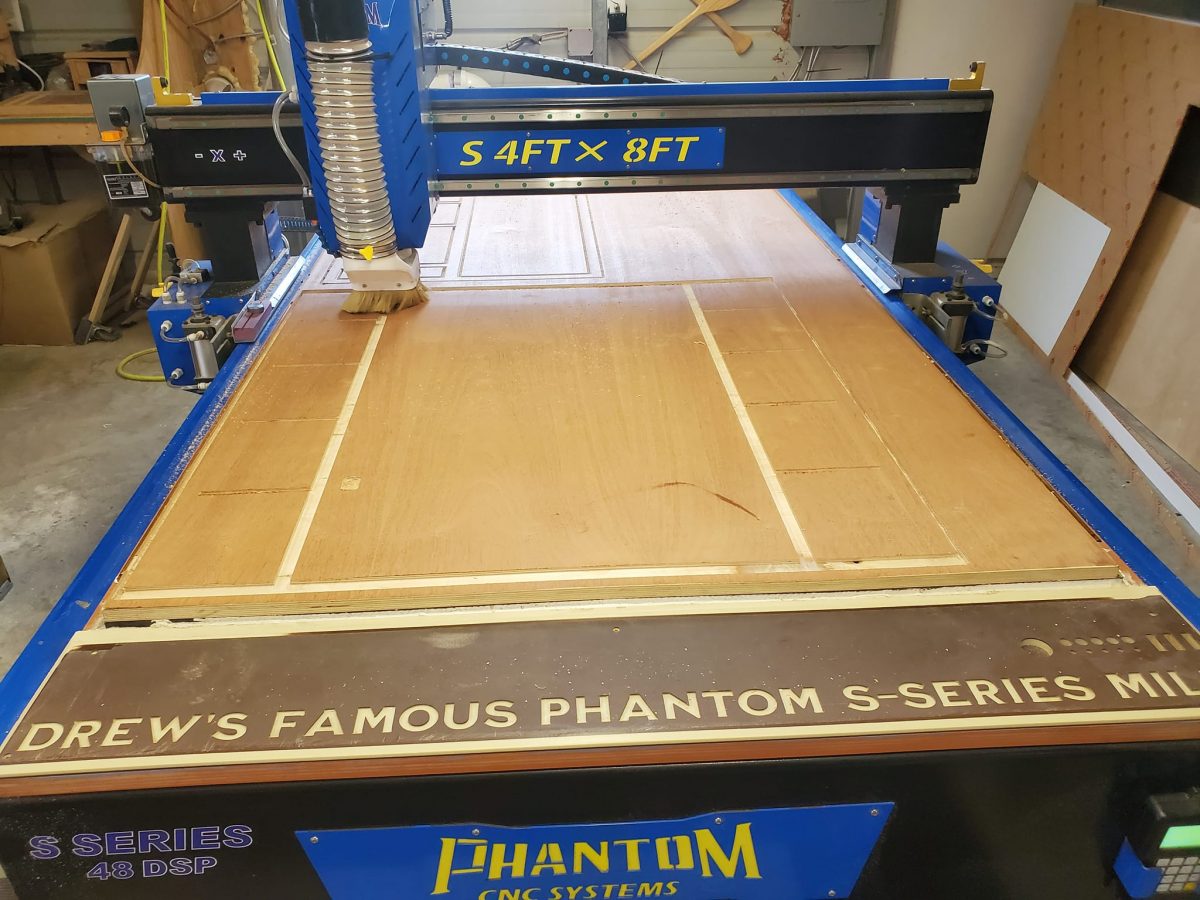
The Industrial CNC Router comes into play, here, and provides the absolute precision required. It’s so precise, actually, that a tolerance has to be left for the glue line and the fitment. It takes an entire  sheet of this ply to complete a single box, and because great attention has been applied to ensure the grain matches horizontally and vertically in the final product.
After the design is nailed down and the conversion to toolpaths is created and applied, these guys get their cut. After the cut of both the plywood and the acrylic lens and shelves (1/4″ clear cast acrylic for the lens, and 3/8″ cast clear acrylic for the shelves) the edges of the ply are banded with that matching mahogany, and the edges of the acrylic are glazed and polished for a clear shine. If you’ve selected to have your shadow box delivered unfinished and unassembled, your product will get a nice clean up and a secure packaging and arrive at your door in this state… Well, along with instructions on assembly and recommendations for finishing.
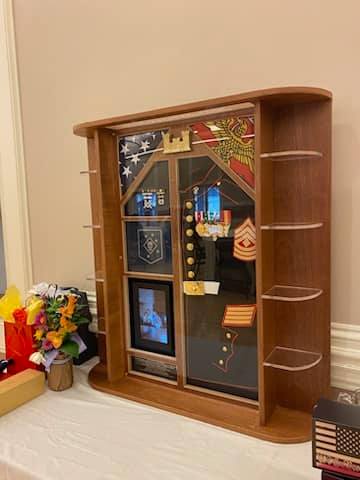
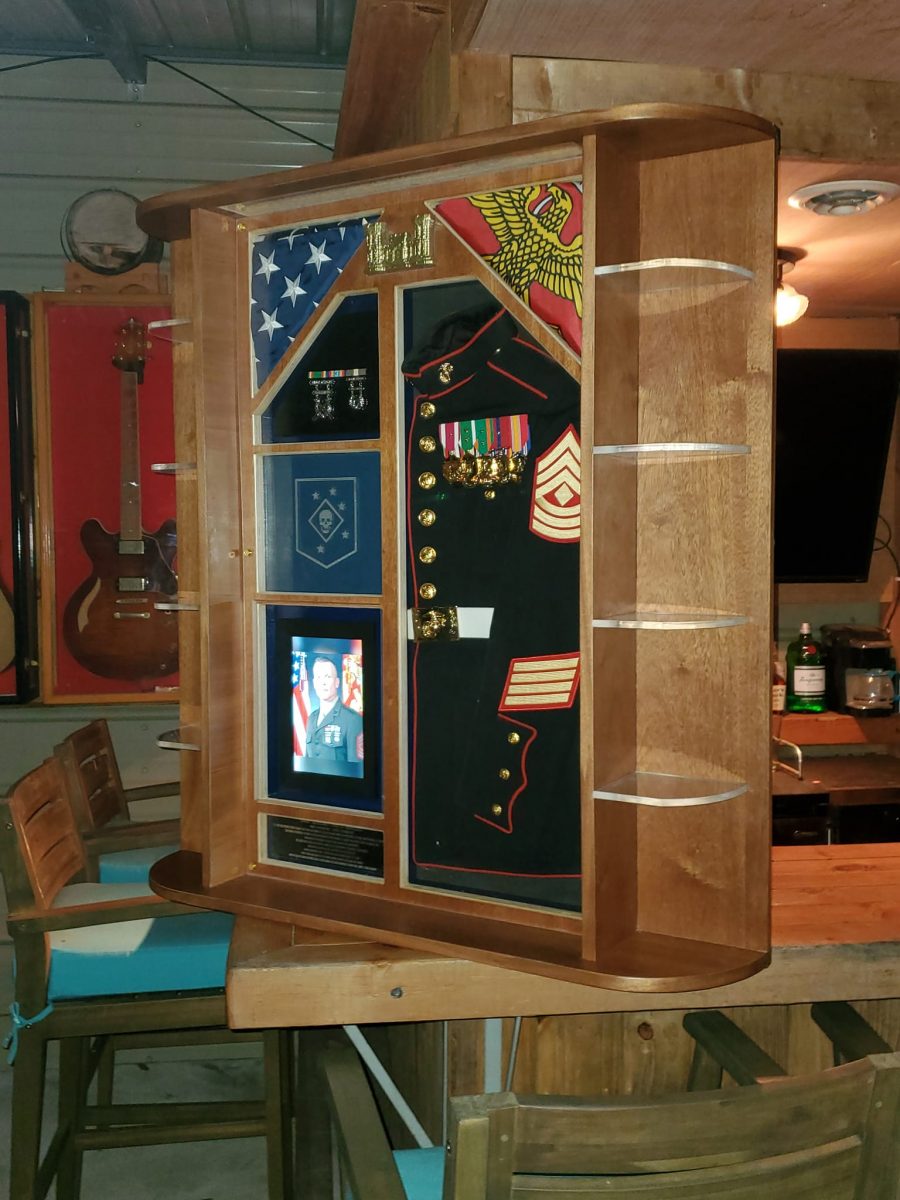
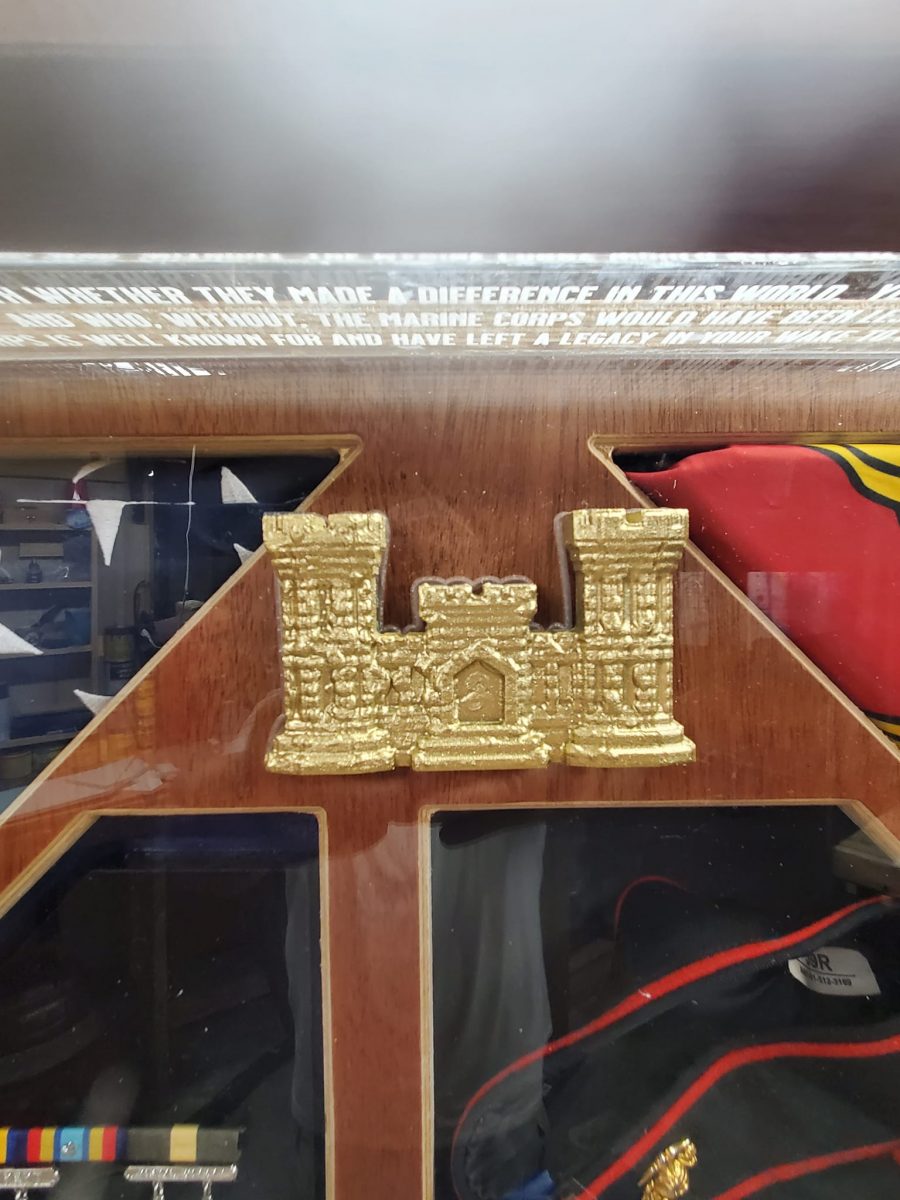
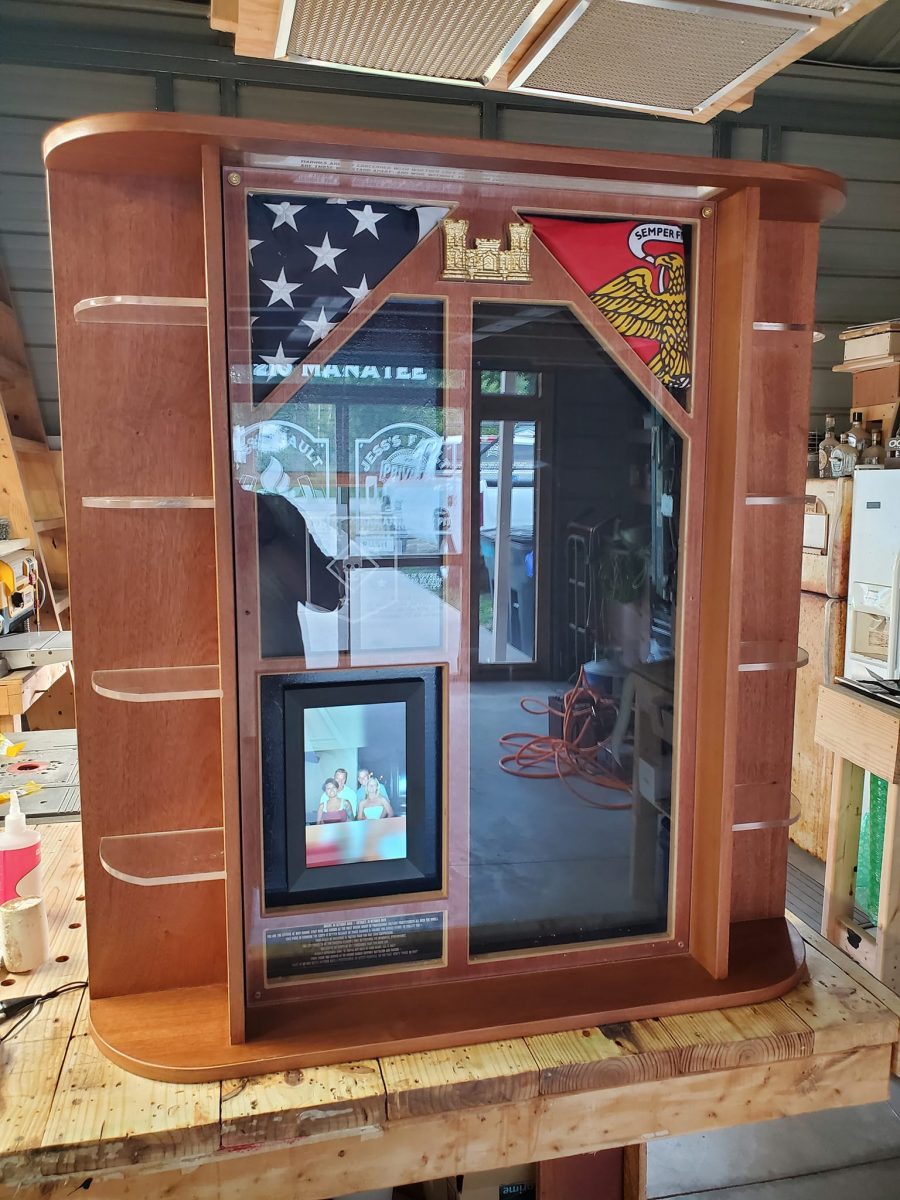
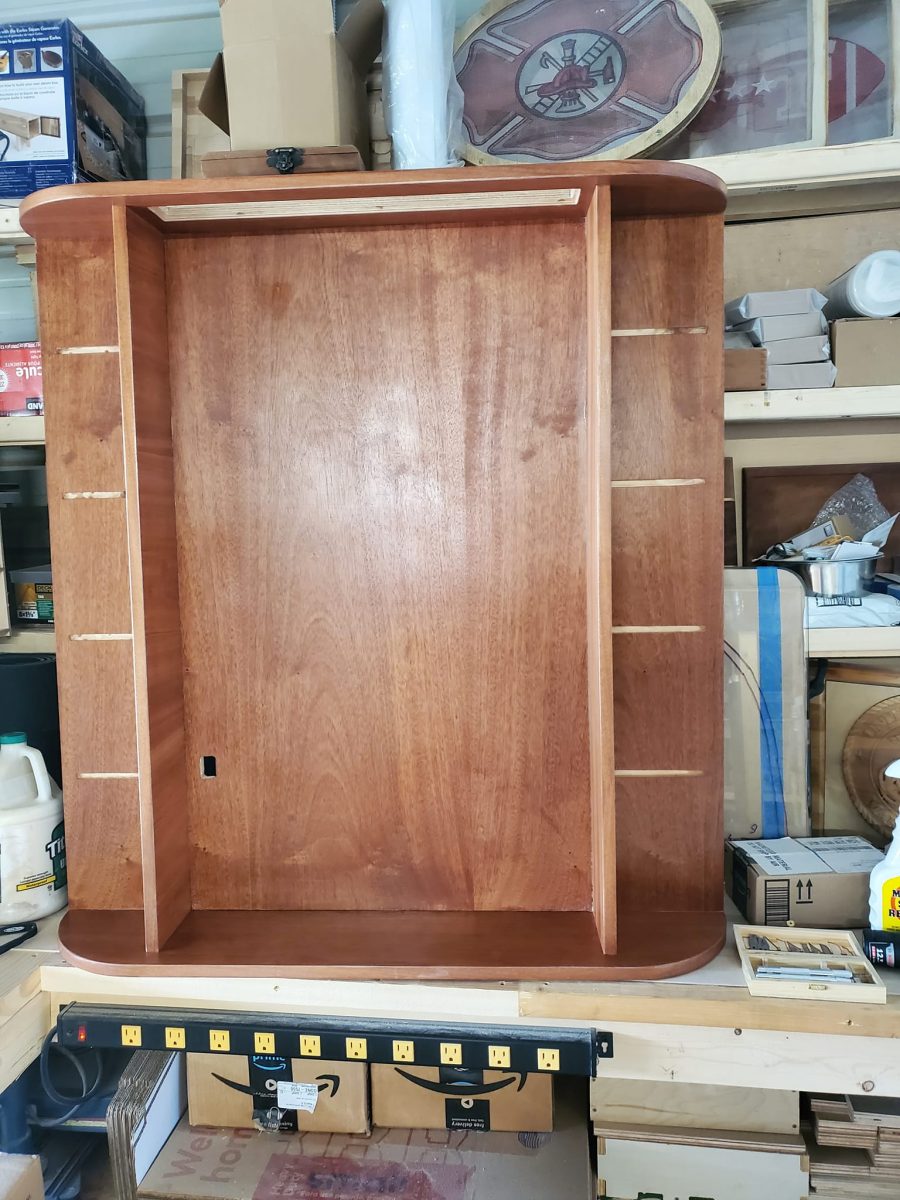
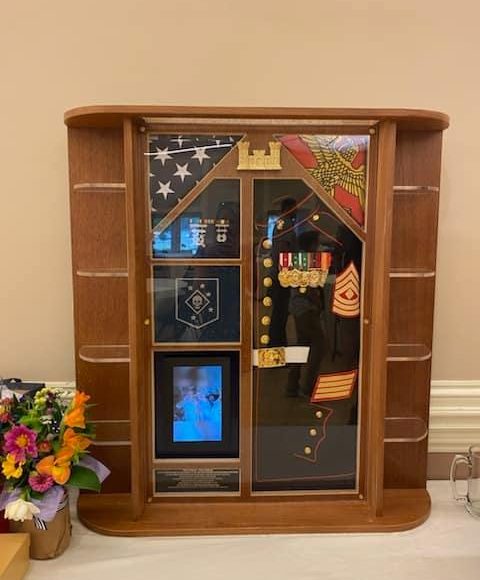
…. just a little note: If you notice, the top of the framing above the lens covered items has a pass through- this allows light to pass over the items under the lens and for better viewing. That also has an acrylic window, and one that can be etched with a special message if you want!
Once everything is checked for fitment and all the edges dressed and 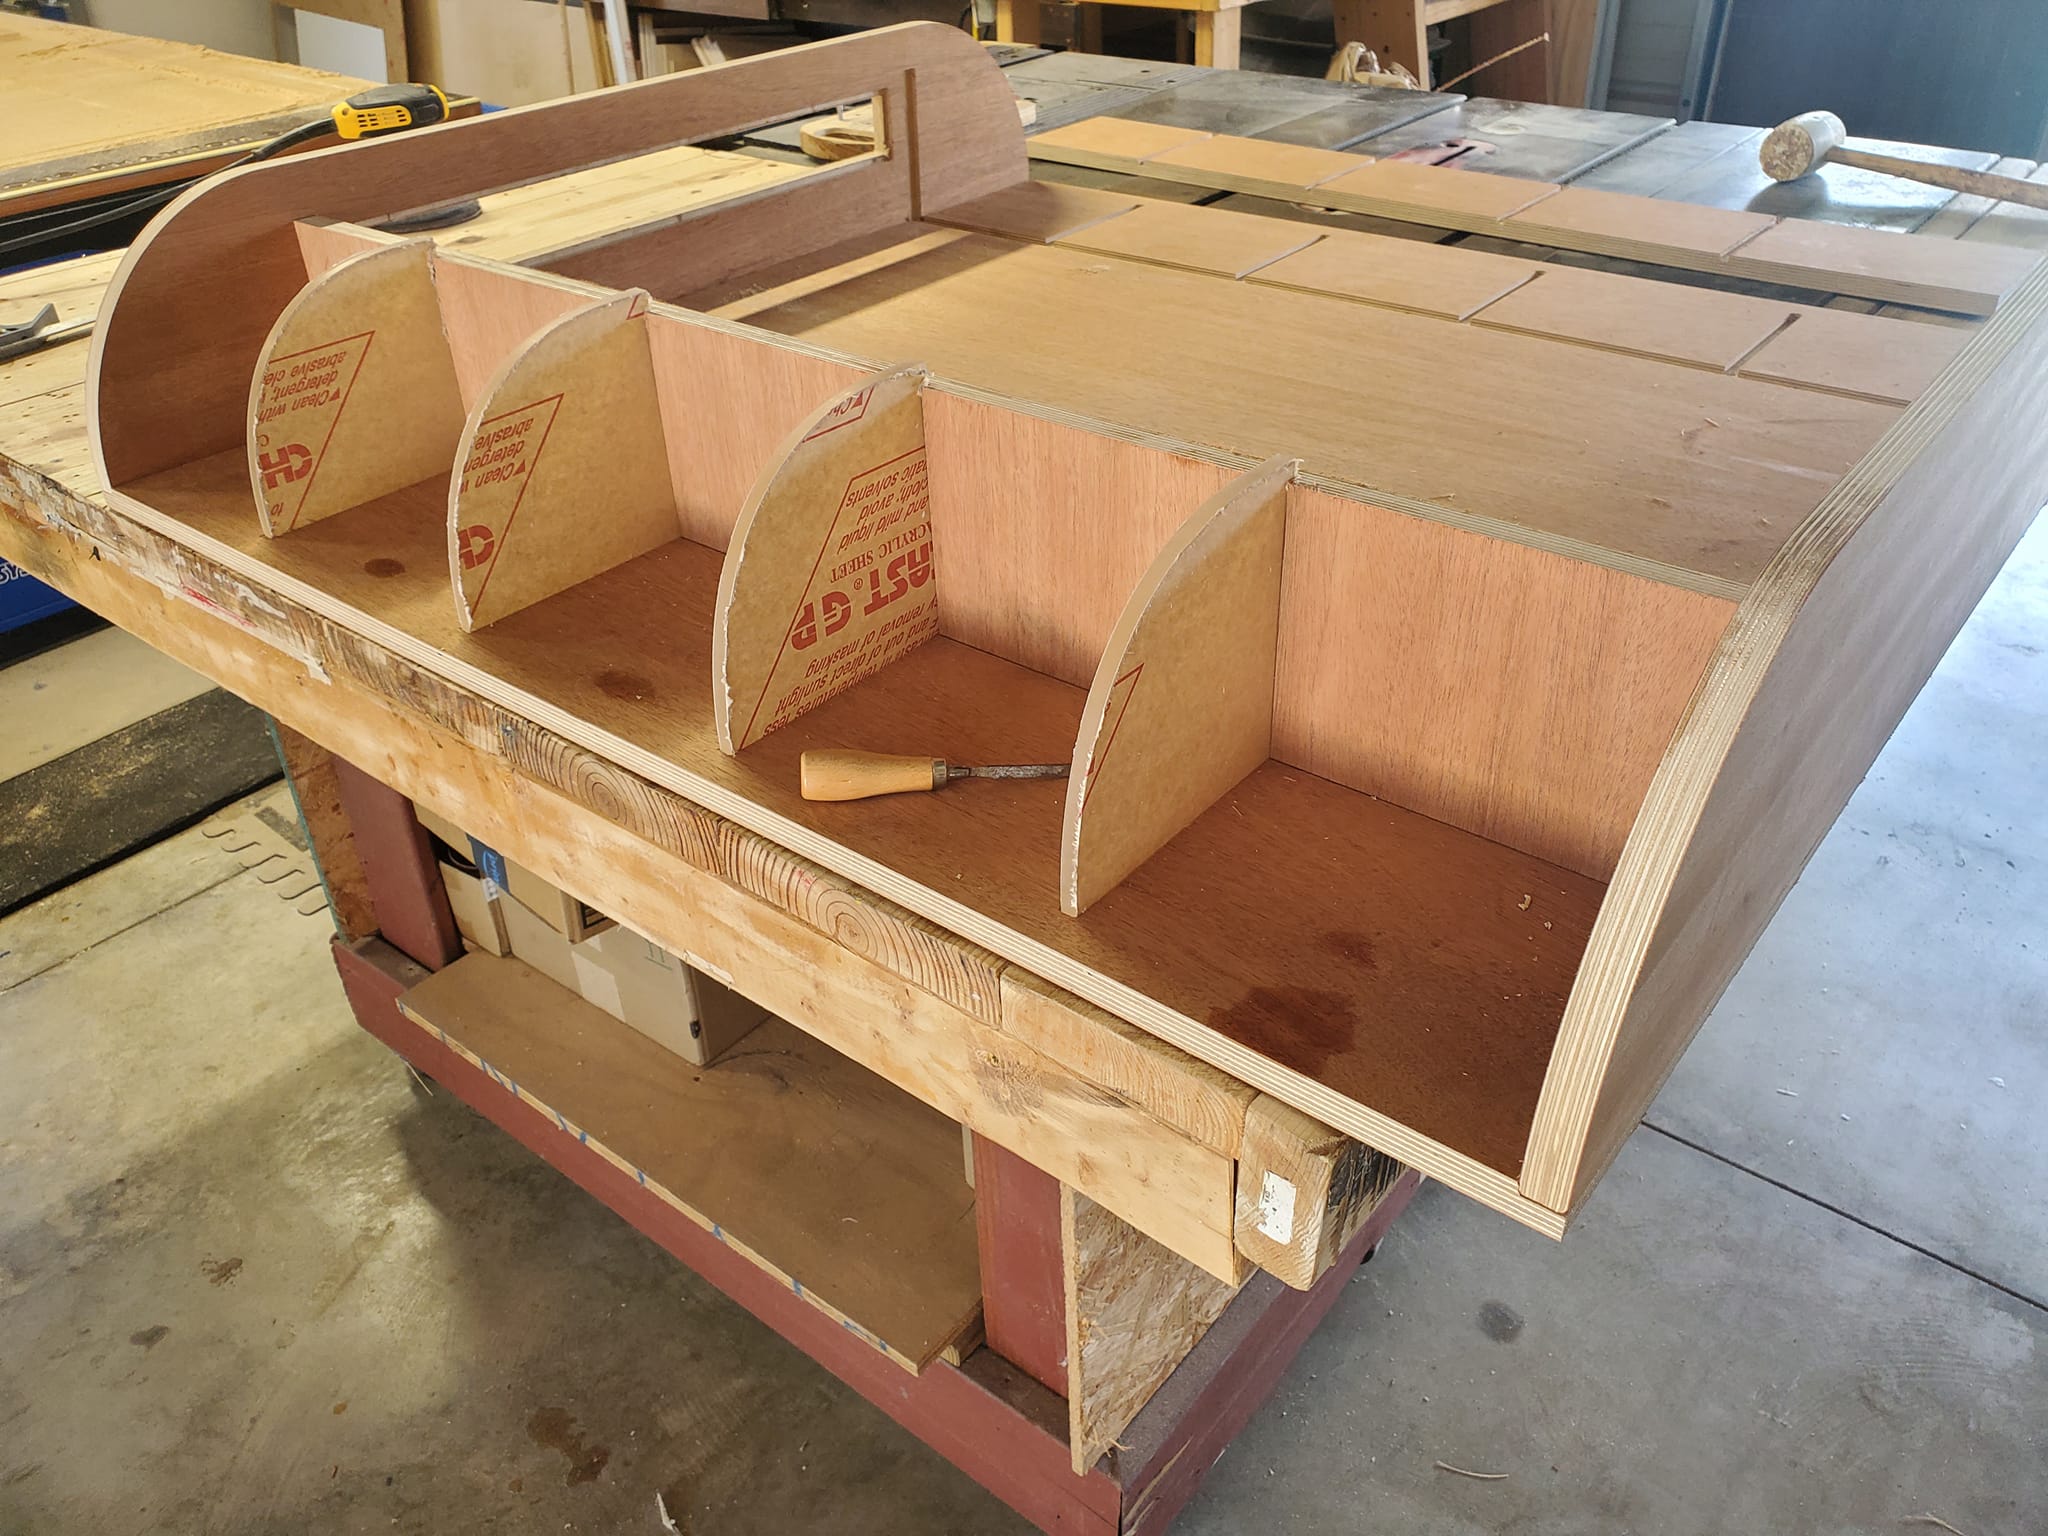 cleaned up, the assembly begins.
What experience has taught me is a little room left for glue is crucial, and  glue is required. Today’s glues aren’t as they were in yesteryear- they go on clean and when they’re cured they’re undetectable by sight…. Well, if it’s done right. It’s done right here. There will be lots of clamping and some strategic brad pins used to hold it together during the curing process. Afterward, the Shadow Box is really taking shape and starting to look like the finished product.
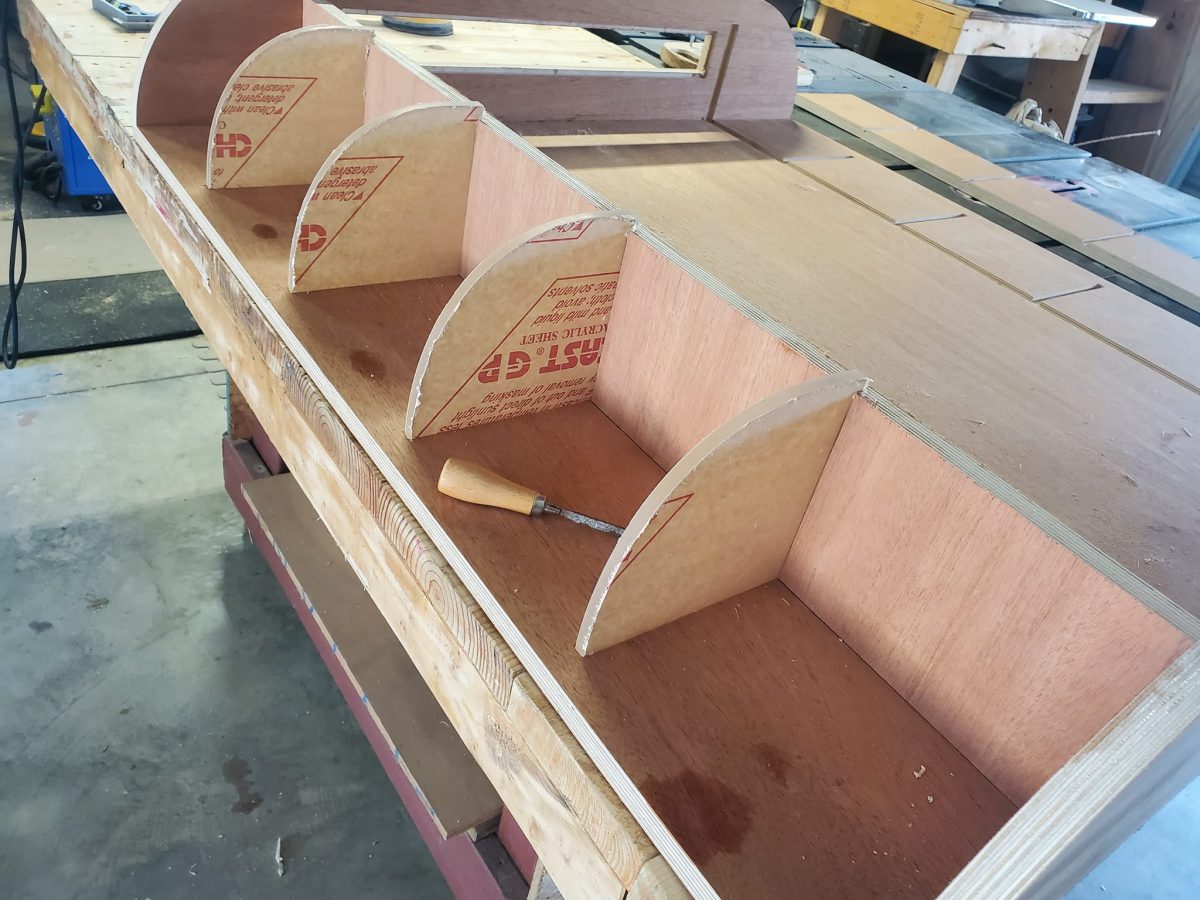
These things are created with rabbets for fitment, as you can see in the images here. That basically means wherever there is a joint, there is a slot cut just the right width and depth for the adjoining piece to slip into- creating a strong joint that won’t part and that doesn’t rely on mechanical fasteners to hold it together. The Shadow Box you’re considering ‘may’ be made using modern technology, but the fitment beckons back to times long ago when fasteners were rare- because of expense- and joinery was an art. For the last 100 years or so, fasteners were used far more often for the opportunity to save time and expense. The use of CNC milling allows for rabbeting to be used once again, and provide secure precision joints that just need a little of encouragement (in the form of glue) to stay in position. Yes, there are ‘some’ fasteners very sparingly used in these, but they are NOT for stability, they are to hold the shadow box fast whilst the glue cures.
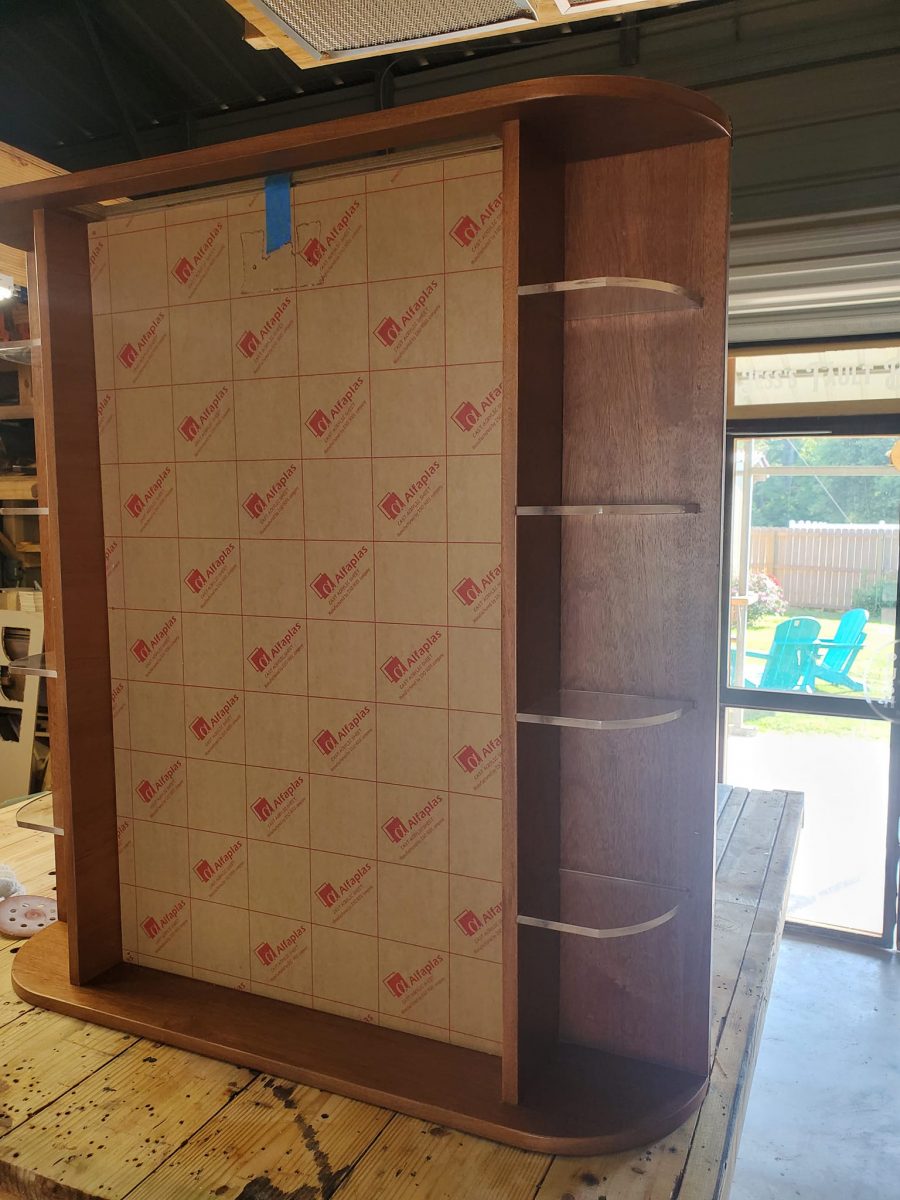
These ‘slots’ the ‘panels’ fit together with are tight and allow for no movement of the panels, be it another wood panel or the acrylic used for the shelves, at all. A matter of fact, the acrylic shelves aren’t even adhered- they rely on fitment alone to hold them in place, and while doing so a substantial amount of weight can be placed on them and they’ll not move; not even a little.
Now that the fitment and assembly is concluded, we’re off to finishing!
This mahogany is beautiful on it’s own. It has a natural refractive property akin to jewels that is difficult to capture in a image. Some woods have a greater delignification than others, naturally, and much of that depends on how the woods are sawn when they’re harvested. Mahogany is almost always quarter sawn for this reason as the refractive property is something that makes it so sought after for fine furniture. So….. why mess with that?
I give the wood a sanding up to 400grit, a dusting to relieve the grain of dust , an introduction of water to raise the grain once again- and then a final 400grit sanding just before sealing it. After being sealed, which there is a trick I won’t divulge as my process is unique, it’s given a good coat of wax and polish. That grain really POPS and the shadow box starts to look more like art than a cabinet.
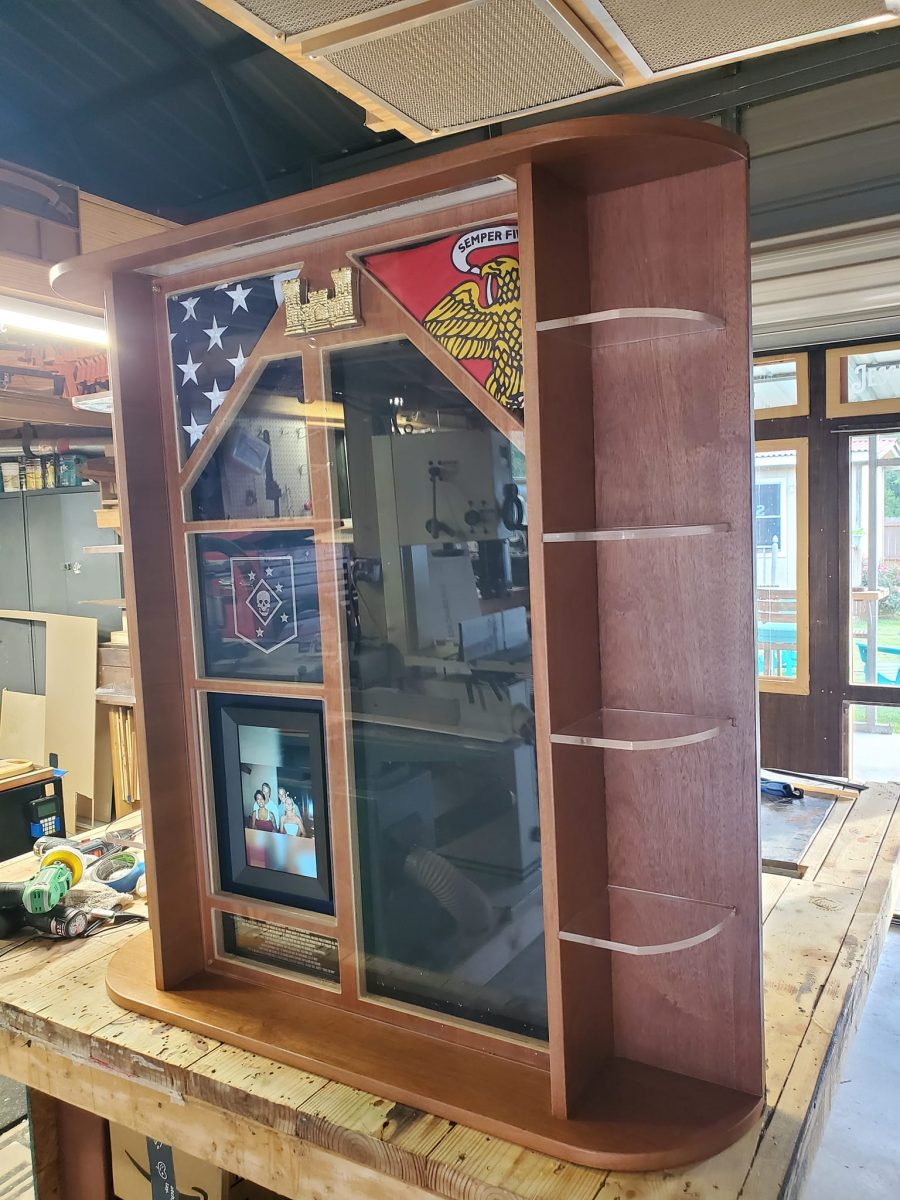
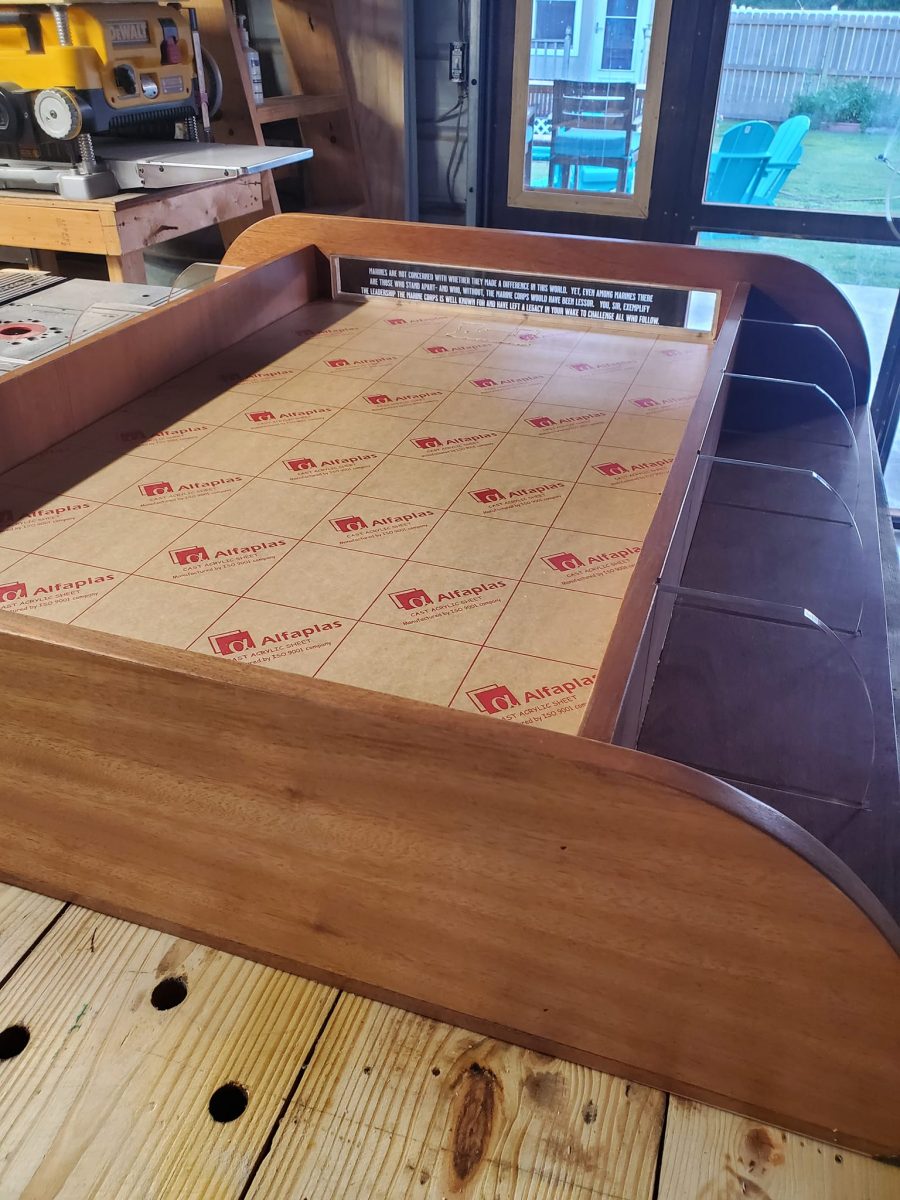
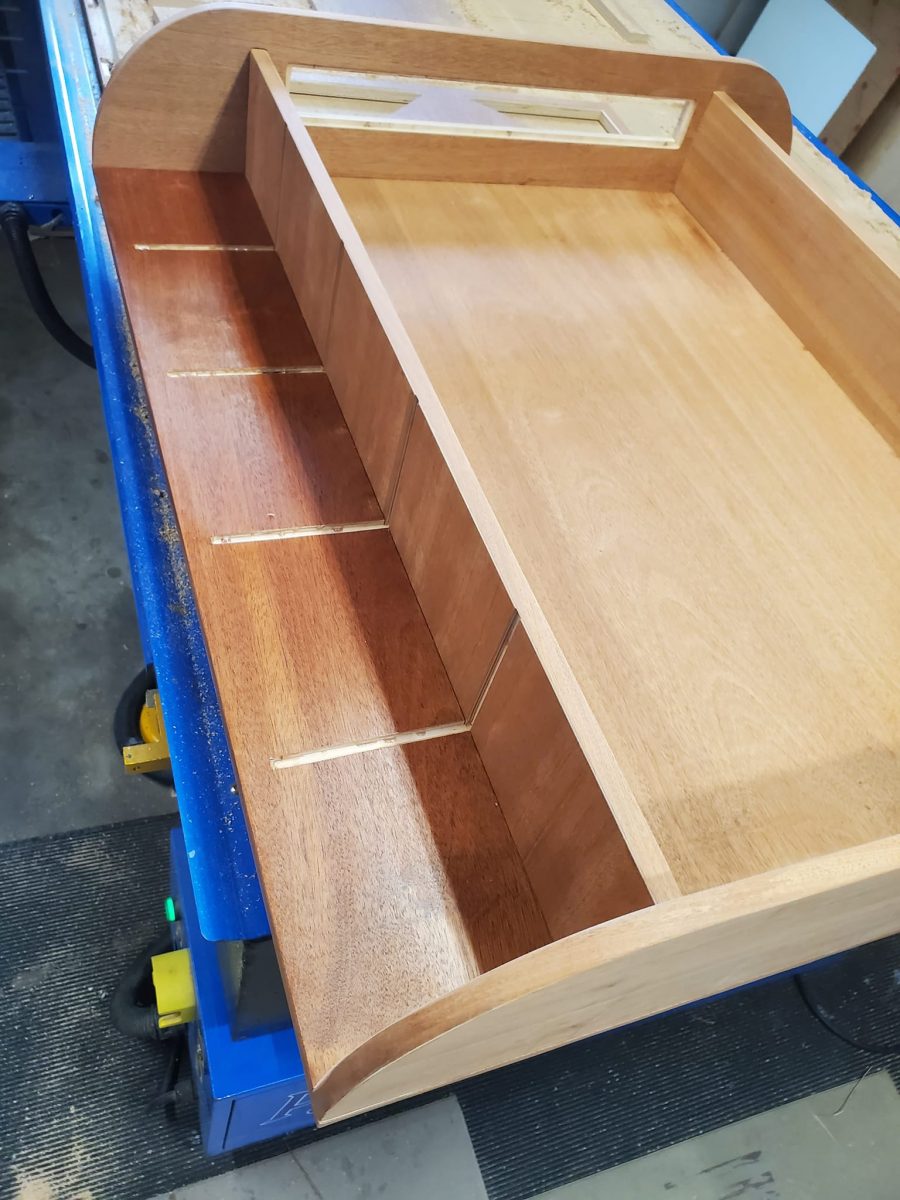
It’s now time to install the acrylic shelves, which are also (as mentioned already) rabbet fit. They’re tapped into the slots which are perfectly aligned and 90 degrees opposed, supporting two sides securely. I selected 3/8″ acrylic here as I desired strength for whatever may be set on them. Prior to the shelves being set, the edges are glazed and polished, rendering a cut side that retains its transparency. I don’t know how important this step is, but I believe the overall product would not have a refined appearance without it.
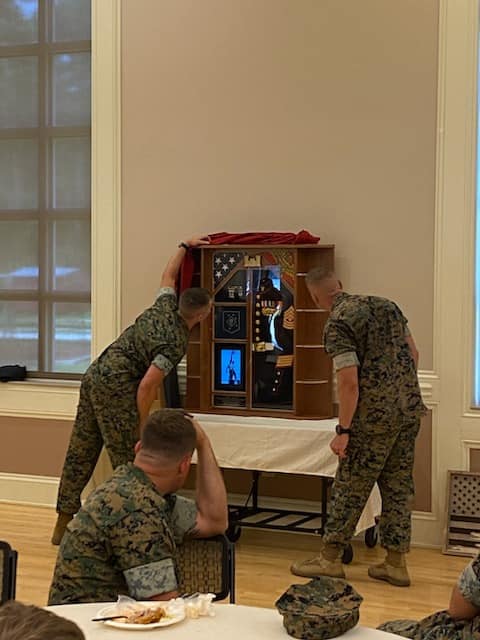
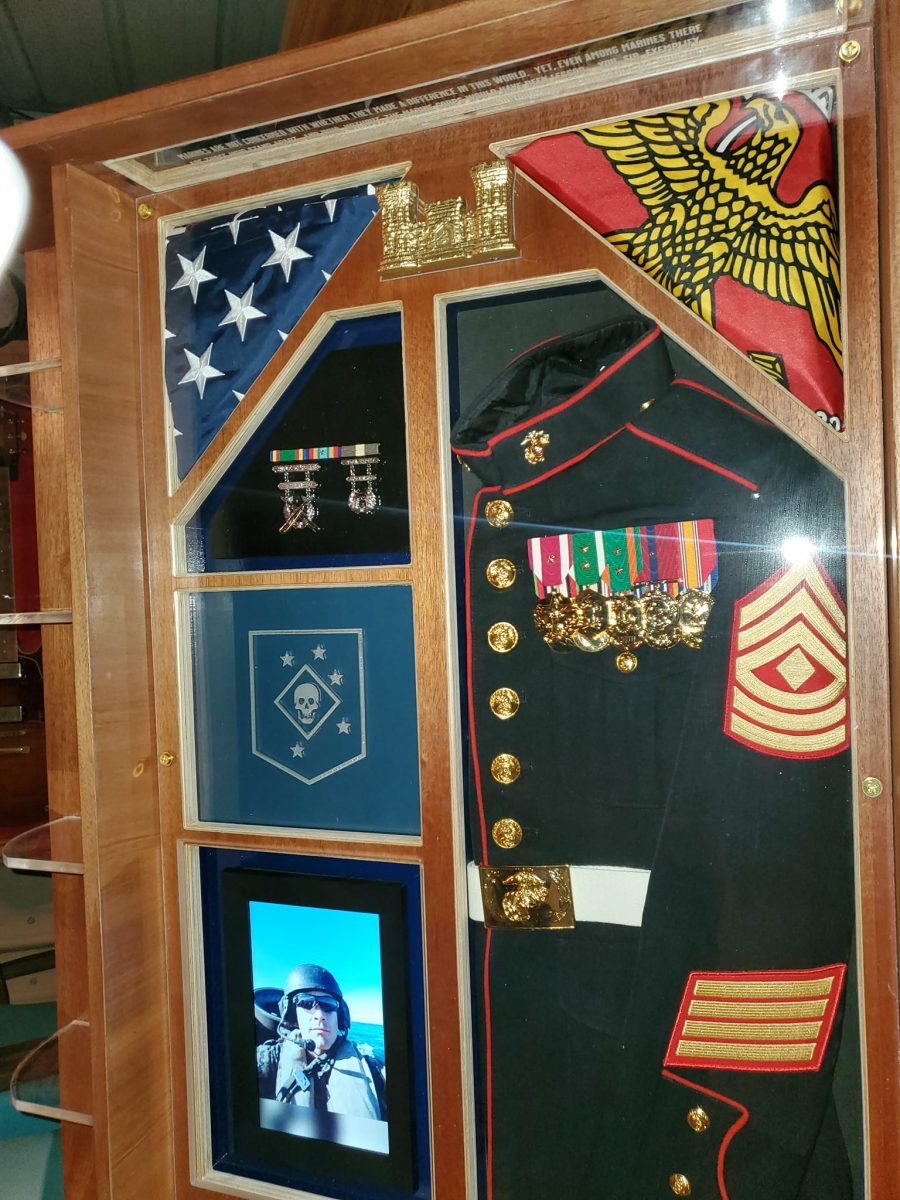
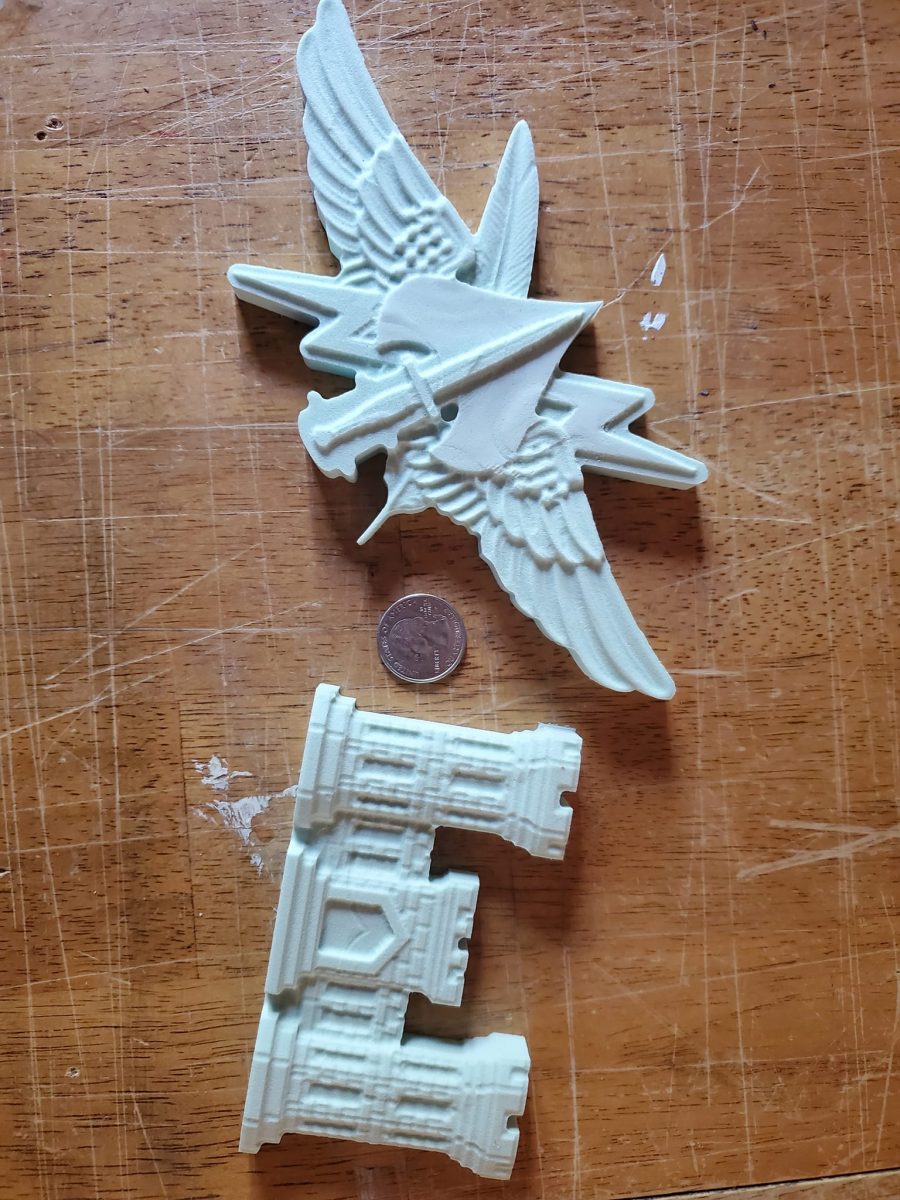
If your buying your shadow box assembled and finished, there is only one step remaining before it gets its own secure packaging- and this is critical to the shadow boxes I turn out- and that is a ‘fixture’. In the images you will  see a ‘fixture’ carved from HDU (high density urethane sign board) and painted an appropriate color. They are mostly requested to be metallic in finish. These don’t affix to the wood, instead they affix to the lens so they are outboard of the lens.
These guys are the tiny detail that really sets apart your shadow box from others- it doesn’t seem like a big deal, but a Mercedes without their badge wouldn’t look right, and neither would a store without a sign. The intent of this badge is to show whomever views the shadow box “A _____ Presents”. For this I’ve done Marine Raider attachments, SEAL attachments, (obviously) Combat Engineer attachments, Ranger attachments, jump wings, dive bubbles, air crew wings- you name it. This IS NOT a badge ‘for me’, this is a badge for the recipient. The touch it applies brings the whole thing together.
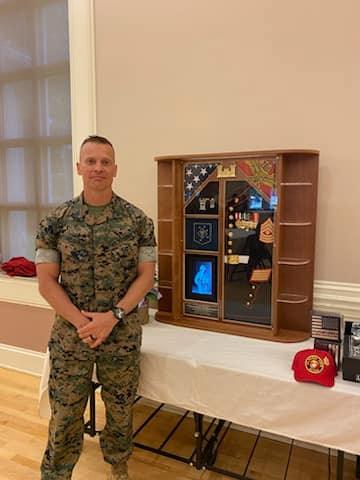
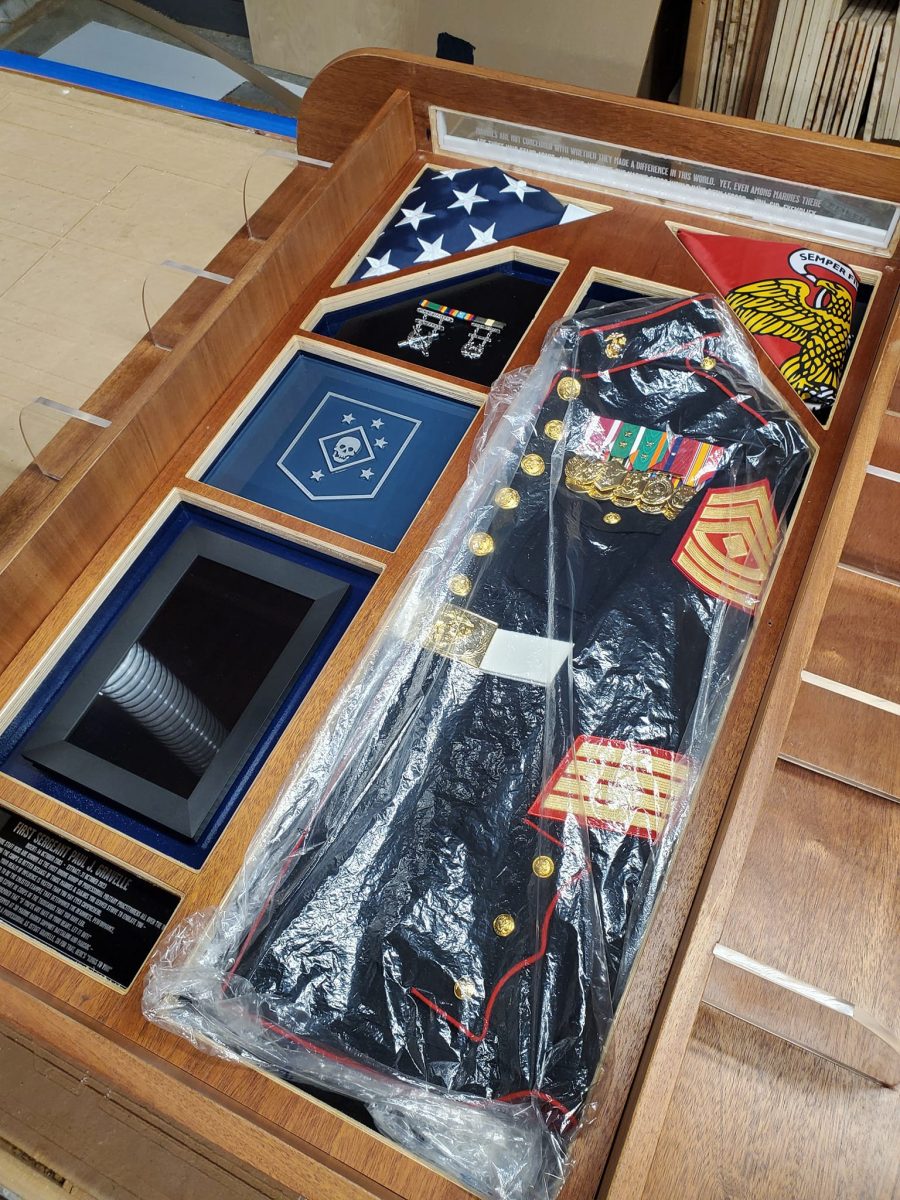
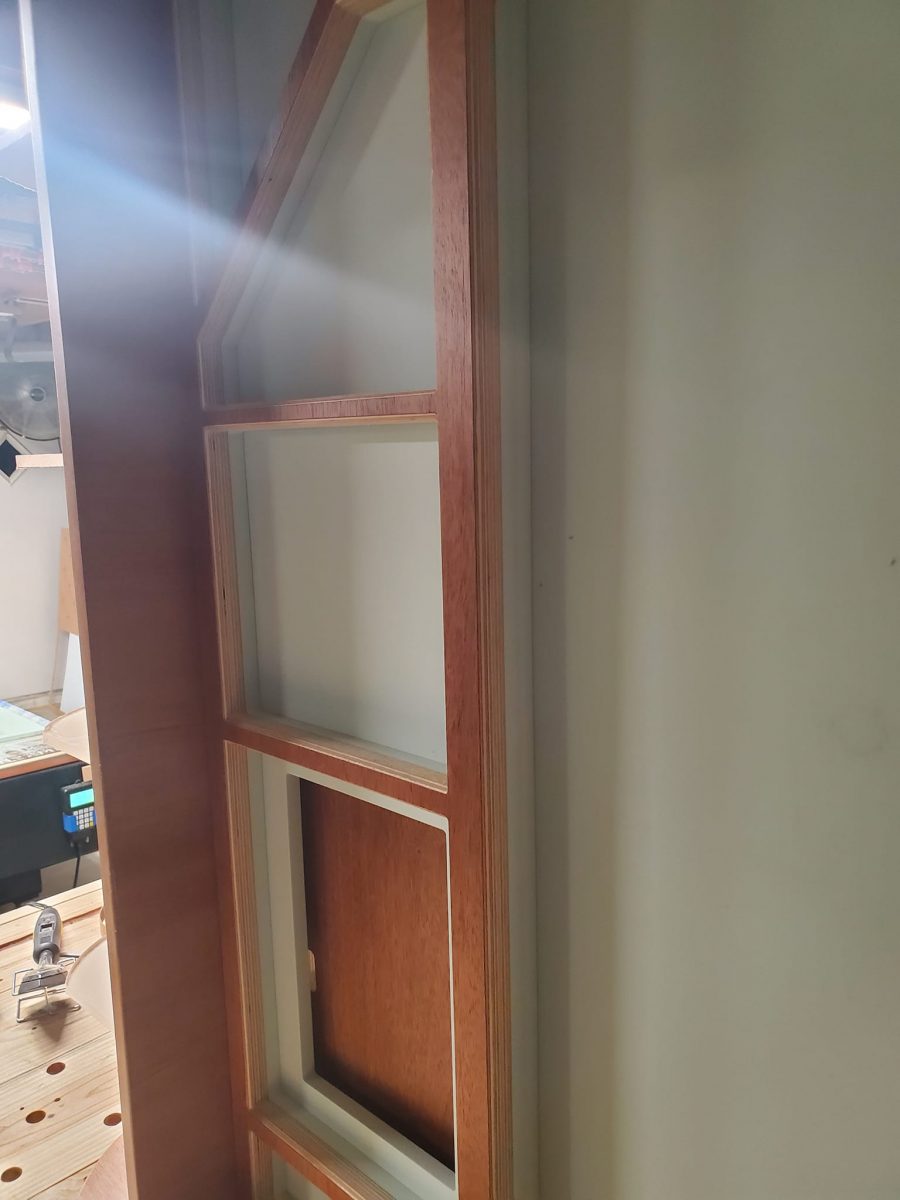
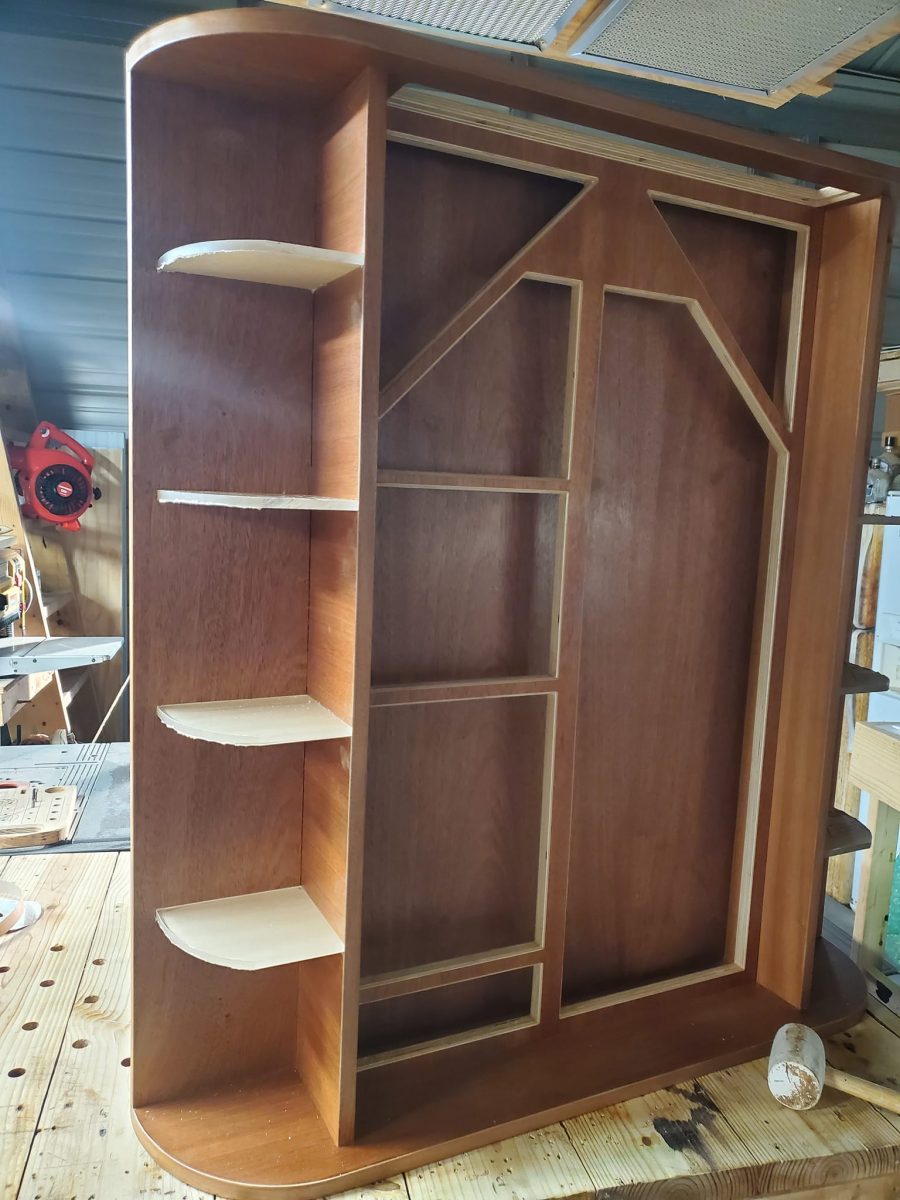
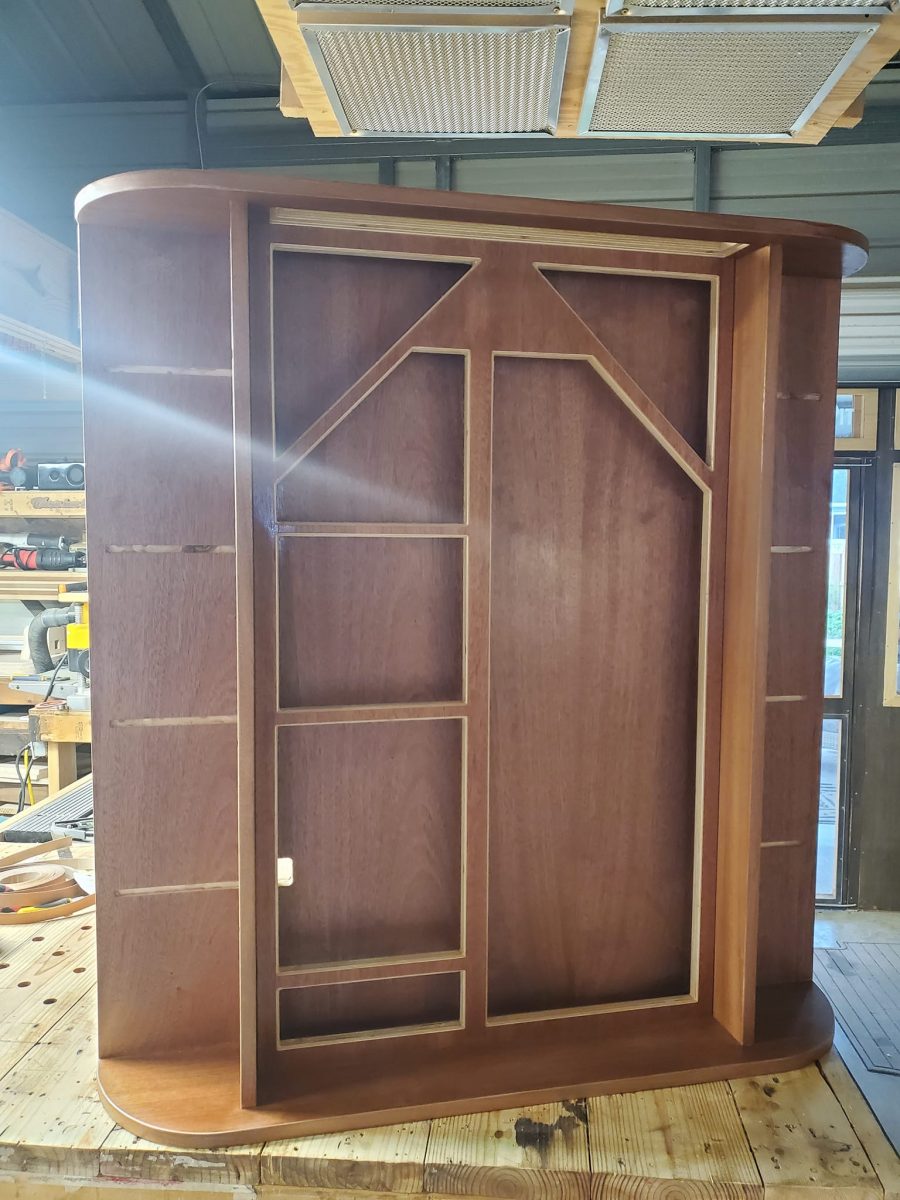
The inner frame is important. This dictates your arrangement of articles you place into the shadow box under the lens. In the images posted here you can see the flags, folded and in order, atop all the other devices. There is space provided for a dress uniform coat/blouse and ample space for medals and ribbons, awards and unit designations to freely hang. The other side (the left) can be arranged with space for whatever keepsake or display piece you choose. An item that also sets these apart from others is the LCD picture frame.
Insofar as LCD picture frames, I’ve used several kinds, and have settled on a wifi enabled touchscreen model with a 10 inch screen measurement. It can be fed images to its internal memory manually or via internet, or a thumbdrive/external drive can be used to hold as many as that external memory can hold (you provide this drive). It’s been my experience that folks who’ve served a career can’t single down to a handful of photos, fairly, so- why should they? Technology, y’all, isn’t so bad all the time.
To accommodate the LCD picture frame, a ‘window’ is cut in the overall  lens. This allows the screen to be ‘touched’ and settings arranged on the picture frame without having to remove the lens every time. The wiring for the LCD frame comes out of the back of the Shadow Box and routes discreetly away. A thumb drive or external drive can either be affixed behind the LCD Frame, or, it can rest on the acrylic shelf adjacent the frame. The frame is attached to the Shadow Box using a strong velcro which makes it’s removal and reattaching easy, if the need ever arises.
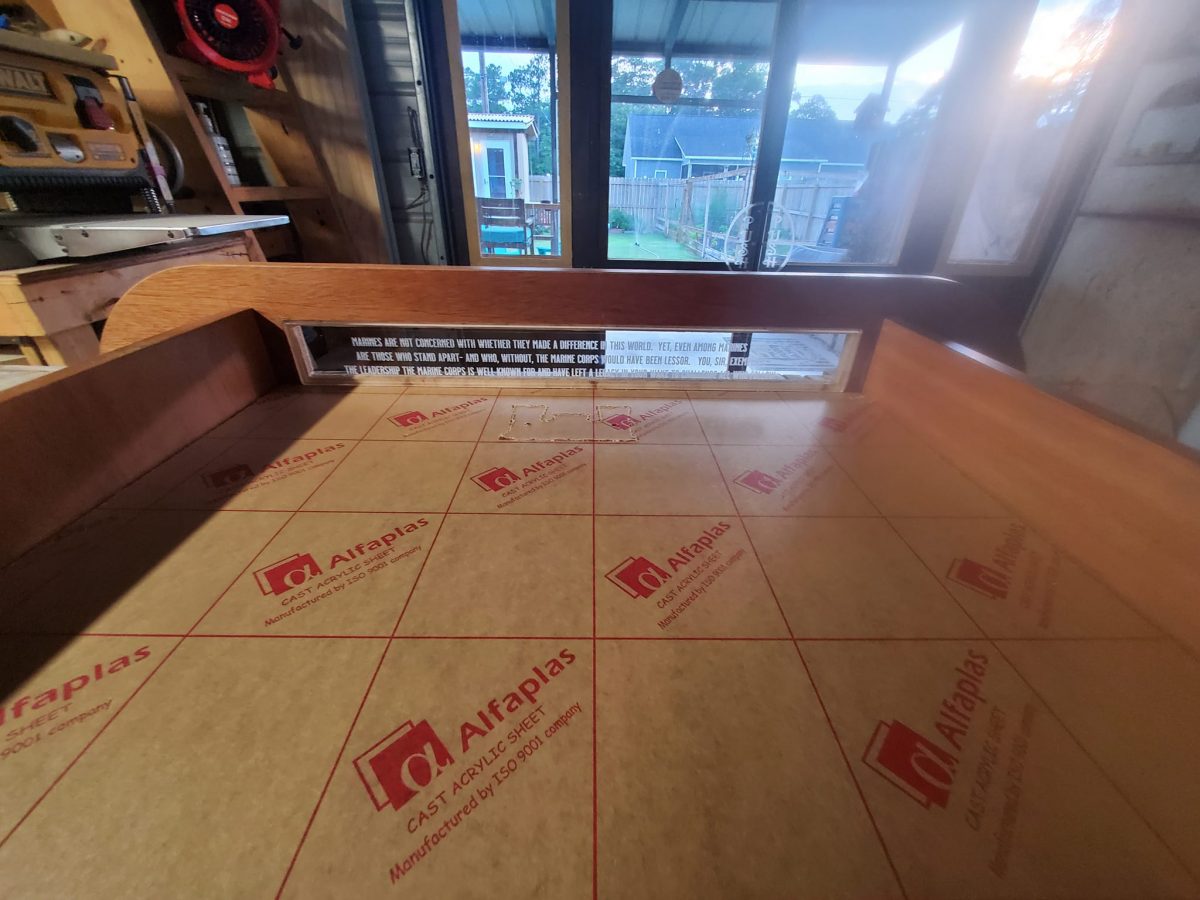
Behind all of this… behind the lens, behind the inner frame, and in front of the backing, are two crucial items. The first is Sign Foam- it provides a resilient surface for affixing items where pins are easily used to hold them, or nails, or rivets, or staples. It is an inch thick and will last forever and not deteriorate with time or climate alterations.
Over the sign foam EVA-PE is used. It is a high density closed cell pliable foam with all kinds of colors to choose from. It is the stuff used as decking on boats- it’s extremely hard to stain it and its UV resistant. It’s hard to even compare its virtues to other materials as its so much better than any other kind of textile material for this purpose. I’ve used felt, I’ve used cotton, I’ve even used uniforms cut at the seams and stretched across a backing- and nothing and I mean nothing comes close to the EVA-PE for this use. The EVA is about 1/4″ thick, and over the 1″ of sign foam, and will have an inner frame over it which is 3/4″ for a total stack height of 2 inches inside the shadow box.
Once the 1/4″ acrylic lens is placed over the items in the shadow box and effectively sandwiching the inner frame, the EVA, and the sign foam, the depth from the lens to the outside back of the shadow box is three inches.
I chose gold plated fasteners 10mm in diameter and 3 inches long set with three on either side of the lens to affix all these components together. 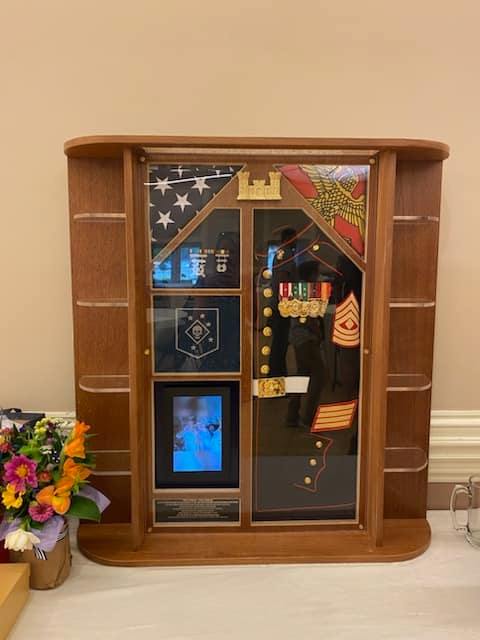
There is more method to my madness than appears at first glance, here. The screws are long enough to penetrate into the back slab of the shadow box and securely hold everything together, but they ‘can’ also serve yet another purpose.
The overall shadow box is quite heavy. Its in the 200lbs range complete. That is a substantial amount of weight to be held to a wall by a bracket- and since I don’t make the brackets I have a general distrust of them. So- my response is to offer 10mm x 6 inch long screws and to recommend the owner finds a stud in their wall, and firmly affix the shadow box using the same screw holes used for holding it together, but this time passing not only through the shadow box and it’s backing slab, but all the way into the stud of the wall by around two full inches. If all three of one side are firmly anchored in that stud, that shadow box isn’t going anywhere.
I should also add, these things can stand on their own with stability. They aren’t going to topple easily, so, you may not even have to concern about mounting them at all. They look great on a table.
I hope this answers any questions you may have about my flagship shadow box and describes to you in detail why it registers the price it does. You simply won’t find one better made or with more attention to detail. You ‘may’ find one that rivals it or maybe even matches it- but there are none made better and with intent to last literally forever- and that doesn’t matter if you purchase the unfinished/unassembled version where you want to apply some of your own effort for your recipient, or all the way to the fully ‘ready to present’ option.